
Destinations & Things To Do
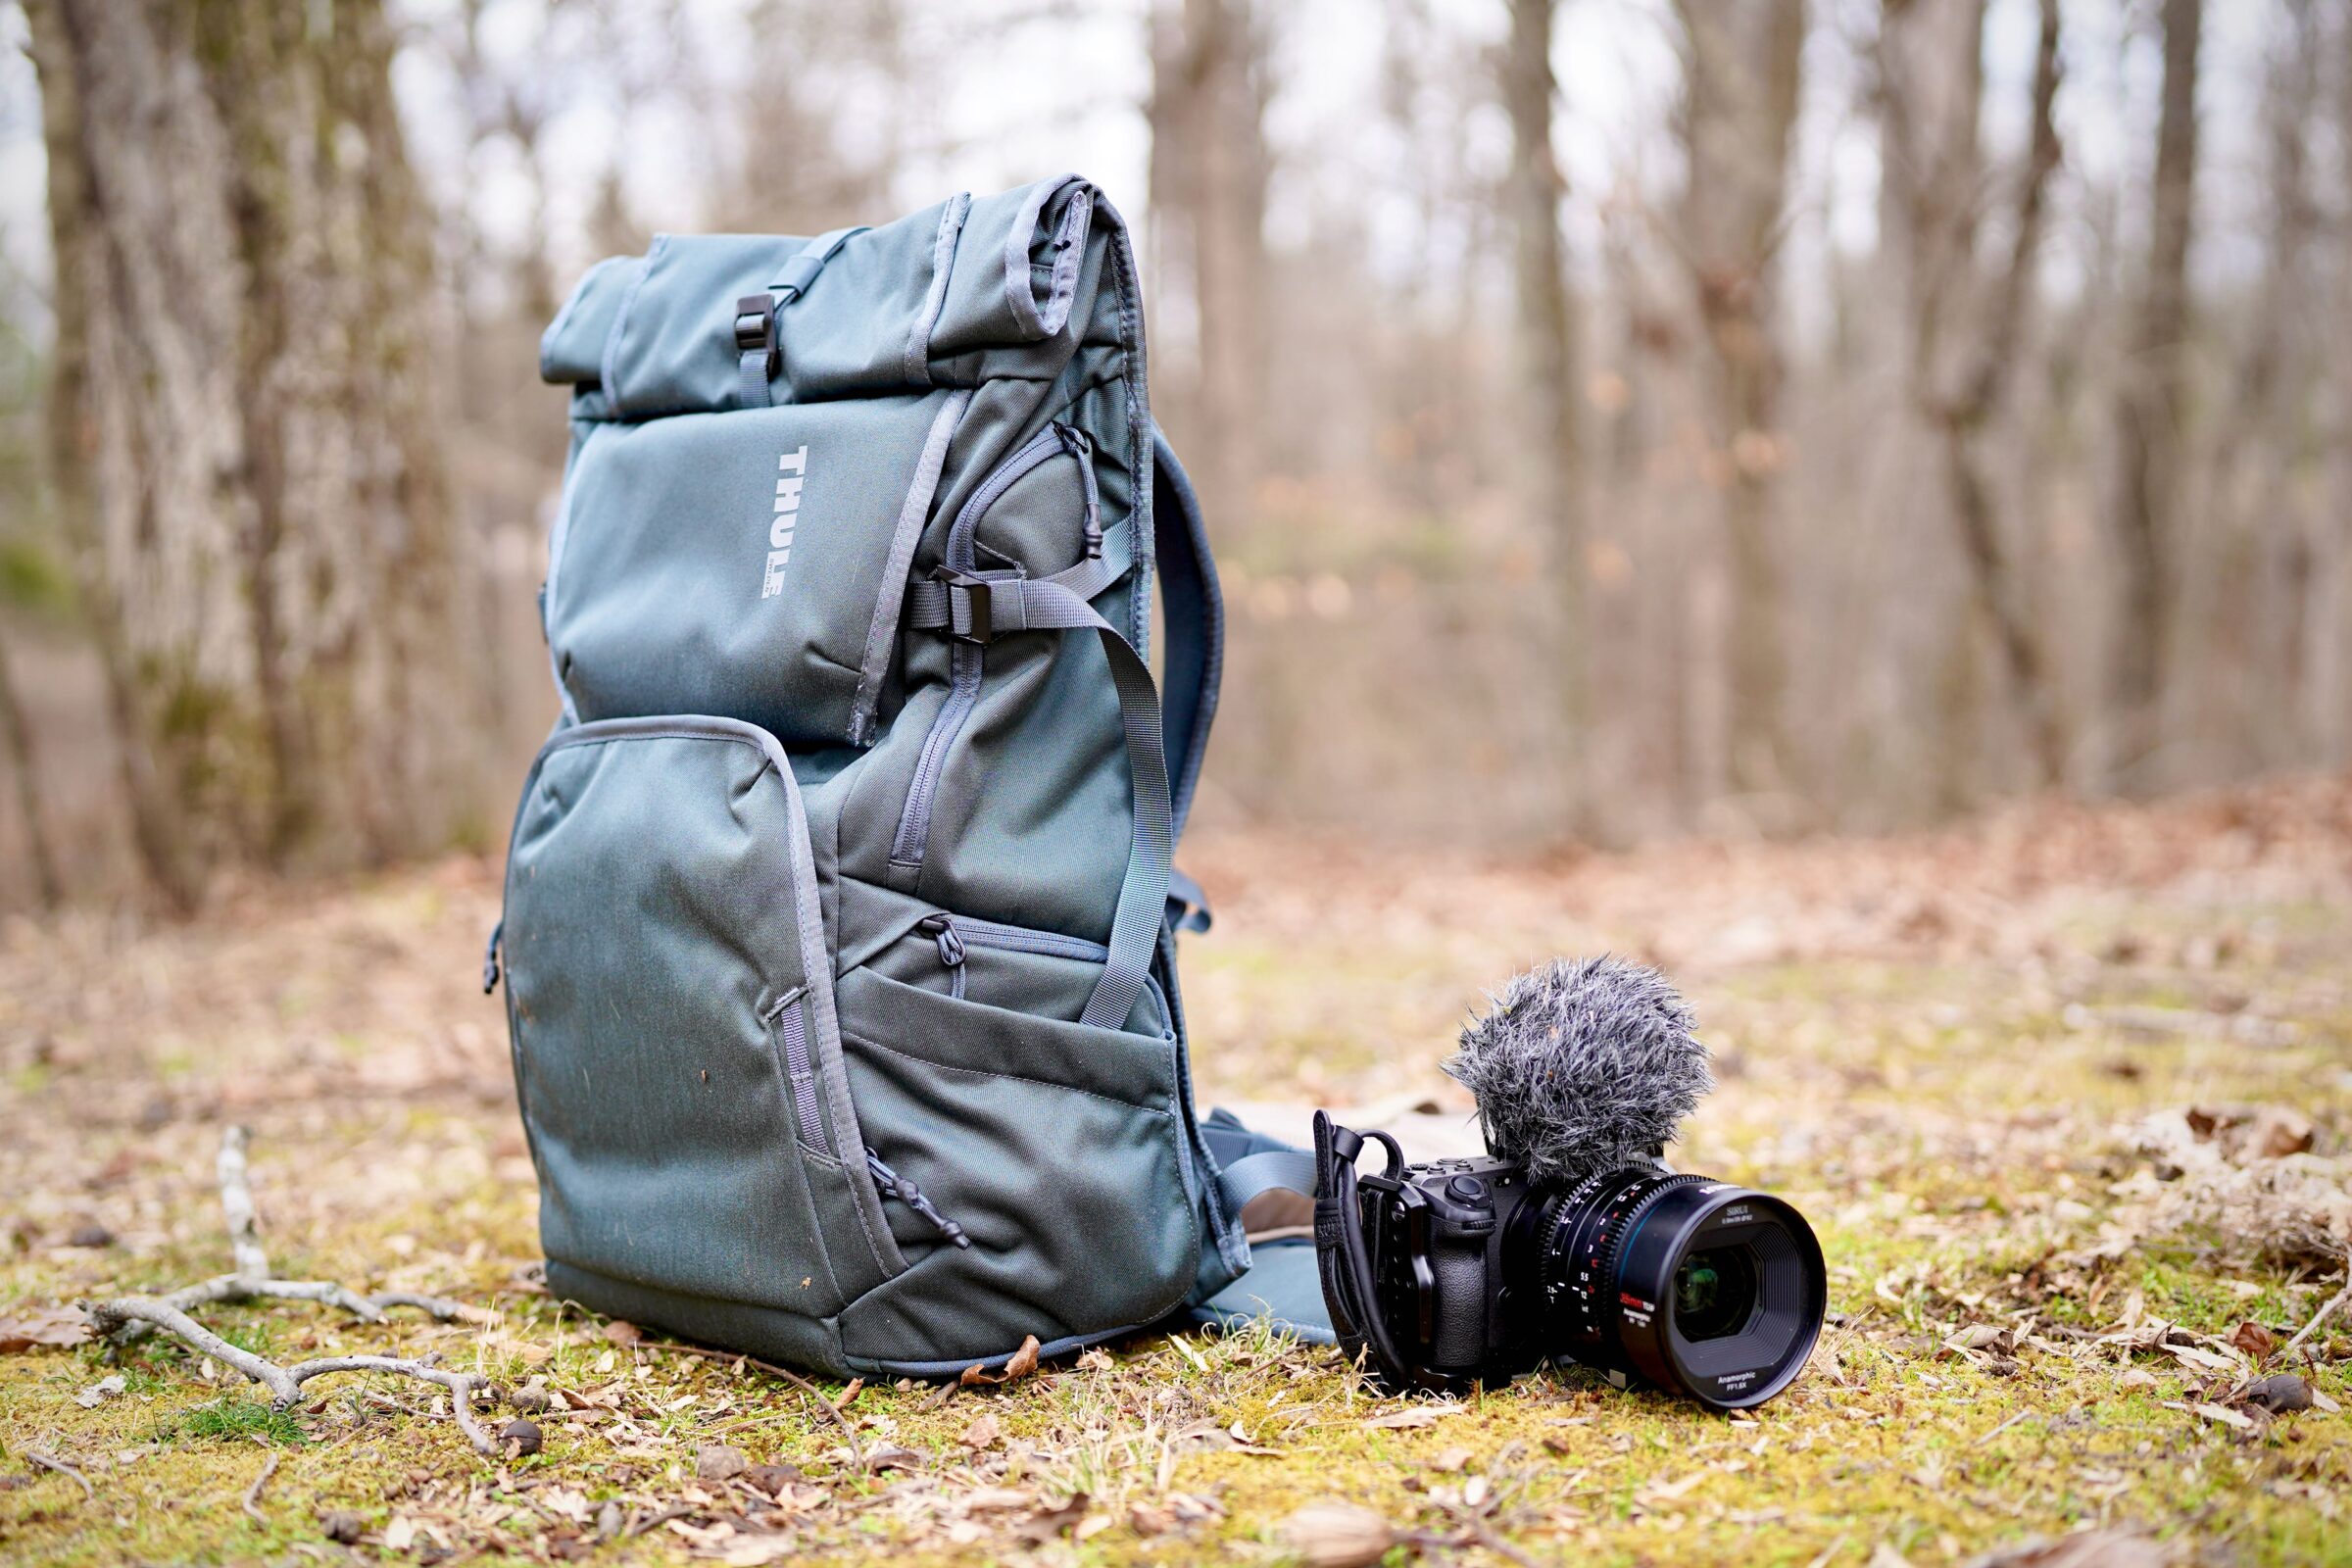
The Best Camera Backpacks of 2025
The best camera backpacks do more than just carry your gear — they protect your investment, keep you organized, and help you focus on capturing the perfect shot. Since 2021, we’ve tested more than 20 top camera packs across photo and video shoots around the world.
To kick off this guide, GearJunkie contributors Chris Carter and Kendra Smith teamed up, hauling these packs from mountain summits to city centers. Carter, who shoots in some of the gnarliest conditions on the planet, is obsessively picky about what protects his kit. Smith, a Minneapolis-based editorial photographer, pushed several models through the rigors of international travel. In 2024, adventure photographer Eric Phillips joined in, lending his eye for detail and years of experience in outdoor and commercial photography.
We evaluated each backpack based on comfort, durability, accessibility, and gear protection. From the all-in-one Nomatic McKinnon 35L to the affordable CADeN Camera Backpack, these are the best options for photographers on the move.
Editor’s Note: We updated this guide on August 10, 2025, by adding the versatile Deuter Jaypack 34+ and the sleek Peak Design Travel Backpack to our lineup.
The Best Camera Backpacks of 2025
Best Overall Camera Backpack
8.6/10 Rating
Best Budget Camera Backpack
7.3/10 Rating
Best Camera Backpack for Daily Use
7.9/10 Rating
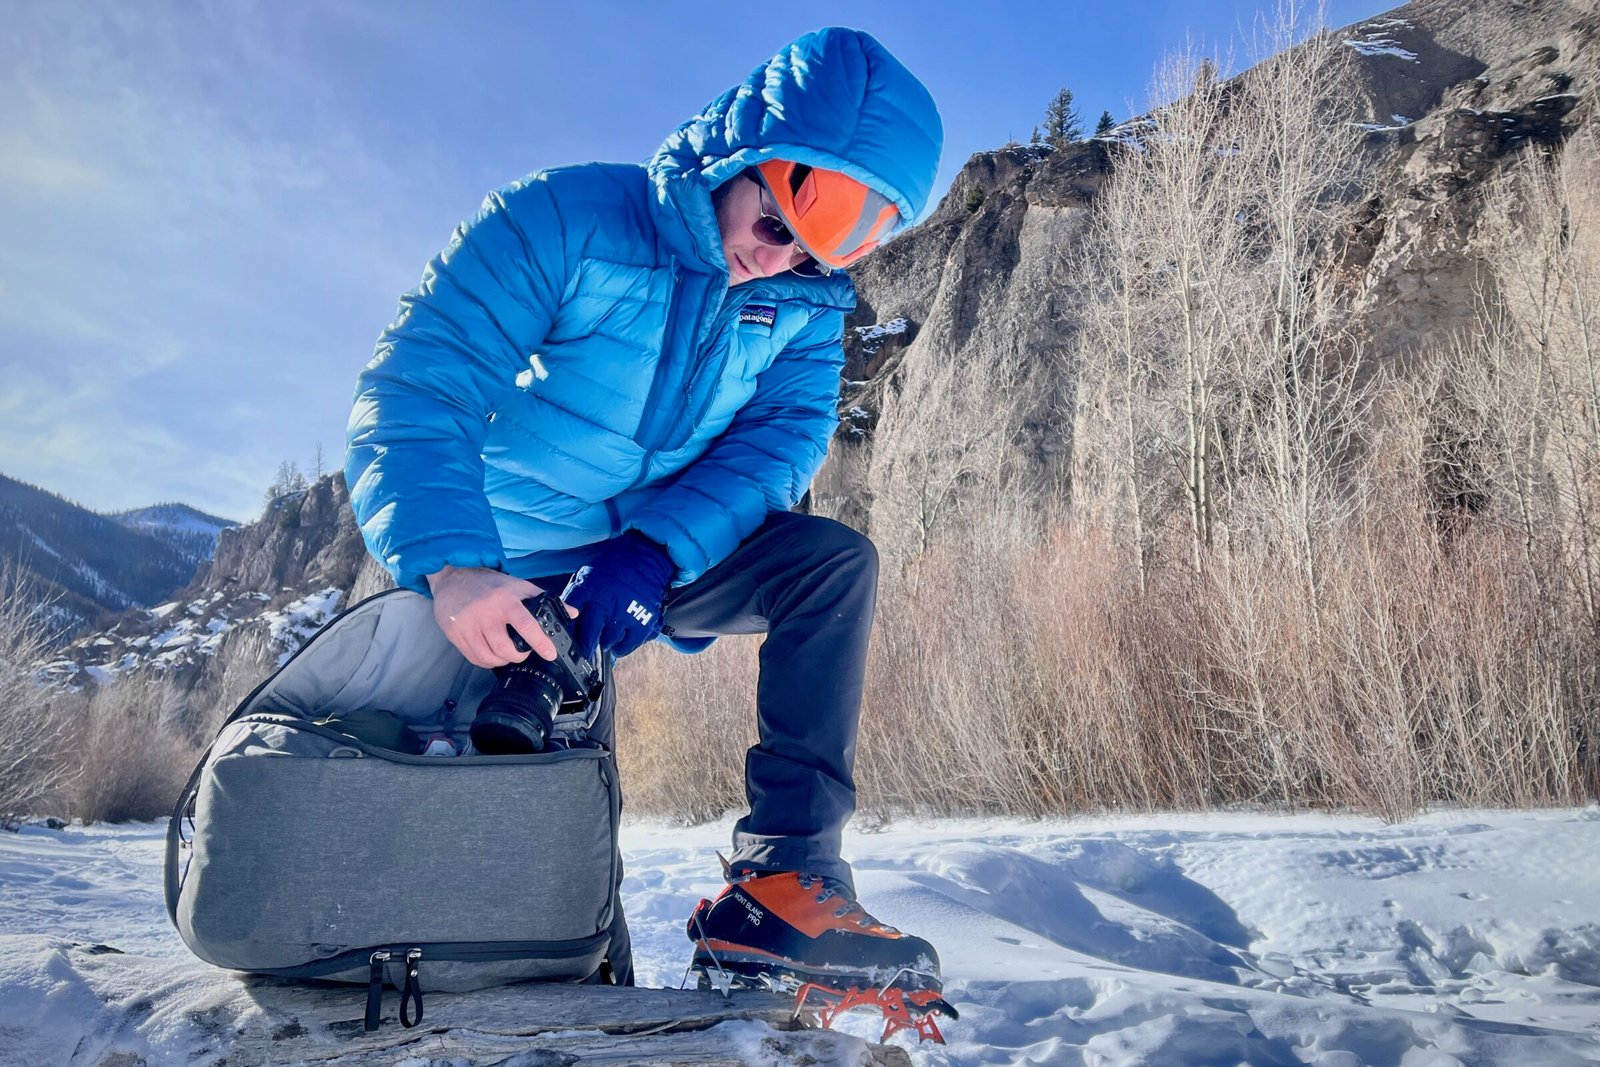
Best Camera Backpack for Adventurers
8.0/10 Rating
Best Camera Backpack for Flying
7.5/10 Rating
Best Camera Backpack for Backpacking
7.8/10 Rating
Most Versatile Camera Backpack
8.2/10 Rating
Best Overall Camera Backpack
-
Padded interior is ultra-protective and includes a padded waist strap -
Exterior fabric and zippers are durable and water-resistant -
Expands for change of clothes and toiletries -
Lots of sturdy storage
-
No rain cover -
Heavy for long periods of travel
Best Budget Camera Backpack
-
Budget-friendly -
Two exterior bottle holders
-
Lacks many interior pockets for organization -
Smaller volume -
Not the most quality construction
Best Camera Backpack for Daily Use
-
Sleek, extremely functional design -
Simple to access all gear from any angle -
Pass-through back for fixing to carry-on -
Tons of organization in a tiny package -
Beautiful construction and aesthetic -
Solid weather resistance for outdoor use
-
Thin, sparsely padded straps get uncomfortable when pack is fully loaded with heavy gear -
We wish the sternum strap had a traditional clip -
Laptop can be a bit difficult to remove when bag is full
Best Camera Backpack for Adventurers
-
Adjustable and extra padded shoulder and waist straps provide a comfortable carry -
Expandable 7-liter roll top provides extra storage -
Action sport-friendly features like helmet holder, ski carry, and hydration routing -
Multiple sizing options available
-
Cube insert sold separately -
Magnetic waist strap buckle collects rocks and debris easily and won’t close
Best Camera Backpack for Flying
-
Converts easily from backpack to roller bag -
Sized to meet standard carry-on requirements -
Optimal space for camera gear
-
No waterproofing on zippers -
No separate area for carry-on clothing -
Heavy and bulky
Best Camera Backpack for Backpacking
-
Carries full backpacking loadouts with tons of camera gear without being too heavy -
Full feature set and plenty of cushion -
Quick, easy camera access -
Water- and tear-resistant fabric
-
Need to purchase camera insert separately -
Light materials make the bag a bit floppy/difficult to load up
Most Versatile Camera Backpack
-
Lightweight -
Super versatile -
Very comfortable -
Great details
-
Can feel overly complicated -
Elastic mesh doesn’t usually hold up over time -
May need to purchase additional cubes depending on desired level of protectio
More Camera Backpacks We Trust
-
Extra-large, fully configurable main compartment holds big lenses (up to 800mm) -
Lockable main and top compartments -
Responsibly made (PFAS-free, 100% recycled pre-consumer waste)
-
Bag feels bulky especially when fully loaded -
Gear straps are thin and not fully adjustable -
Not a lot of gear storage outside of main camera compartment
-
Expandable from 35L to 45L for versatile use -
Multiple access points and smart internal organization -
Weatherproof recycled nylon build -
Stowable harness system for travel ease -
Pairs seamlessly with Peak Design camera cubes
-
Can feel bulky when fully loaded -
Camera cubes sold separately
-
Lightweight -
Ultra shock resistant -
Sleek design -
Easily a daily professional camera backpack as well as a travel companion
-
Zippers are not water resistant -
Hip and chest straps are not padded but possibly not needed
-
Expandable water-repellent, roll-top design -
Stylish bag looks crisp and clean -
No need to buy additional camera cubes -
Removable camera insert allows conversion to a general bag
-
Only holds one camera body -
Tilting camera insert has narrow access compared to back zip bags -
Side pockets are on the small side
-
A plethora of dividers and storage options for camera gear -
Easy camera access from all sorts of angles -
Comfortable suspension system for an all-day carry
-
Personal storage compartment is a bit limiting -
On the clunky/heavy side
-
Durable construction -
Velcro dividers are quick and easy to use -
Easy side access -
Removable padded camera pod -
Massive back panel opening -
Roll-top closure for expandability
-
So much organization/pockets can get overwhelming -
Resists a bit of water but not heavy rain -
Zippers can be a tad sticky
-
Expandable side pockets for water bottles or tripods -
Optional hip belt (purchase separately) -
Four external carry straps and sternum strap are all stowable
-
Expensive -
A bit on the heavy side for a daily driver
-
Waterproof materials and water-resistant zippers -
Optional accessory straps have six different attachment point options -
Sternum strap is adjustable and removable -
Luggage pass-through thanks to webbing on back panel -
So many pockets!
-
Need to purchase camera elements separately if not buying it as a bundle -
Pricey
Camera Backpacks Comparison Chart
How We Tested Camera Backpacks
Our Testing Grounds and Process
With decades of experience behind the lens, GearJunkie’s rabble of creatives is no stranger to flashy photography trinkets — and they know the importance of keeping that precious glass safe and sound in any environment.
A good camera backpack is the foundation of a successful shoot. It keeps thousands of dollars of heavy, fragile gear cocooned in cushy compartments and is the difference between getting that perfect shot or endlessly fumbling around while the sun sinks below the horizon.
For that reason, our team doesn’t take our testing lightly. We rummaged around online forums, bugged our pro photog contacts, and scoured the tables at gear shows to narrow in on the absolute best roundup of camera backpacks on the market. Rest assured — this list represents the crème de la crème of these niche packs.
These backpacks wound their way along cobblestone streets in Europe, bounced across the dusty African savannah, slowly plodded up endless Sierra switchbacks in California, and were thoroughly abused in the Colorado backcountry. We clocked some serious distance and time with each model and would feel confident recommending any one of them for your various photography ventures.
Our Expert Testers
Senior Editor Chris Carter and GearJunkie contributor Kendra Smith joined forces to spearhead this guide. Taking over 10 different camera backpacks on shoots and adventures all over the world, they reviewed this fresh stock of packs over a year-long testing period before settling on the list above.
In 2024, adventure photographer Eric Phillips took over this guide and tested five new backpacks. Some backpacks he’s been using for a few years, while he tested others for 6 months. Eric is most known for his images that capture compelling landscapes, human exploration, and outdoor industry news. His outdoor photos have been featured in local and national publications, including 5280 Magazine, REI Co-op Journal, SNEWS, Elevation Outdoors Magazine, and Adventure Pro Magazine.
Through his experience, he has learned what makes a great camera backpack, and his critical testing is key to the recommendations in this guide. If you prefer a bag or sling-style camera bag to protect your precious cargo, check out our guide to the Best Camera Bags. And if you’re looking for other camera gear, check out our guide to the best camera tripods.
Buyer’s Guide: How to Choose the Best Camera Backpack
When considering the perfect camera backpack for your personal or professional pursuits, it’s important to think of location, distance, accessibility, and capacity. Additional considerations are materials and capacity, comfort, and value. Things like weather, durability, body type, and budget will also come into play when making the best personal choice in a camera bag.
How Will You Use It?
If you’re an outdoor enthusiast, you may want a simple hip pack to carry your camera and other essentials, while a professional photographer will need a pack with substantial weight capacity along with storage and good padding for protection. In any case, thinking through when and where you’ll use your camera backpack will help guide your purchase. Below are a few good questions to ask yourself before making your purchase.
- Is this for professional or personal use?
- Do I need a daily camera pack or does this have a specific use such as travel, hiking, or commuting?
- How many cameras, lenses, and accessories are necessary to fit into the camera backpack?
- What is my comfort level with weight?
- How accessible do I need my camera to be in my bag?
- Do I need a computer insert? How large is my computer or tablet?
It’s worth noting that all of the packs we listed above serve the niche purpose of transporting and protecting sensitive camera gear. If you’re on the hunt for other backpack categories, be sure to check out our comprehensive review on the absolute best backpacking backpacks, or our streamlined roundup of the best daypacks for everyday use. All of these packs could also be converted to DIY camera backpacks with the inclusion of some nifty camera cubes — but it sure is nice to have an all-in-one package.
Location
As every photographer knows, location is everything, and with that comes weather, lighting, and terrain. These aspects will inform some of the most important elements your camera pack should be prepared for — and hopefully help narrow down your options.
Based on location, a common accessory to many photographers is the tripod. Most camera backpacks have clips to hold a tripod but this very much depends on the size and weight of the trip, so look out for the specs of the pack and your tripod when considering how important a tripod holder is to your camera backpack.
If you know there is a higher risk of inclement weather, you will want to look for waterproofing or water-resistant materials on the fabric, zippers, or a rain cover. Another major element to consider is dirt and dust. At the very least, good camera backpacks keep dirt from getting inside your pack, so check out the materials section below for more information.
When choosing your camera backpack, consider the full range of conditions and environments you plan on shooting in. This will largely determine the capacity, materials, and overall organizational features of the pack that are best for your needs.
Distance
Knowing how far you need to travel with your camera backpack will help inform how durable your pack should be and how much weight you’re willing or able to carry for that distance.
In general, thicker materials with double-stitching in the seams and straps will help your pack manage normal wear. Ripstop and other strong materials help with extensive wear for increased or long-term use. It’s important to note how much or little space that your pack allows compared to your gear.
Ironically, the tighter your gear fits into your pack, the better, as extra room allows your gear to get knocked around while traveling. Either get the perfect fit or find ways to make that space tighter.
If you’re carrying your pack longer distances with substantial weight, you’ll definitely want to consider choosing a backpack with waist and chest straps to balance the weight distribution of your gear. A good long-distance pack also has substantial padding around the walls of the front, back, and side of the backpack as well as the interior separators.
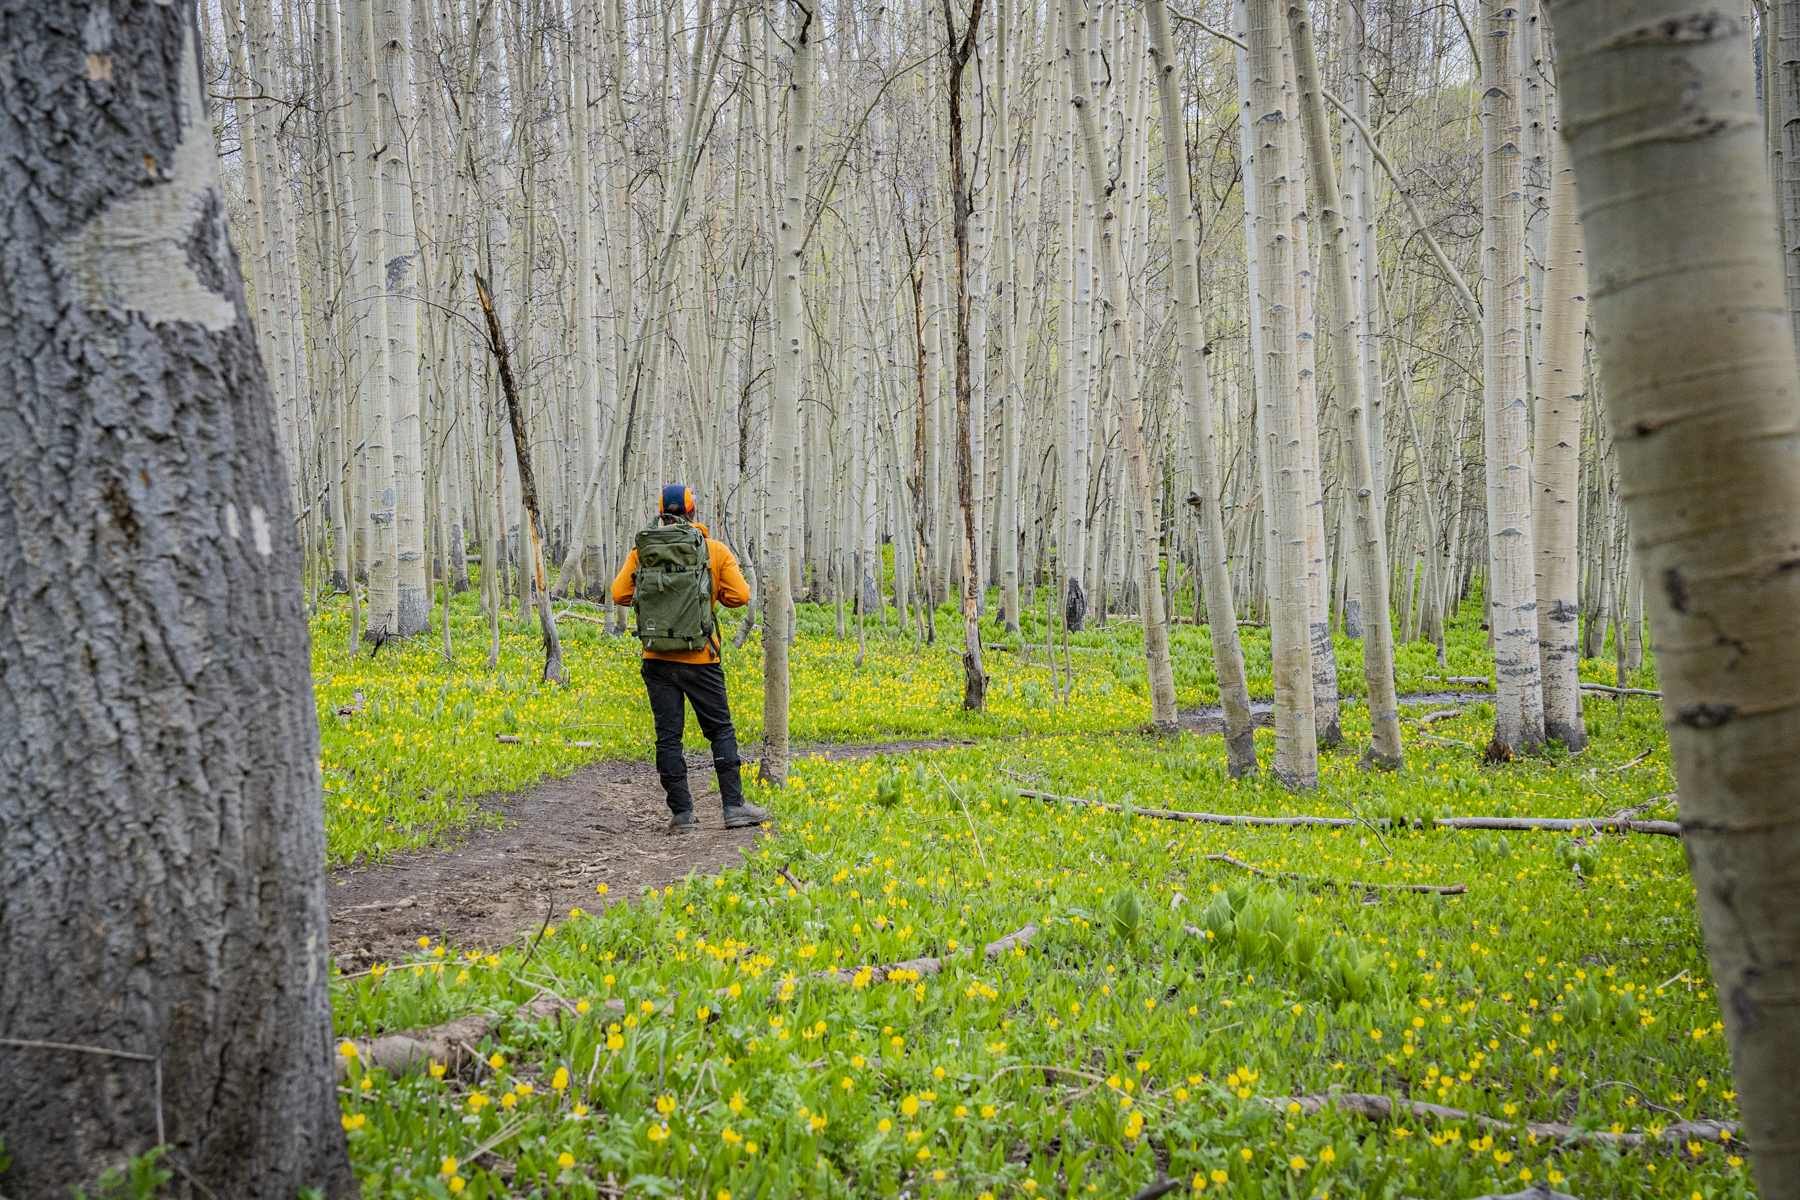
We narrowed in on the Moment Strohl Mountain Light pack as our heavy hauler of choice for long backpacking trips. We also love the Peak Design Outdoor Backpack 45L for hiking and adventuring. Packs like these allow you to safely carry a full camera loadout in addition to a basic backpacking kit for multiday travel in the backcountry.
Flying With Camera Backpacks
Inevitably, you’re going to have to cross some big ponds during your filmmaking/photography exploits — which can be an understandably disconcerting experience. Not everyone — TSA *cough cough* — understands just how fragile and expensive this glass can get. Horror stories abound of camera gear getting ruined in transit between countries.
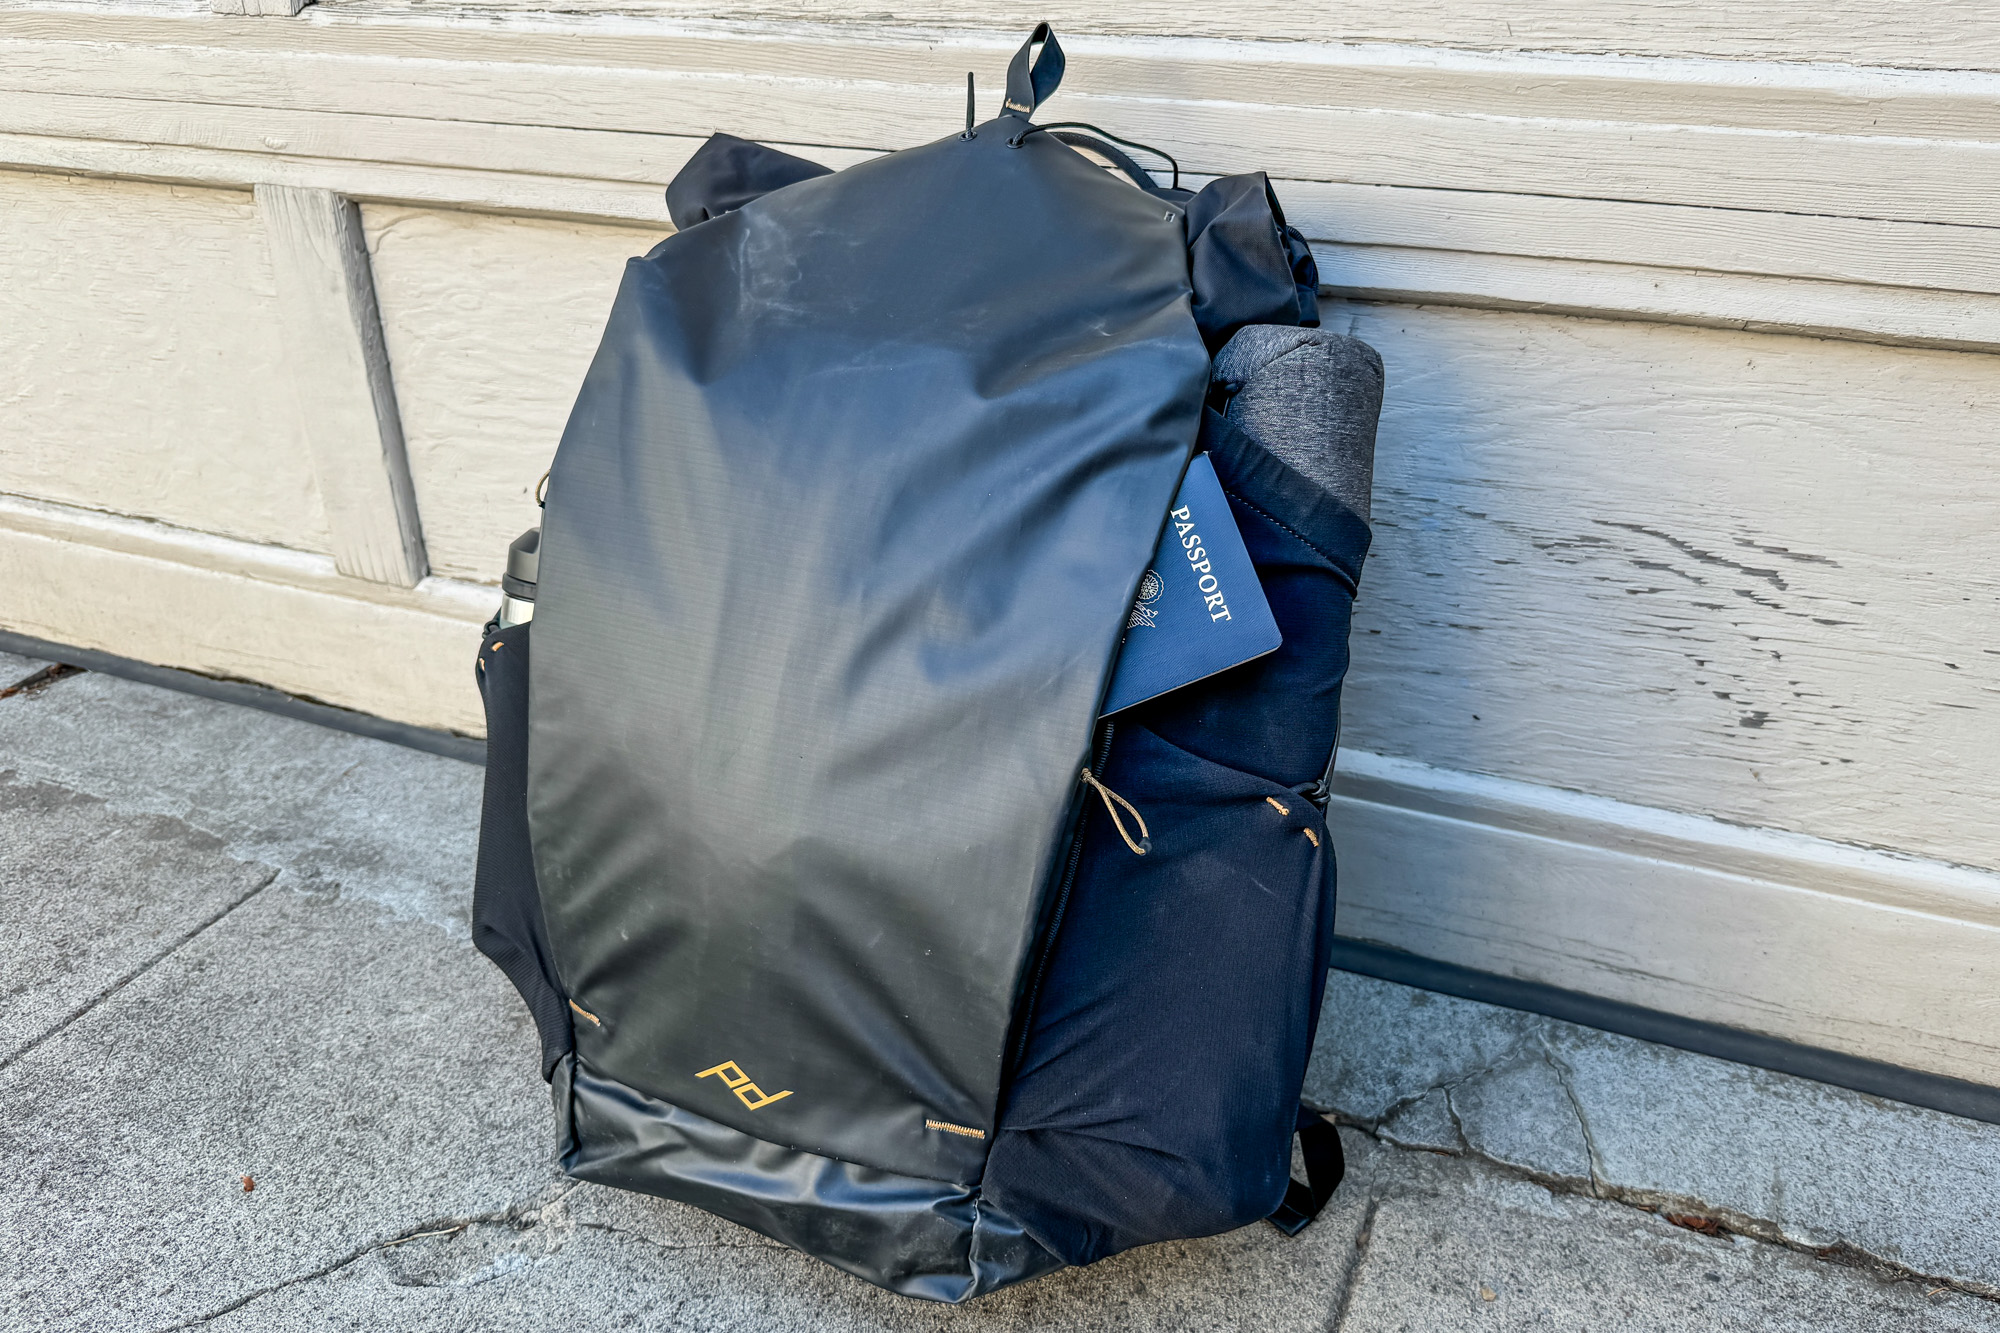
Carry-On
Your best line of defense against these woes is to carry all of your pricey gear in either your carry-on, using a backpack like the Lowepro Pro Trekker RLX 450 AW II, or your personal item. You can then stash more durable gear like a tripod, mounts, or a bulky camera cage in your checked bags.
Our favorite combo for schlepping gear for even moderately complicated shoots abroad is to slot a large camera cube, such as PD’s Medium or Large Camera Cube V2, into a hard-sided carry-on like the one above, and fill it with any assortment of lenses, mics, or sensitive filters. We then pack our pricey camera bodies and some of the more expensive lenses in a smaller personal item-sized camera backpack — like PD’s Everyday Zip 20L or the Tenba DNA 16.
This streamlined combo has allowed us to haul an absurd amount of film gear all over the world for everything from simple photo gigs, to complicated multi-month international video projects. Never once have we had to put anything fragile in a checked bag. Though this does make our personal items quite heavy, it’s a price we’re willing to pay for peace of mind.
Checking Bags
Checked bags get chucked haphazardly around while loading and unloading onto planes, and we’d rather not worry one bit about a cracked lens or broken body. With that said, we’d still recommend purchasing gear insurance before going anywhere too wild.
If your camera loadout is simply too massive for your personal luggage, you can splurge on something like the bombproof 1615 Air Case from Pelican to check sensitive gear — but this gets pricey fast.
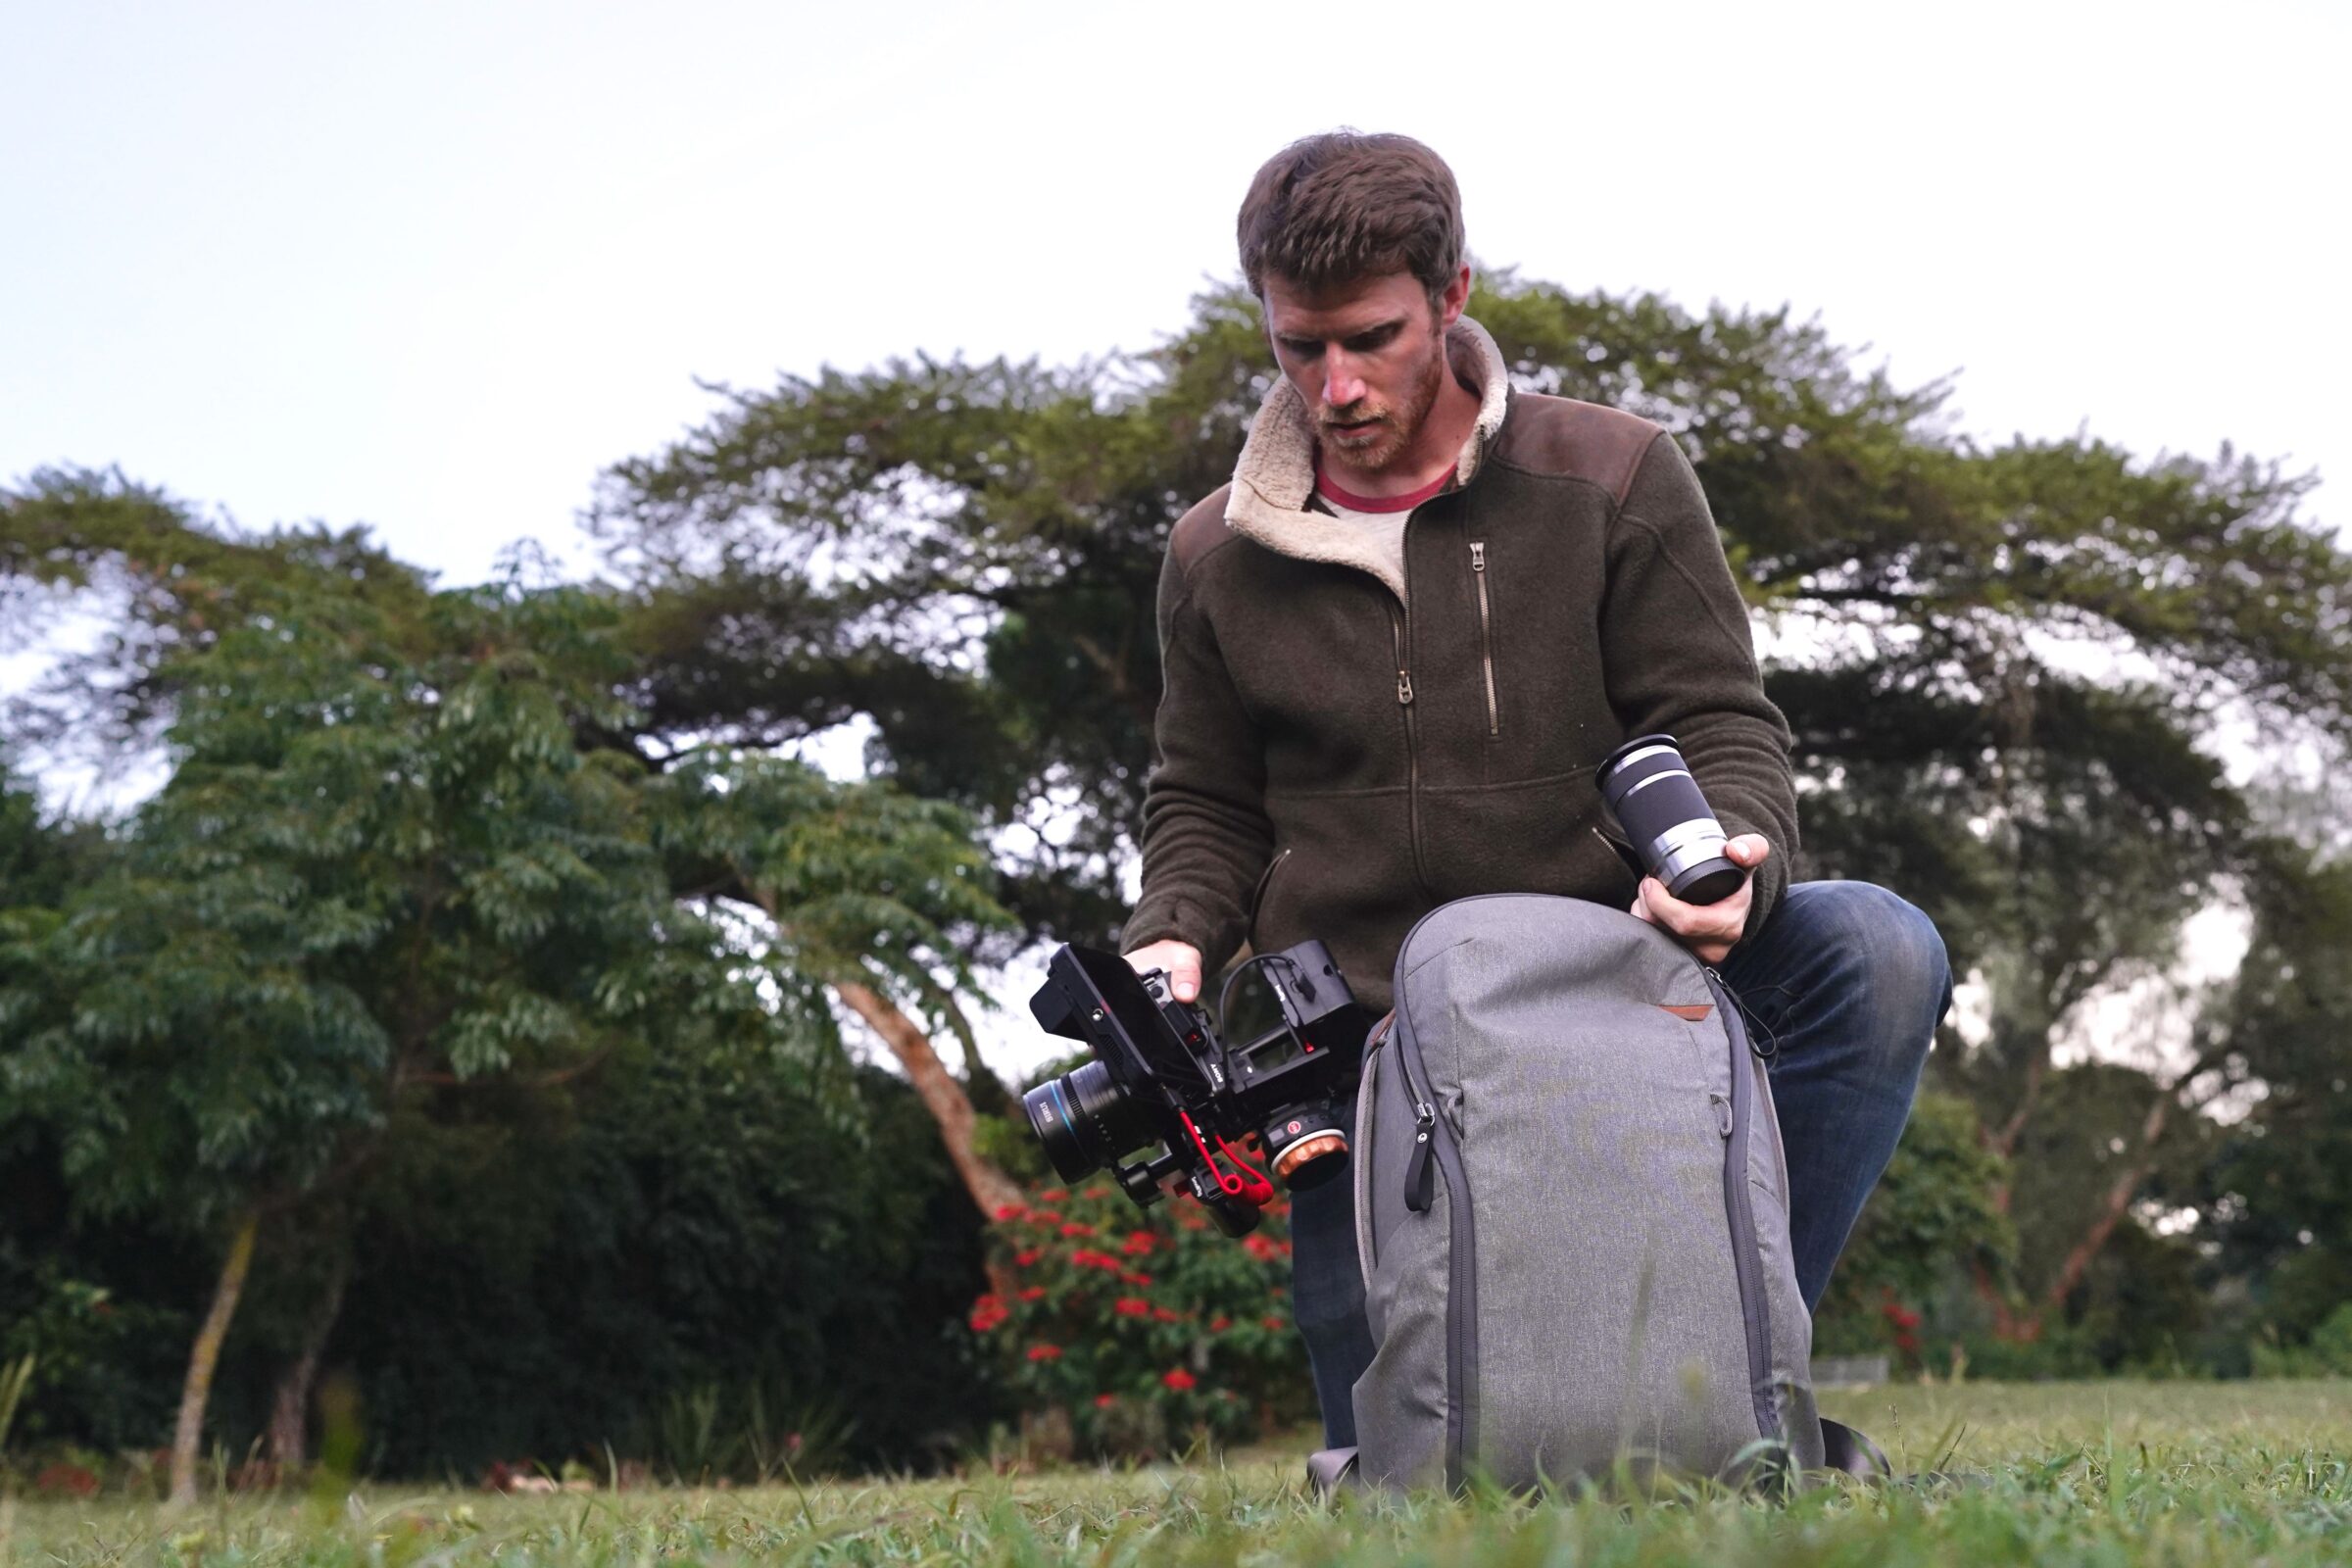
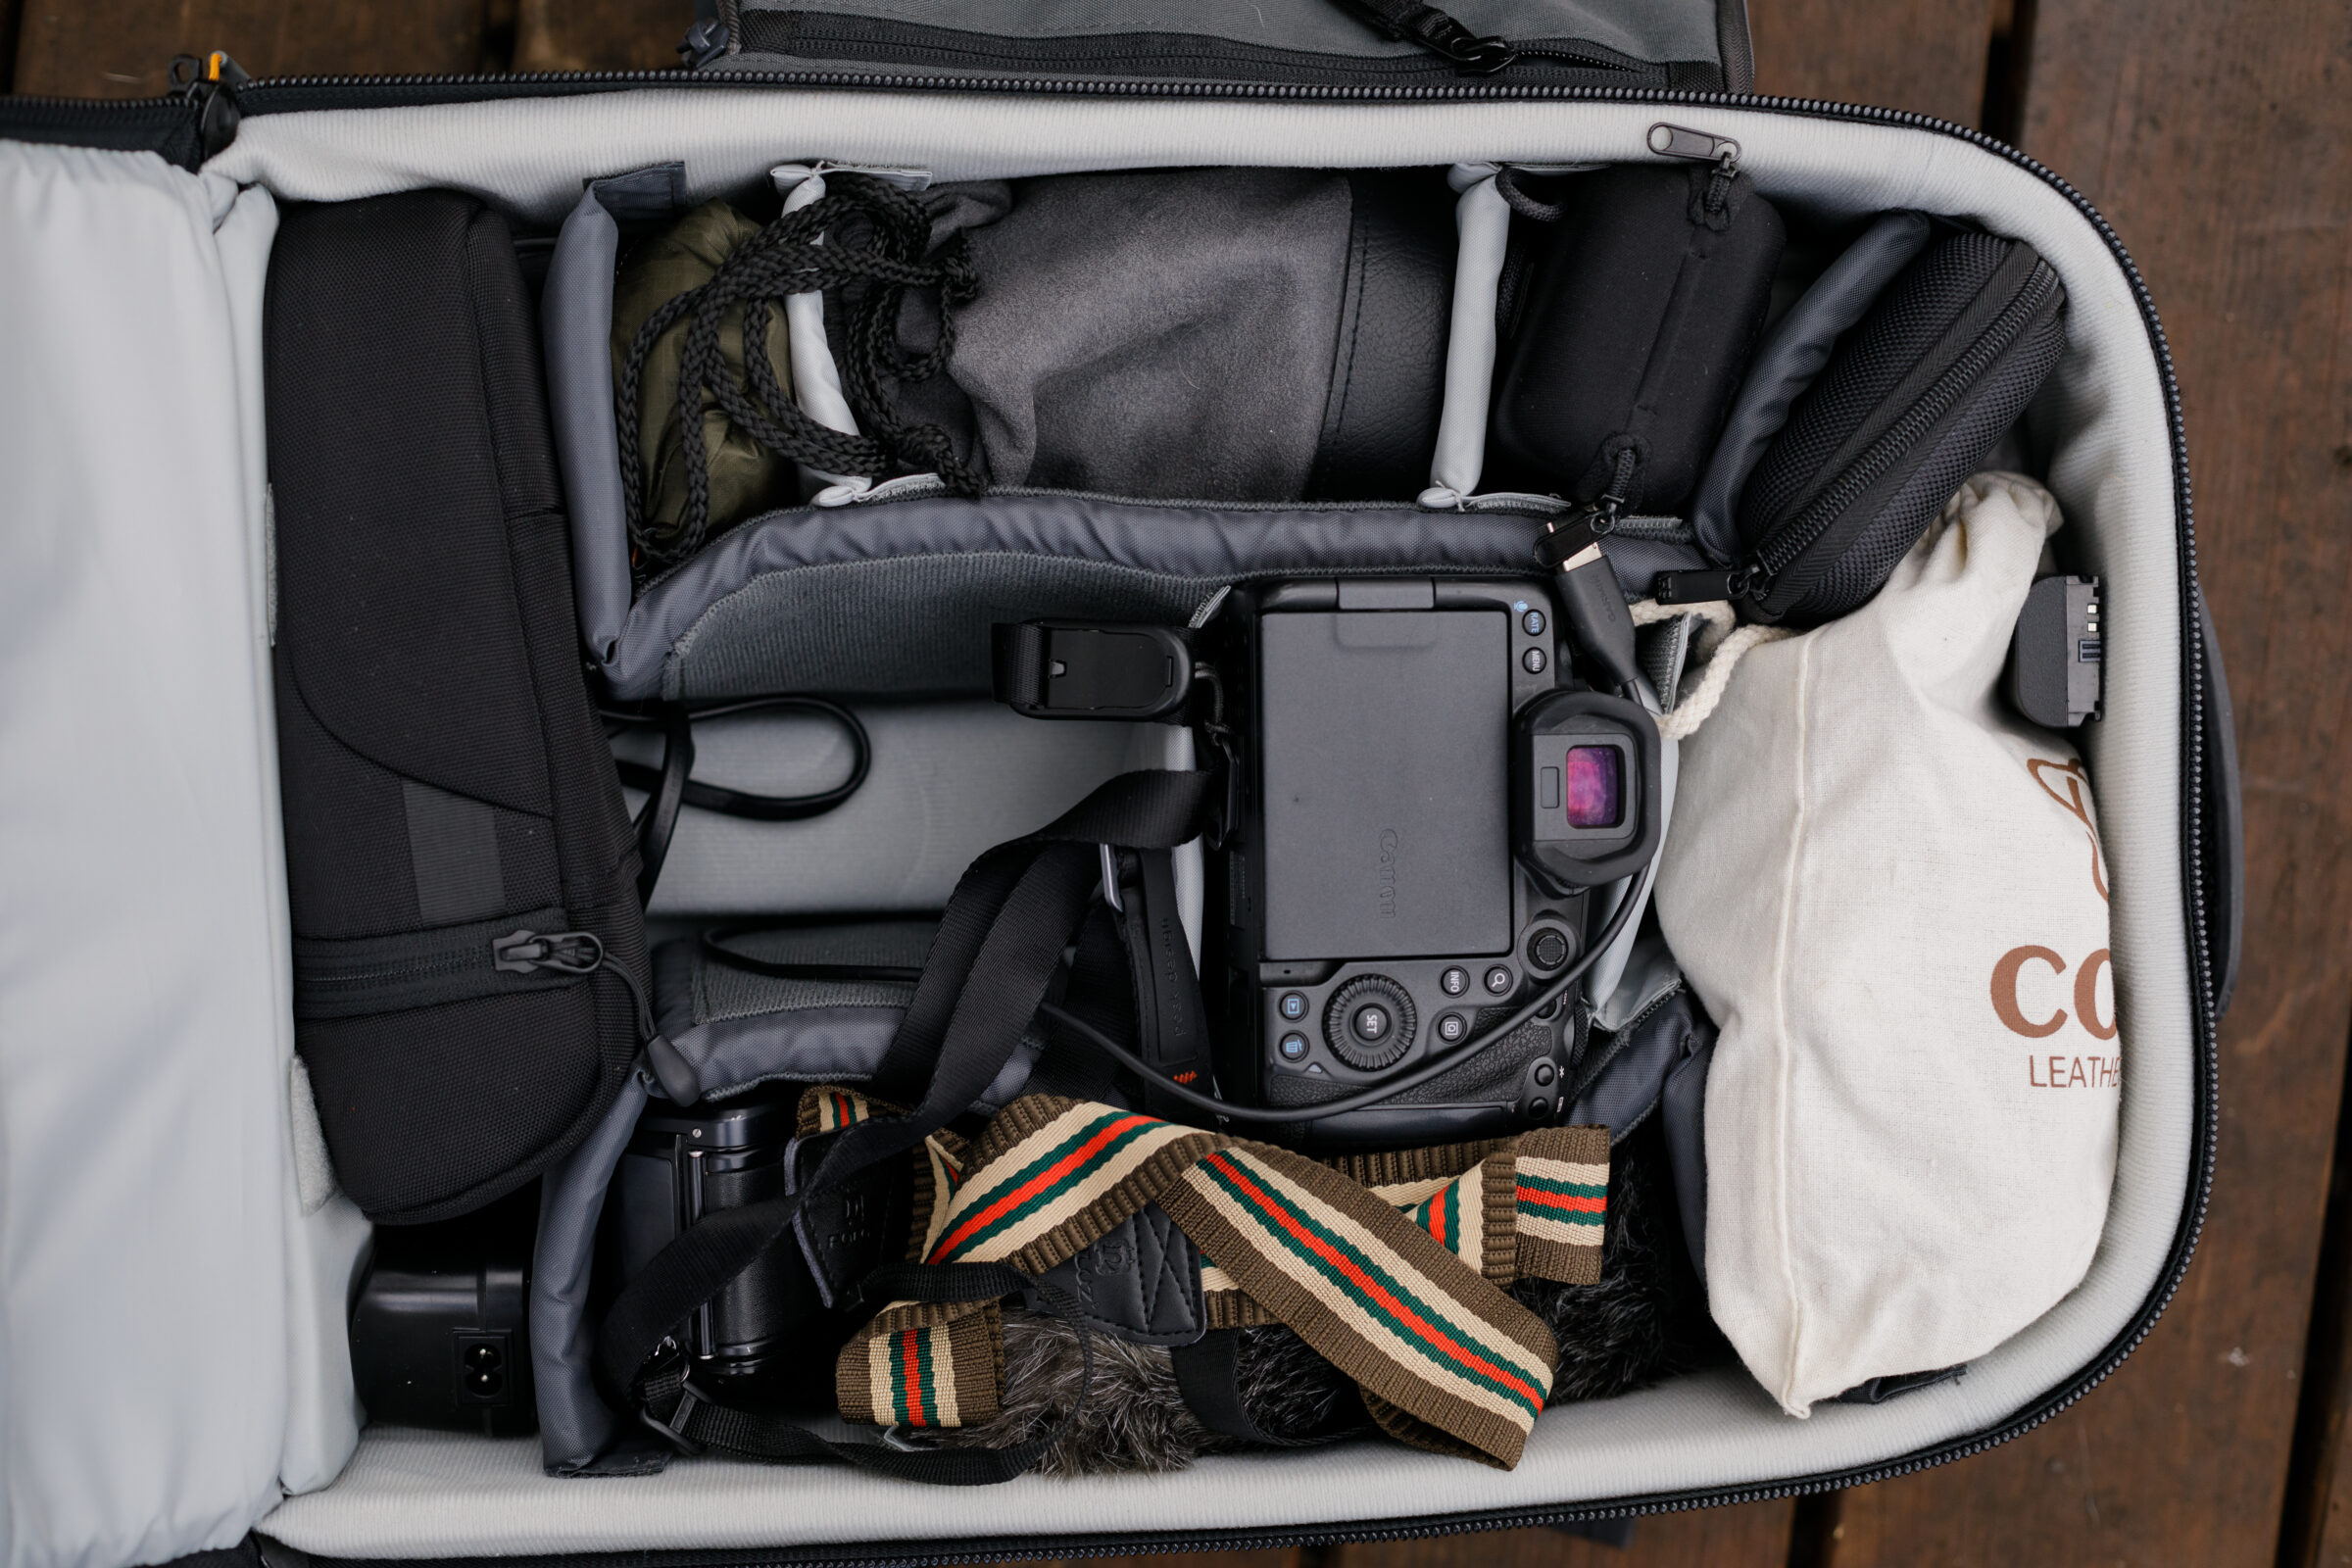
We recently were able to shove multiple camera bodies, a slew of bulky lenses, camera cages, gimbals, mics, monitors, and all manner of awkward-shaped tech accessories into this carry-on/personal item combo and travel stress-free to Africa for a months-long video project in brutal conditions.
The multiple access points of PD’s Everyday Zip, and easily accessible organization of the camera pod in our carry-on, allowed us to quickly reveal our suspect film gear to prying airport security eyes without having to spill all of our personal contents on the ground at checkpoints. A cherished detail.
When traveling internationally, it’s safe to assume that expensive camera gear will be scrutinized while going through airport security. It’s therefore best to have everything as easily accessible as possible if/when your bag gets pulled aside to be rummaged through.
It’s also helpful to have an itemized list on hand of what camera gear you’re bringing into the country, and its rough monetary value — as we’ve been asked for this on multiple occasions while traveling abroad. Having to scroll through your recent Amazon purchases to wrangle this info together last minute while folks wait impatiently behind you is less than fun.
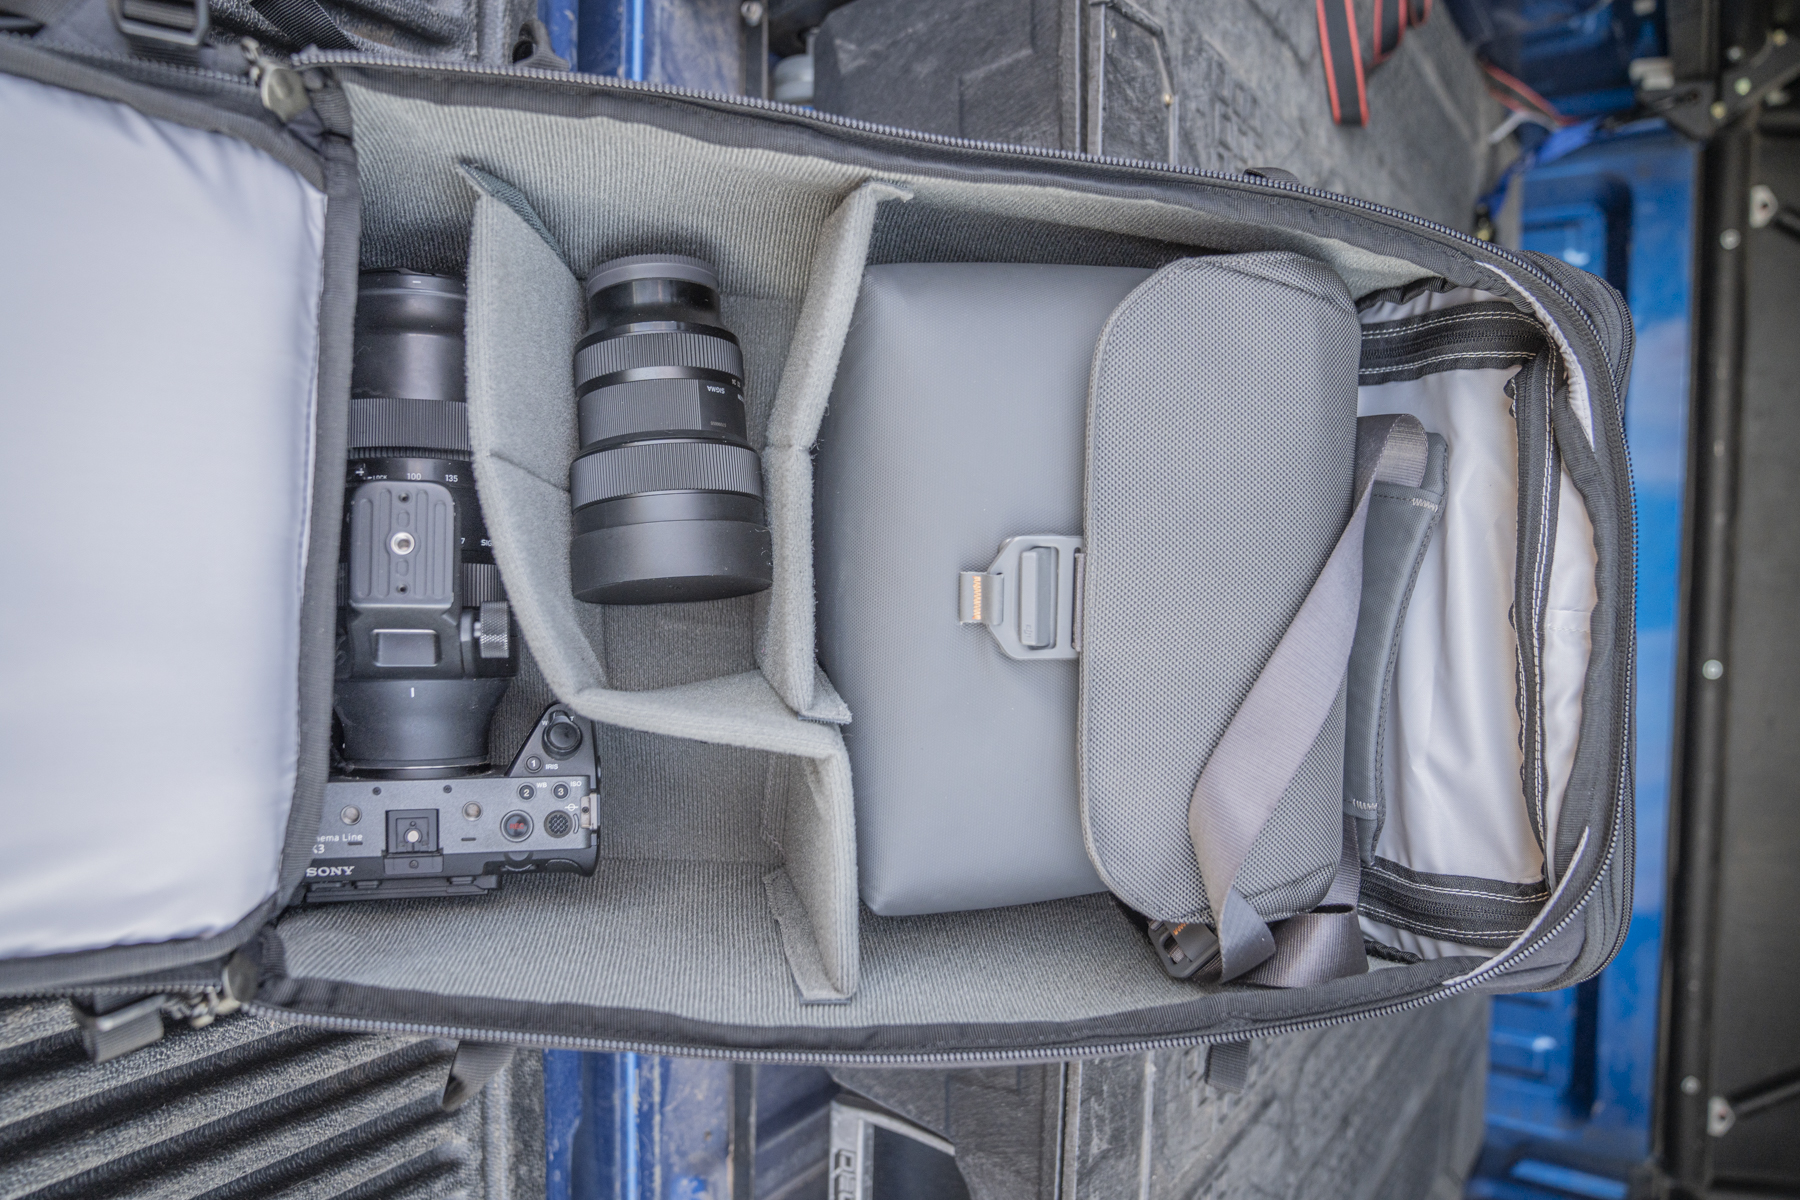
Pods/Camera Cubes
Camera pods/cubes are another important feature to consider, and can be immensely helpful when flying or road-tripping around — as mentioned above. Pods, or “camera cubes” can make many different backpacks into camera backpacks, and are smaller inserts that fit within a larger pack. They generally have foam dividers for cameras and lenses, and vary in sizes.
First, be on the lookout for pods that are and are not included. Many packs are now offering pods as an add-on to create a more customized bag that can double as a camera backpack or regular pack. The add-on options allow you to choose what size of pods you need. In any case, try to visualize where your gear will be placed in the pods, how many you need, and how to customize them to your needs.
Some of our favorite camera cubes are Peak Design’s Camera Cube V2s and Lowepro’s GearUP Pro Camera Boxes. We’ve been using the small and medium PD cubes to make our regular carry-ons into full-fledged camera rollers, and the GearUP Boxes for carrying loads of heavy bodies and lenses on backpacking trips.
The ability to slide them in and out of any backpack makes these shoo-ins for just about any adventure we’ve gone on during this testing period. The PD cubes also work seamlessly with all Peak Design bags — such as their sleek Travel Duffels — and can be securely clipped into attachment loops within the bag.
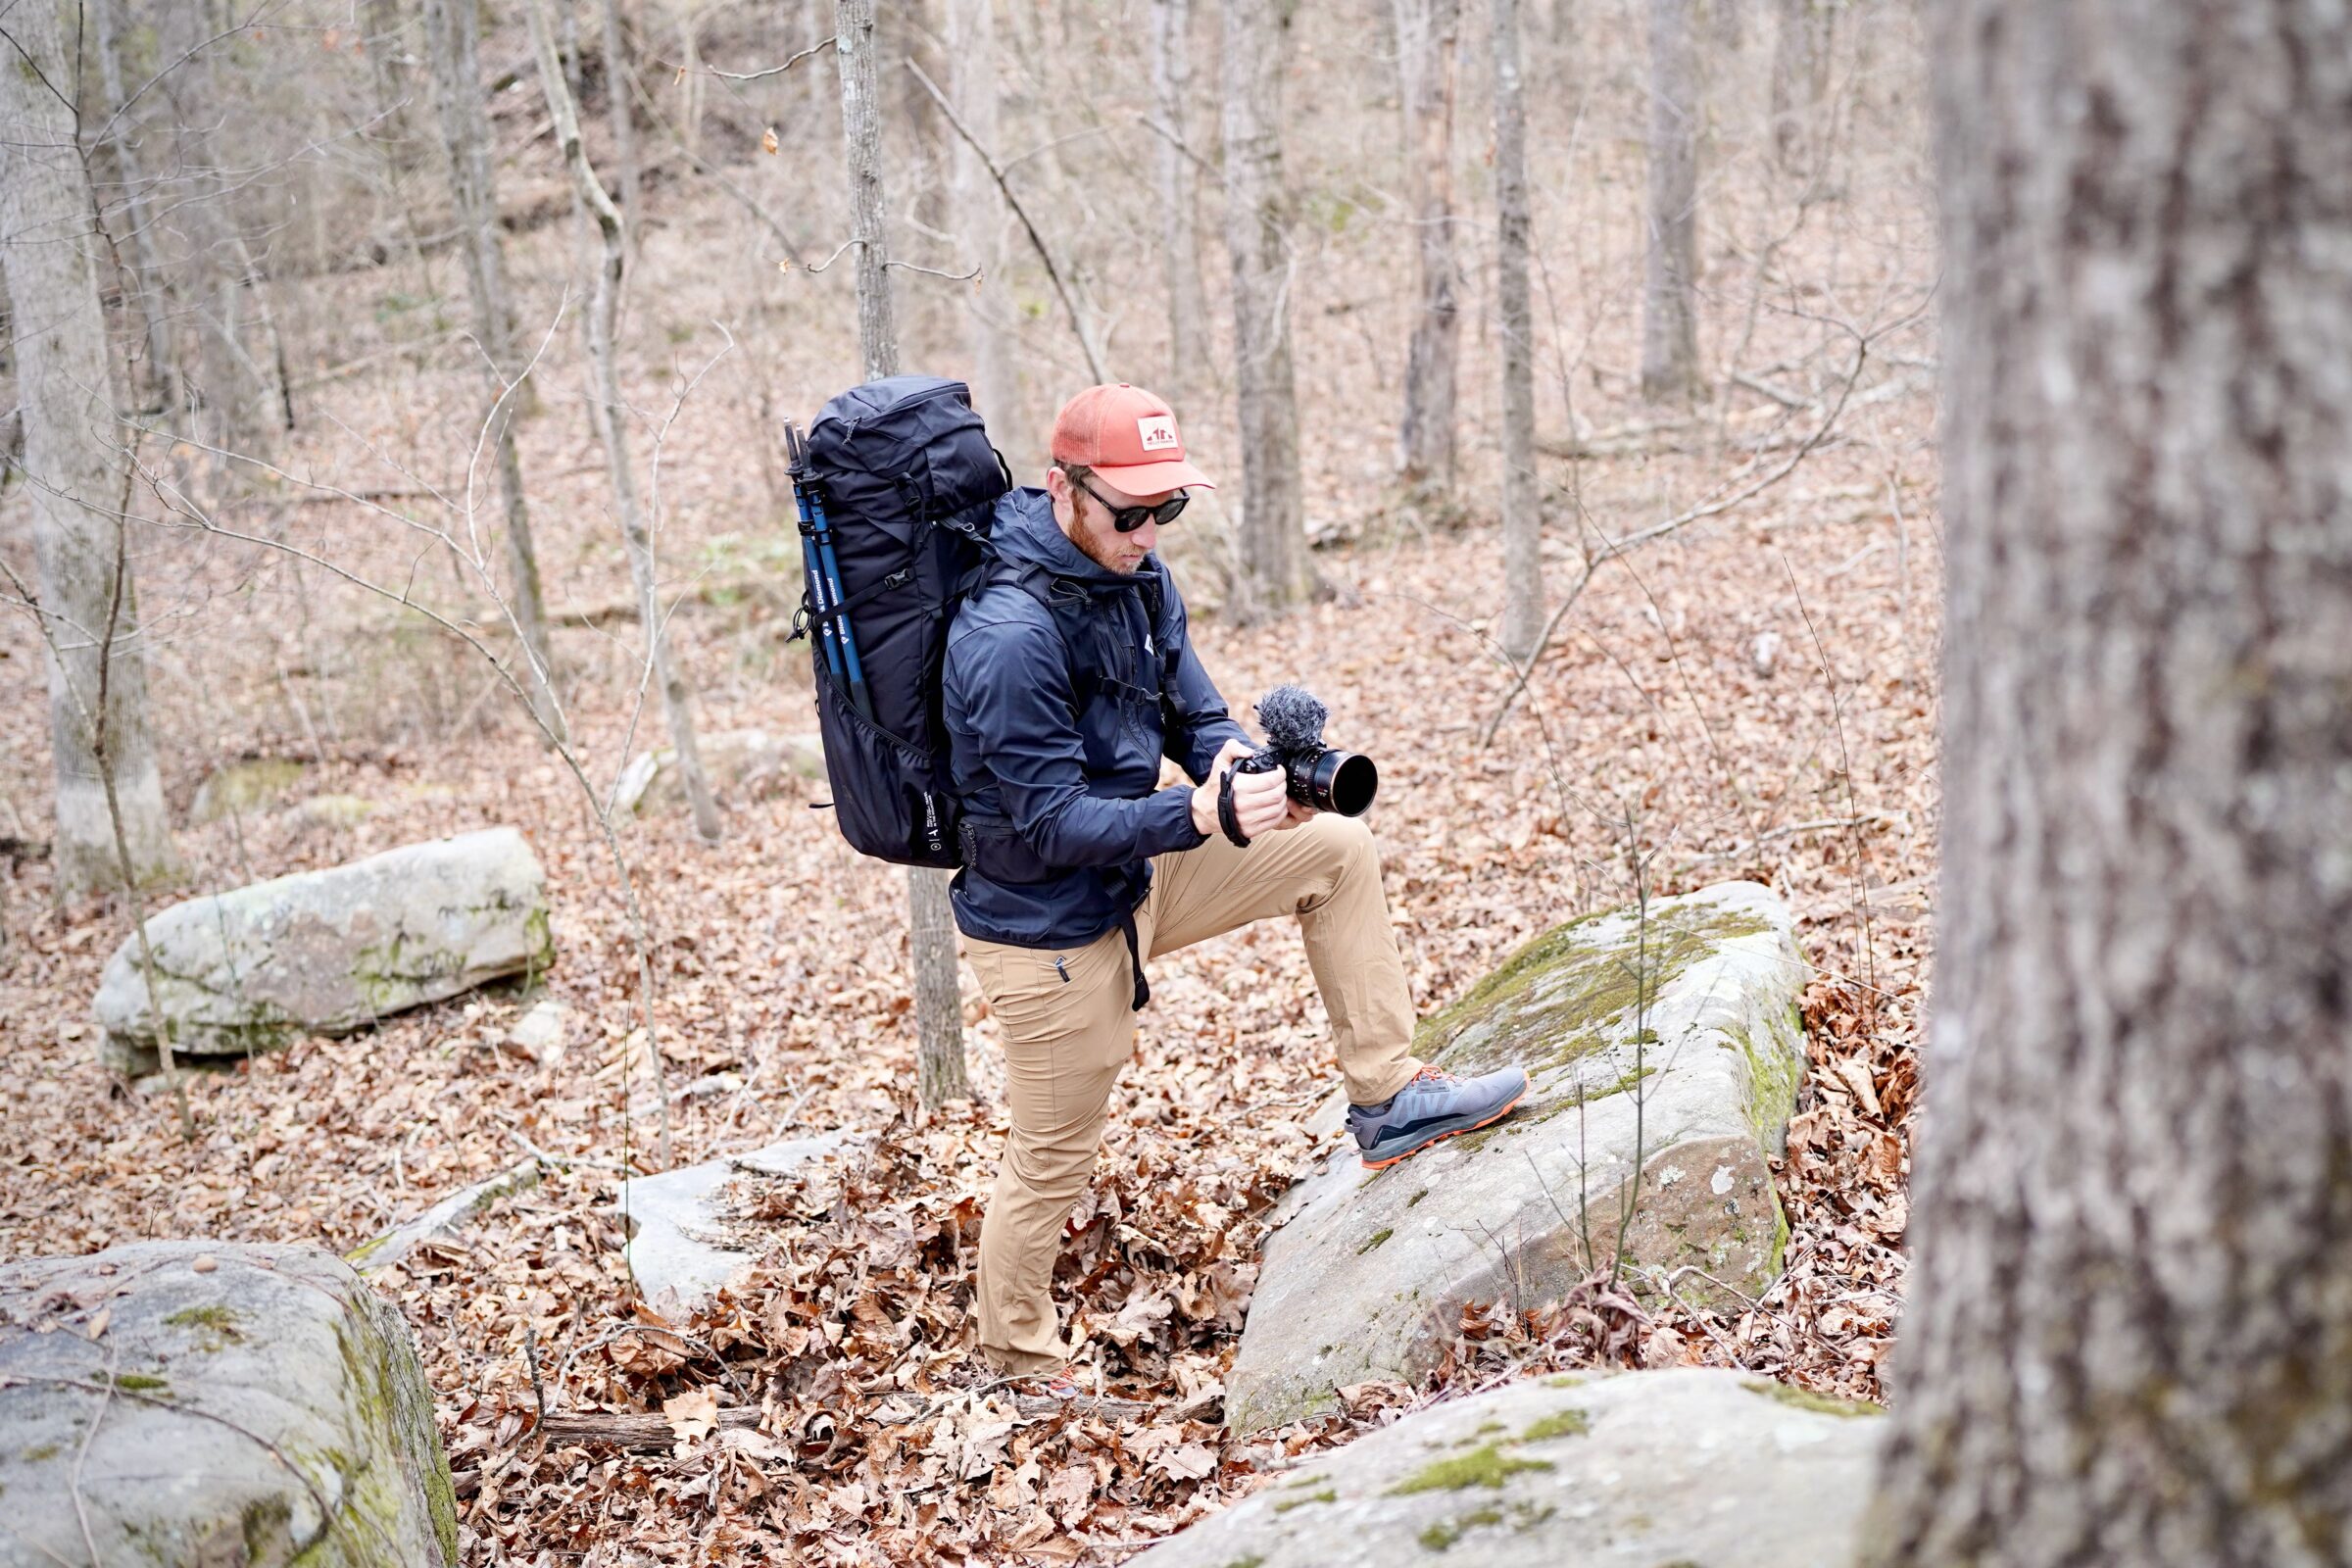
We love being able to store a body and one or two lenses in LP’s GearUP Boxes, and slide them vertically into our backpacking backpack for quick, multidirectional access to our camera mid-trek. The GearUPs have a large zippered opening on the front to access everything when you pull it out of your pack.
Or, you can open a smaller door on the top to slide the camera out when the pod is slotted vertically, nestled among your gear (see above). If you aren’t using a dedicated camera backpacking backpack — like Moment’s Strohl Mountain Light pack — this can be a great solution for the trail-trotting creative.
Camera cubes can also be used to add more gear storage to camera backpacks. Often times, the included camera compartment of camera backpacks just isn’t enough, and cubes can be added to personal gear sections of the pack to safely store additional sensitive gear.
Accessibility
The most important feature we look for in a camera backpack is its quick access to gear. Manufacturers must balance the need to protect fragile equipment while ensuring you can swiftly grab your camera for that perfect shot.
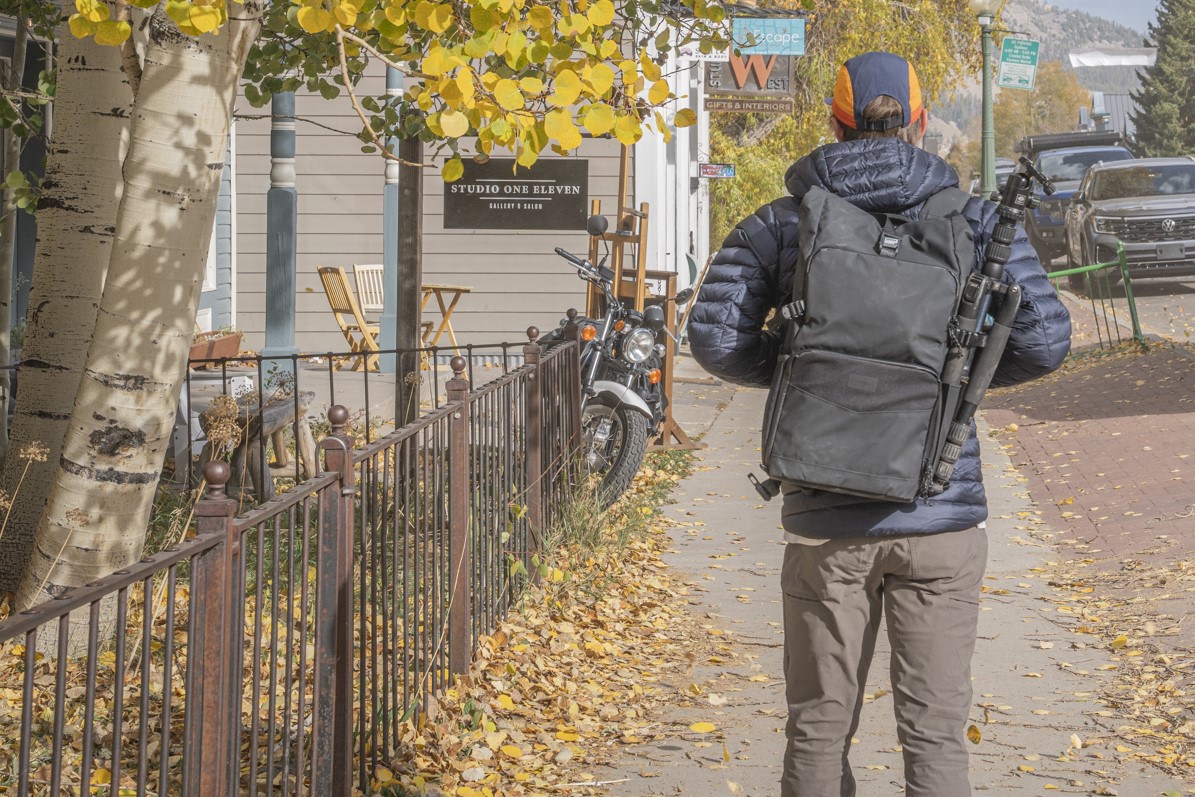
Multidirectional zippers, various access points, and strategically placed Velcro dividers all aid in this complex process. Perhaps our favorite accessibility layout can be found in PD’s Everyday Zip 20L. The pack features top and dual side access via a single 270-degree wraparound zipper, with four different zippers to open whichever compartment of the pack you need.
Handles on each side of the pack allow you to rip it around with ease to quickly access each segment, and the rotating shoulder straps let you drop the pack onto one shoulder and rip it open without plopping it on the ground.
When selecting a camera backpack, think about your access needs—quick access or transportation. Look for features like top and side access, camera clip loops, and a side door entry for easy camera retrieval without removing the pack.
A good camera pack typically has a zipper that extends to provide a full view of your gear when the pack lies flat. A clamshell design allows the bag to open completely for easy visibility. The location of the camera compartment varies: zippers can be positioned near the back, front, or sides. Some users prefer added security at the cost of accessibility, while others opt for easier access from the back or outer zipper, depending on their needs.
Tripod-Holder
Every good camera backpack will have a tripod holder. If the bag you’re considering has one, it’s usually located on the exterior of the pack. Many packs use a pocket that usually acts as a bottle holder to support the bottom of the tripod, with a strap near the top of the pack to secure it.
Capacity
Most standard camera bags are around 20-30 L. This is plenty of room for camera gear, a laptop or tablet, and other essentials. The Deuter Jaypack 34+ comes with a range of dividers that allow for endless customization options and enough room to fit a telephoto lens, and even a drone.
If you go out on longer multiday trips, opt for a larger pack — 50 to 60 L might be a good size. In this capacity range, we especially love the Shimoda Action X50 V2, which carries well and has added features. Find a padded camera cube so you can pack your camera and lenses safely in the pack if you don’t plan on getting one with integrated camera storage.
Durability
As far as pack durability goes, double-stitched straps and high-denier (thicker) materials will help your bag withstand standard wear and tear. For keeping your gear safe, the more padded the backpack, the safer your equipment will be.
Also, the more snug the compartment design is, the better. Extra space leaves room for gear to jostle around whether you’re running through the airport, riding your cruiser to the park, or steering a dirt bike to an overlook for sunset.
Look for a pack that has padding that surrounds the main compartment, not just on the separators. If you tend to be extra hard on your gear, some bags have hardshell liners for extra impact protection.
Waterproofing/Weather-Resistance
It’s important to know the difference between waterproofing, water-resistant, and how long these materials last. If you want to be prepared for any weather, definitely look for a backpack that is waterproof with waterproof zippers.
Water-resistant bags are great for minor exposure to liquids and in between throwing on an additional rain cover or rain jacket. They will eventually become saturated if there is substantial water, so be sure to consider a game plan if you’re out and about during rainy or snowy seasons. In any case, you can always plan to move your camera backpack underneath a rain jacket for coverage on the move.
If you tend to shoot in rainy weather, look for a pack that comes with a rainfly. Many packs stash these in a small pocket on the exterior for quick deployment.
Be wary of packs that are advertised as waterproof. Even if the bag’s material is waterproof, the zippers usually aren’t. So, while a waterproof exterior may repel rain, humidity, mist, or splash action from the bottom of the canoe, there’s a chance that it can seep in through the zippers and get your camera wet.
Comfort
Camera backpacks can get heavy fast. If you’re planning to pack multiple cameras, lenses, and accessories along with your laptop, it’s important to consider how much weight is bearable for your body and find a backpack that distributes weight evenly.
Many backpacks, like the Peak Design Outdoor Backpack 45L and Shimoda Action X50 V2, include chest and hip straps. Really great packs add padding to all the straps with adjustments to fit your body. Look out for these features and consider spending a little extra if you’re someone who often carries heavy gear.
Another thing to consider is how heavy the backpack is before you put your gear in. It’s a hard balance as extra comfort and padding usually lead to more weight while ultralight gear can be flimsy and less likely to distribute weight evenly. There are packs that do a great job of balancing both comfort and protection with good padding and weight distribution to help offset the discomfort.
Shoulder Pads & Hip Belts
Some camera packs put these two important comfort qualities on the back burner, which is a bummer because a loaded pack of electronics is a fair load to carry around! Ideally, the shoulder pads are breathable, ergonomic, and well-cushioned.
Likewise, the back panel should have cushion, support, and hopefully breathability through a mesh material and airway channels between the pads.
Hip belts that are constructed of a simple strap will help secure the load from swinging around but will not support the load off the shoulders and upper back. They are also not the coziest to snap on.
Cushioned hip belts help to protect the hips from rubbing and carry a portion of the pack weight, relieving the upper back; plus, they are generally more comfortable. For folks with back or neck pain or injuries, be sure to look for adequate pads in your camera pack.
Categories of Camera Backpacks
Different camera backpacks serve different creatives’ needs. Whether you gravitate to simple day or wedding shoots, or frequently find yourself filming technical expeditions lasting for months, there’s a pack out there with your name on it. We’ve broken down some of our favorite camera backpacks into three main categories. Most of these packs are featured above, while some we have reviewed in previous years.
- Casual: General use around town, non-professional gear but still provides good coverage
- Technical: Great for professional gear for the long haul with increased padding, waterproofing, and support straps to support additional weight when traveling.
- Backpacking: Packs with larger volumes — used best for 2-3-day trips hiking over various terrain, or even general traveling.
Price & Value
Whether for personal or professional use, be prepared to spend a little extra on a good backpack. Camera backpacks vary dramatically in price and features. Generally, the more you want to carry (e.g., multiple camera bodies or lenses), the pricier the backpack becomes. However, size isn’t the only factor that matters. Weather resistance, durability, and the level of camera protection can also impact price.
Budget
The budget category ranges from as low as $30 to around $100. Here, you can find backpacks like the CADeN Camera Backpack ($36), a true barebones camera bag. At this tier, the bags are made of questionable fabric that lacks waterproofing, and they may lack padding and ergonomic support.
These bags generally are less comfortable and hold less gear than other options, however, these budget bags may be the right choice for you depending on the way you use them. The CADen has enough padding to properly protect your gear, but it lacks support for heavier loads. While these packs may not save your back, they are easier on your wallet.
Mid-Tier
These camera bags range from $150 to $250, and most camera backpacks fall into this range. The standouts in this tier are the Lowepro ProTactic 450 AW II ($220) and the Tenba DNA 16 ($230). At this level, backpacks have more features like laptop pockets and waist straps. They typically also have more ergonomic and comfortable designs.
These bags are worth the price jump as they are significantly better for daily use. At this price point, the backpacks are still on the smaller side, so if you’re looking for a quality bag that can hold a lot of gear, then you should check out the premium bags.
Premium
Premium bags start at $300 and go upward, with the most expensive in our guide in the $500 range. Here the backpacks come with the most features like extra padding, waterproofing, and the ability to hold multiple camera bodies and lenses. If you plan on doing big days in the mountains, these will save your back from discomfort.
A camera bag filled with a drone, multiple bodies and lenses, and even a gimbal, can be worth thousands of dollars. It’s best to protect that investment with a high-quality backpack protecting your precious camera equipment from weather, shocks, and drops.
The standouts in this category are the Peak Design Outdoor Backpack 45L ($330) and the Shimoda Action X50 V2 ($350) for their ability to securely carry a range of cameras and outdoor gear in all weather conditions while your back gets the support it needs to haul all that weight around.
Frequently Asked Questions
Protection, organization, weight, access, gear fit, and comfort are the key components of good camera bags. Look for a bag with a padded interior, plenty of internal and external pockets for keeping your small, easy-to-lose accessories handy, and a well-designed harness system that distributes the pack weight well.
Look for a pack that allows you to grab the camera on the fly thanks to a seamless side entry point.
Every camera bag has a padded compartment that’s designed to keep your camera safe from bumps and scratches. The best way for you to keep your camera safe in your pack is to pack it correctly.
Also, know that your average camera pack is not bombproof. Use common sense with your bag: Avoid throwing your bag around, sitting on it, or piling other bags on top of it, and your camera should be safe.
While camera backpacks are built with durable, often water-resistant material, note that zippers are not typically waterproof. Be aware that moisture, humidity, splashes, setting it in puddles, traveling through pouring rain or snow, or a spilled water bottle have the potential to reach your equipment.
Pay attention to your surroundings when you travel, too. If you’re overseas or in a crowded bus or train station or at an airport, consider using a lock on your pack. Not all camera pack zippers are compatible with TSA locks.
The TSA allows bags with cameras, tripods, and lenses if they fit in the overhead bin or under your seat. Drones are allowed through checkpoints. But individual airlines’ rules may vary. Check with your specific airline to see if your drone is allowed in your carry-on.
Short answer: no. If you feel like risking it, you can keep your camera in a regular bag. But the likelihood that your camera will be damaged is increased. And if you’re attached to your bag, you can always buy a padded camera cube, put your camera in it, and then place it in the bag.
That said, a camera bag will not only be safer for your camera but will also keep all your peripherals organized, allowing you to access everything you need when you need it.
Like a painter or graphic artist, every photographer is slightly unique with their technique, tools, and how they carry and operate their gear outside or indoors on a film mission. Generally, a few things that pros will carry include multiple memory cards, batteries, a lens wipe, a tripod, plus, of course, their camera and a couple of lenses tailored to the shots that they have in mind for that destination.
Sometimes they’ll also bring an extra camera, reflector, or light meter, but it really depends on how quick, fast, and lightweight they need to travel and what their objective or contracted project entails.
Just like any other piece of gear, it’s important to provide routine TLC to your bag. Clean the exterior and interior according to the product tag, and reapply water repellent too. Make sure the zippers are well-lubricated and clean.
Repair and patch any tears or deep scratches. Also, be sure to air out the interior pockets and camera cubes, as storing your equipment in a dry, clean space is important.
Shelter cove to Big Lake Youth Camp
At one point after leaving Charlton Lake, I hiked through a desolate burned area. The area had been so completely torched that not even dead trees remained. The ash was fine on the trail and you could see the footprints of other hikers superimposed over each other with exquisite detail.
Throughout this hike, my feet follow the steps of others. Am I a leader, or a follower? We all hike the same path but what we take away from it may be completely different. So far, I can say that I have never met so many interesting people. Or maybe I have, but just never had the time or interest to get to know them before. This has been a surprising discovery on the PCT.
Updates
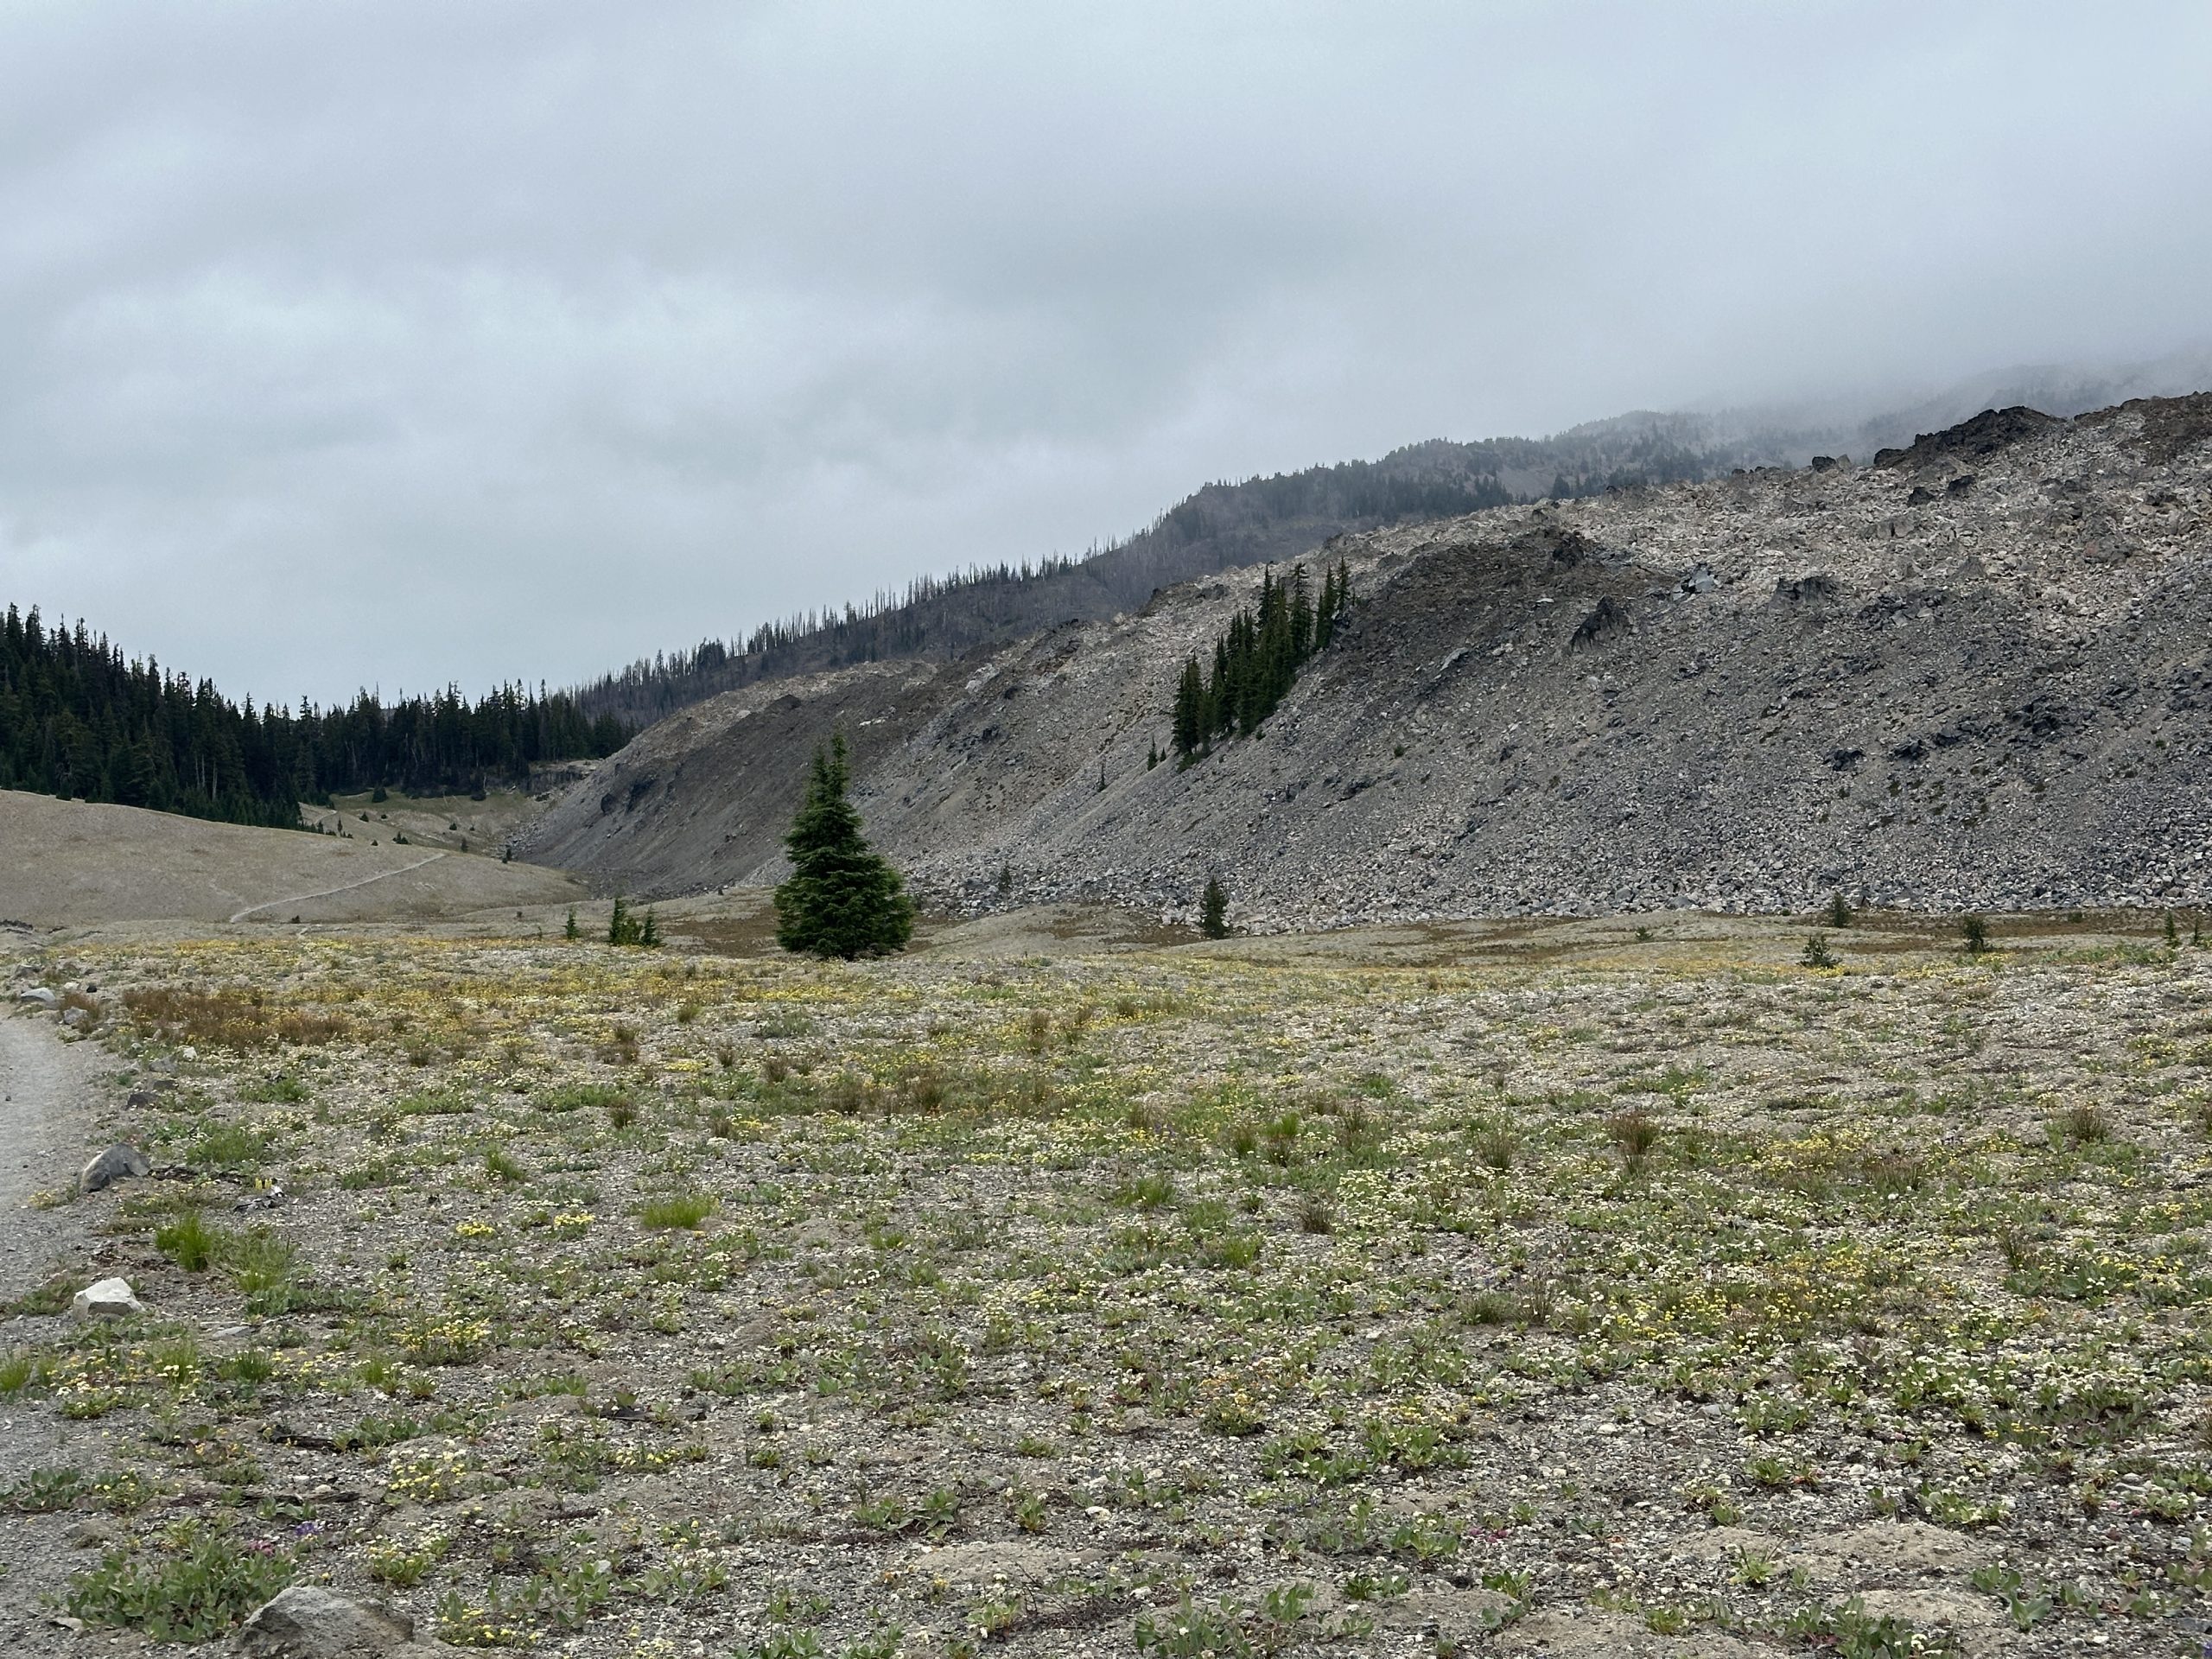
The most recent area I hiked through had a wide variety of different landscapes. The Three Sisters wilderness is extremely beautiful and fascinating with obvious signs of previous volcanic activity. To add to the mystique, the weather was cloudy and misty. In some ways, this was great because much of the trail was exposed, and would have been very hot. On the other hand, it obscured the tops of the peaks so vistas weren’t dramatic. Some sections went through flat plains full of small wildflowers while next to this plain, there was a mesa of volcanic rubble with nothing growing at all.
Obsidian Falls tumbles over boulders of obsidian.
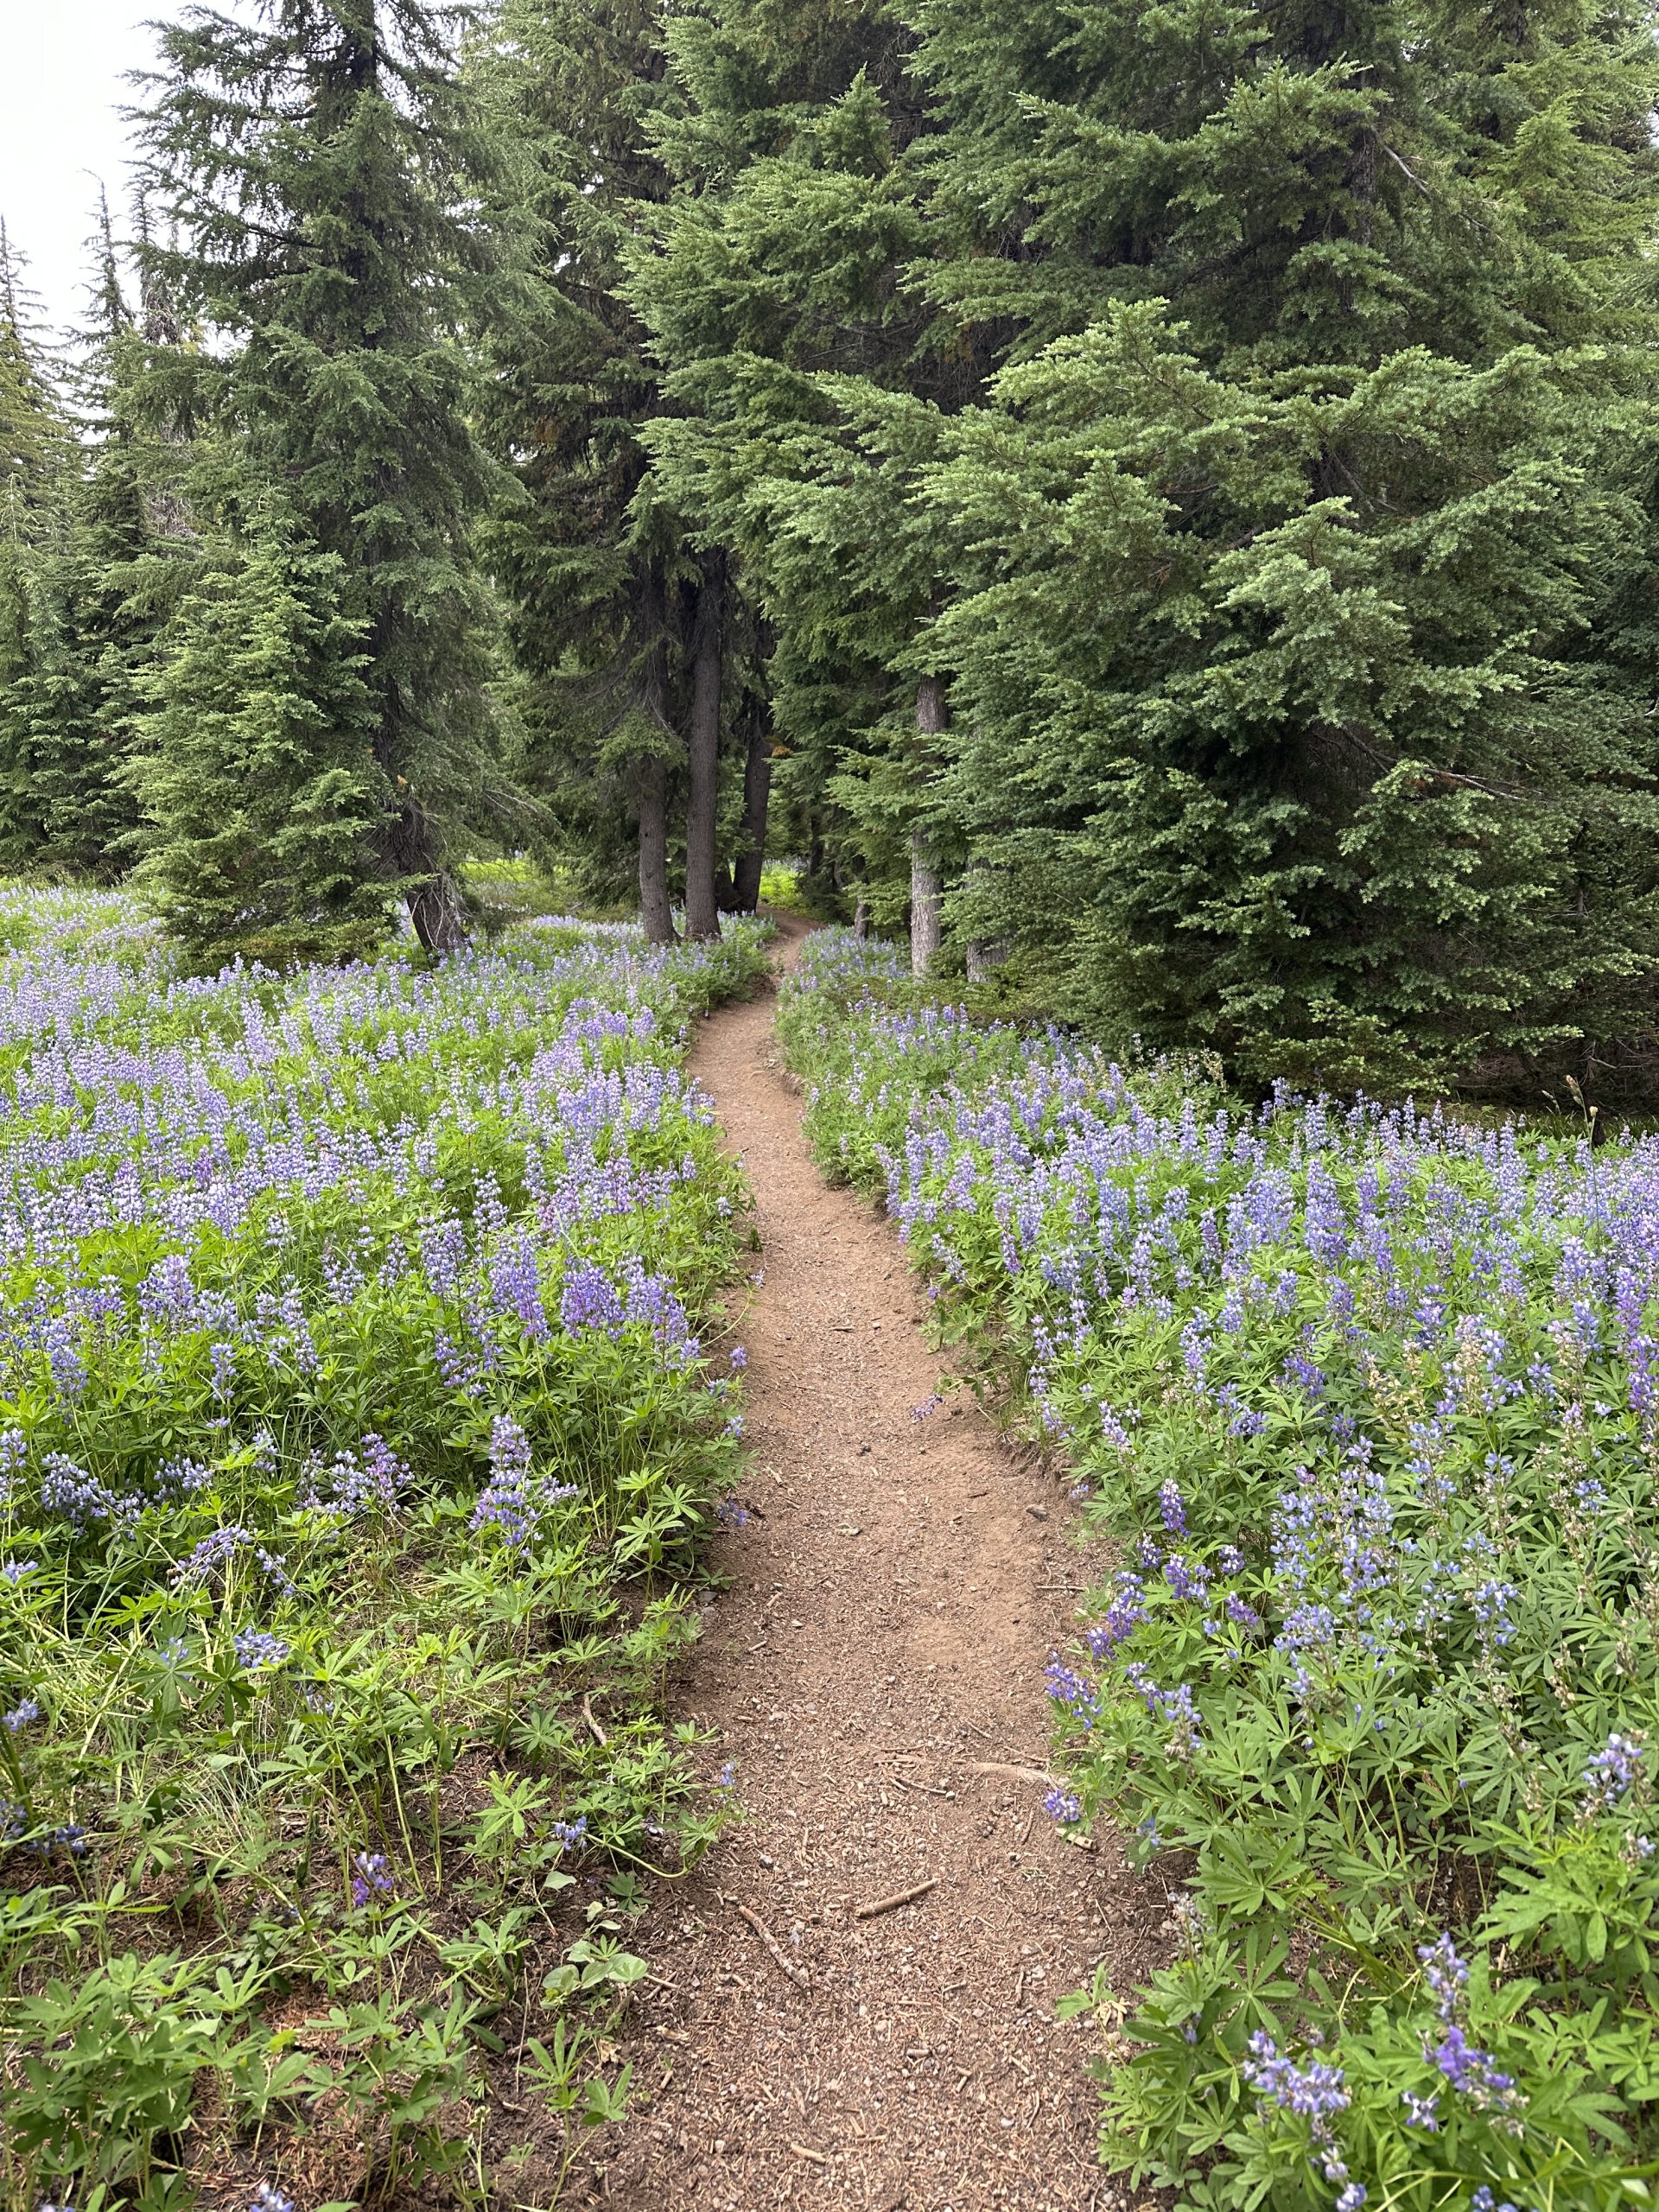
High glacial streams tumble down, their source the snow that is still present even in August. I walked through fields of fragrant lupine.
The misty weather turned to rain. I was extremely proud of my Durston x-dome in the wind and rain. The interior stayed completely dry.
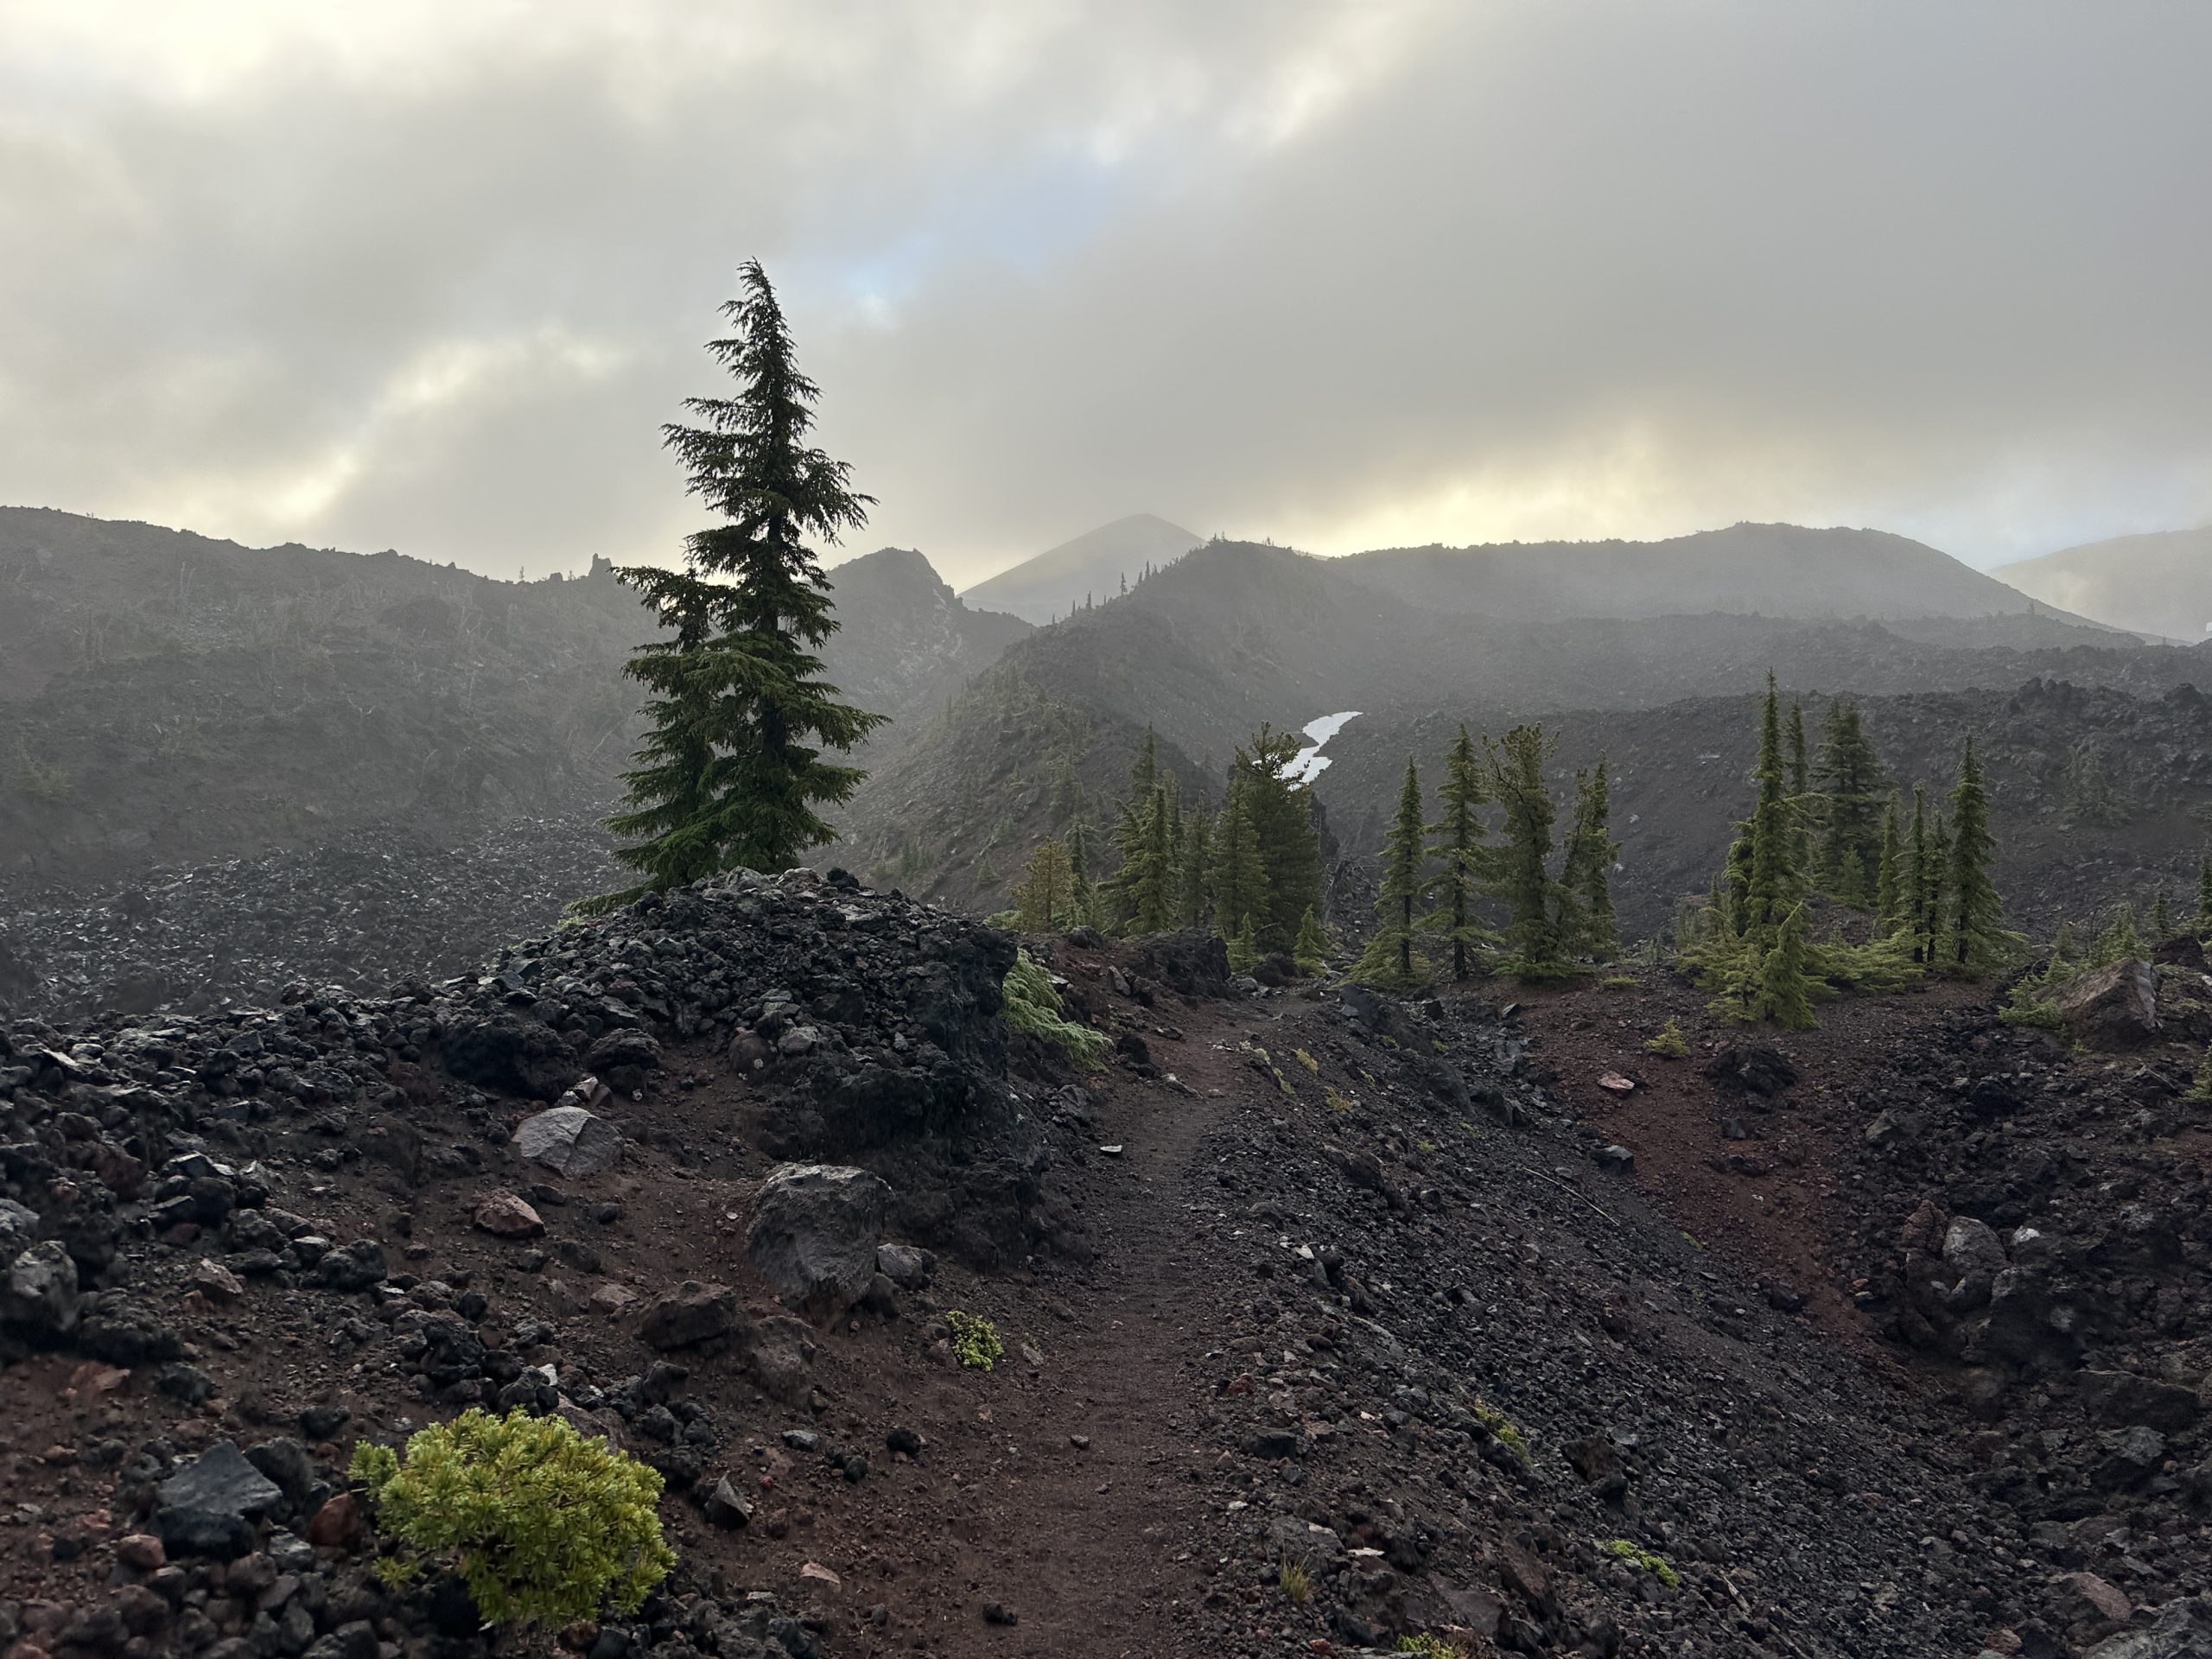
I had heard of the lava fields from a random stranger and an ice cream shop in Ashland. He had remarked on how challenging it was in the hot sun. I wondered when that would be and this was it. Again, cool and windy. Weather made it a little bit easier but walking over large gravel pieces for several miles made for slow going and was really tough on my feet. Another hiker described it as “hiking on the moon” (I wish we had had the moon’s gravity as well.)
Finally, I arrived at Big Lake Youth Camp. They are very welcoming and have a separate space for PCT hikers to socialize, do some laundry, take a shower, and deal with their resupply. They also offer meals to thru hikers. I am thankful they are so welcoming. I slept next to Big Lake last night. For the first time, my tent was frozen in the morning. Time to switch out to cool weather gear.
Seeing Family
After leaving Big Lake, I hiked to Santiam Pass, where my brother and his family picked me up. We visited Belcamp hot springs and stayed in the town of Sisters. It’s so nice to see family and to have the time to spend with them. I am so grateful that they came to support me.
This website contains affiliate links, which means The Trek may receive a percentage of any product or service you purchase using the links in the articles or advertisements. The buyer pays the same price as they would otherwise, and your purchase helps to support The Trek’s ongoing goal to serve you quality backpacking advice and information. Thanks for your support!
To learn more, please visit the About This Site page.

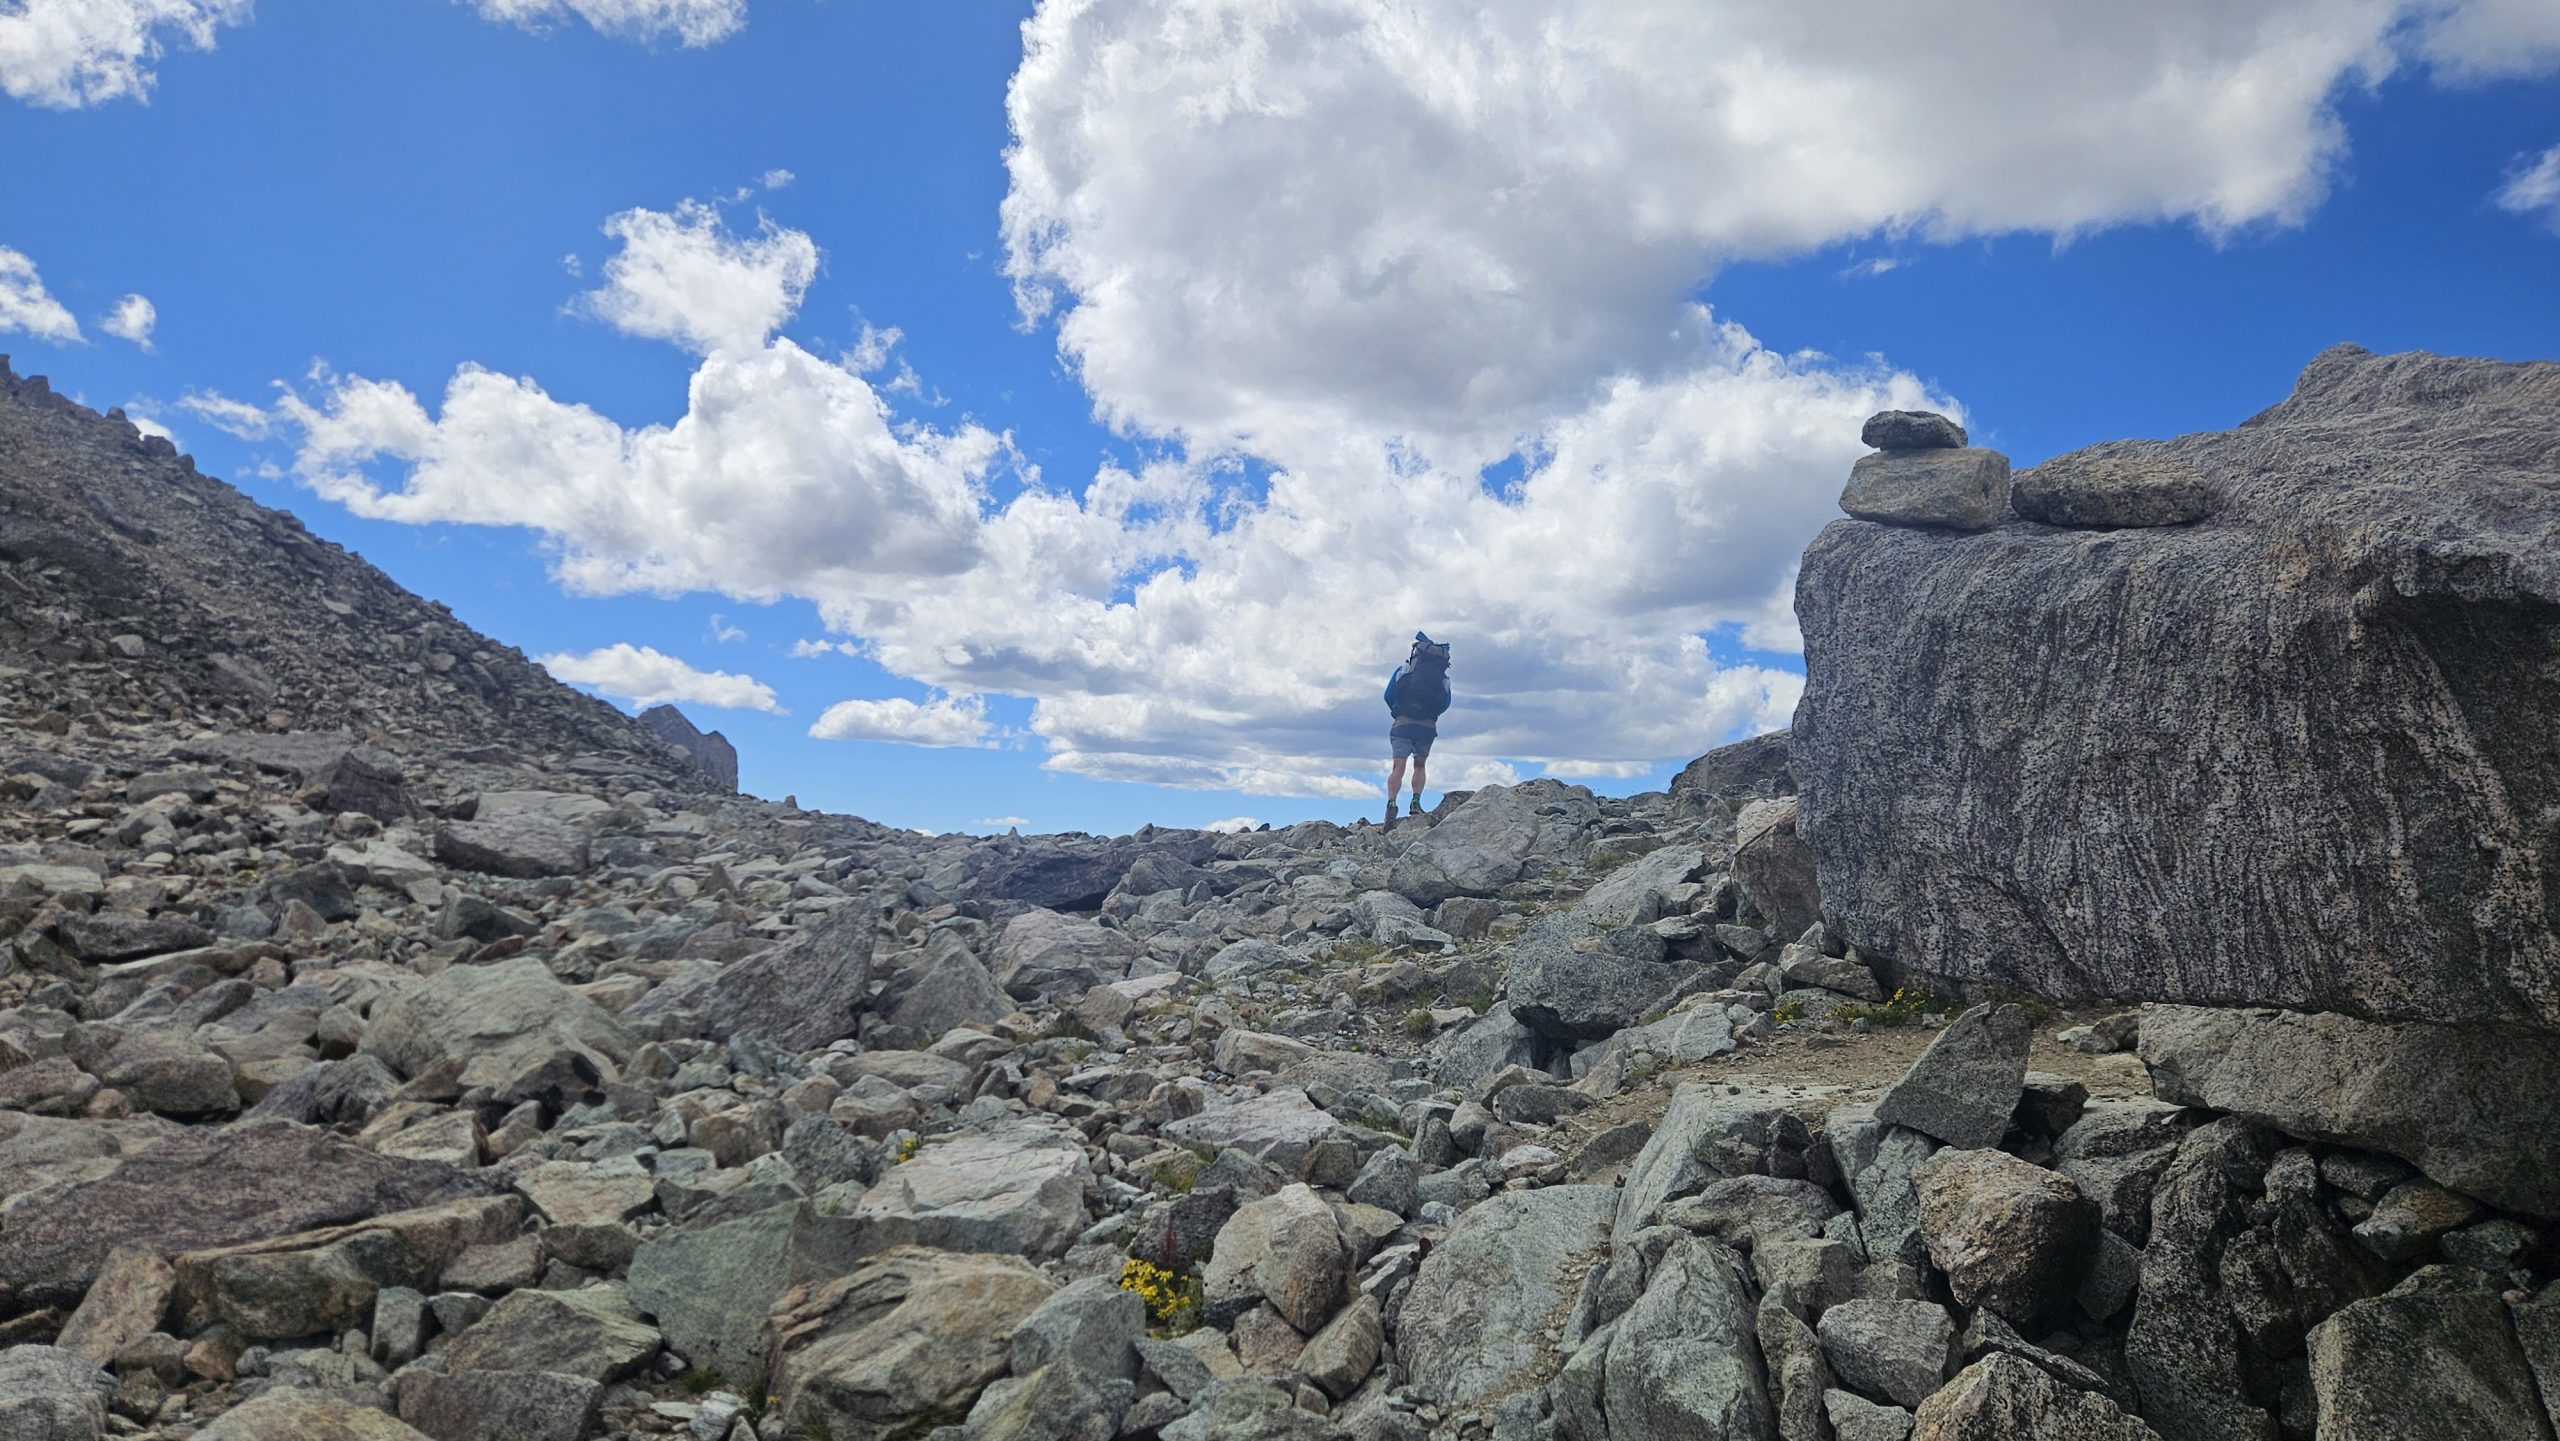
I woke up around 6, which is fairly normal. I felt fairly alert so it seemed like a good time to get started. I had about 13 miles to Knapsack Col. From what I hear from northbounders, it’s either amazing, beautiful, or very difficult and they would not do it again. It sounds like there’s lots of boulders or a boulder field where most likely trekking poles are of no use and you hop from rock to rock for potentially miles. I could see how this could be arduous or frustrating, but to me it sounds like an adventure. On the Appalachian trail during Mahoosuc Notch, some say the hardest mile of the A.T. I put my trekking poles away and hopped boulder to boulder as it started to rain. Ducking and crawling between giant rocks, scrambling. I make my way through in 45 minutes for a mile. This is considered a quick speed for Mahoosec Notch.
As I pack my things up I notice the mosquitoes from the night before are gone. I openen my bug netting to start packing my bag as I continue to lounge.
First things first, after getting out of my tent, I head off to dig a cat hole, do my business, and grab my food bag from the tree it was tied up to all night. No issues with animals, thank the Lord. One hiker I met, Matcha, told me that a bear was clawing at her bag one night and she decided to pack up and hike a few more miles by headlamp to get away from the Bear. I pray that never happens to me. After packing my things I make one last stop by the river since I’m almost out of water. I mix my coffee/breakfast essentials, take a swig, and I’m good to go. The trail is pretty smooth and follows along a river valley with little ups and downs, some rocks but overall fairly well beaten down.
Flat and smooth
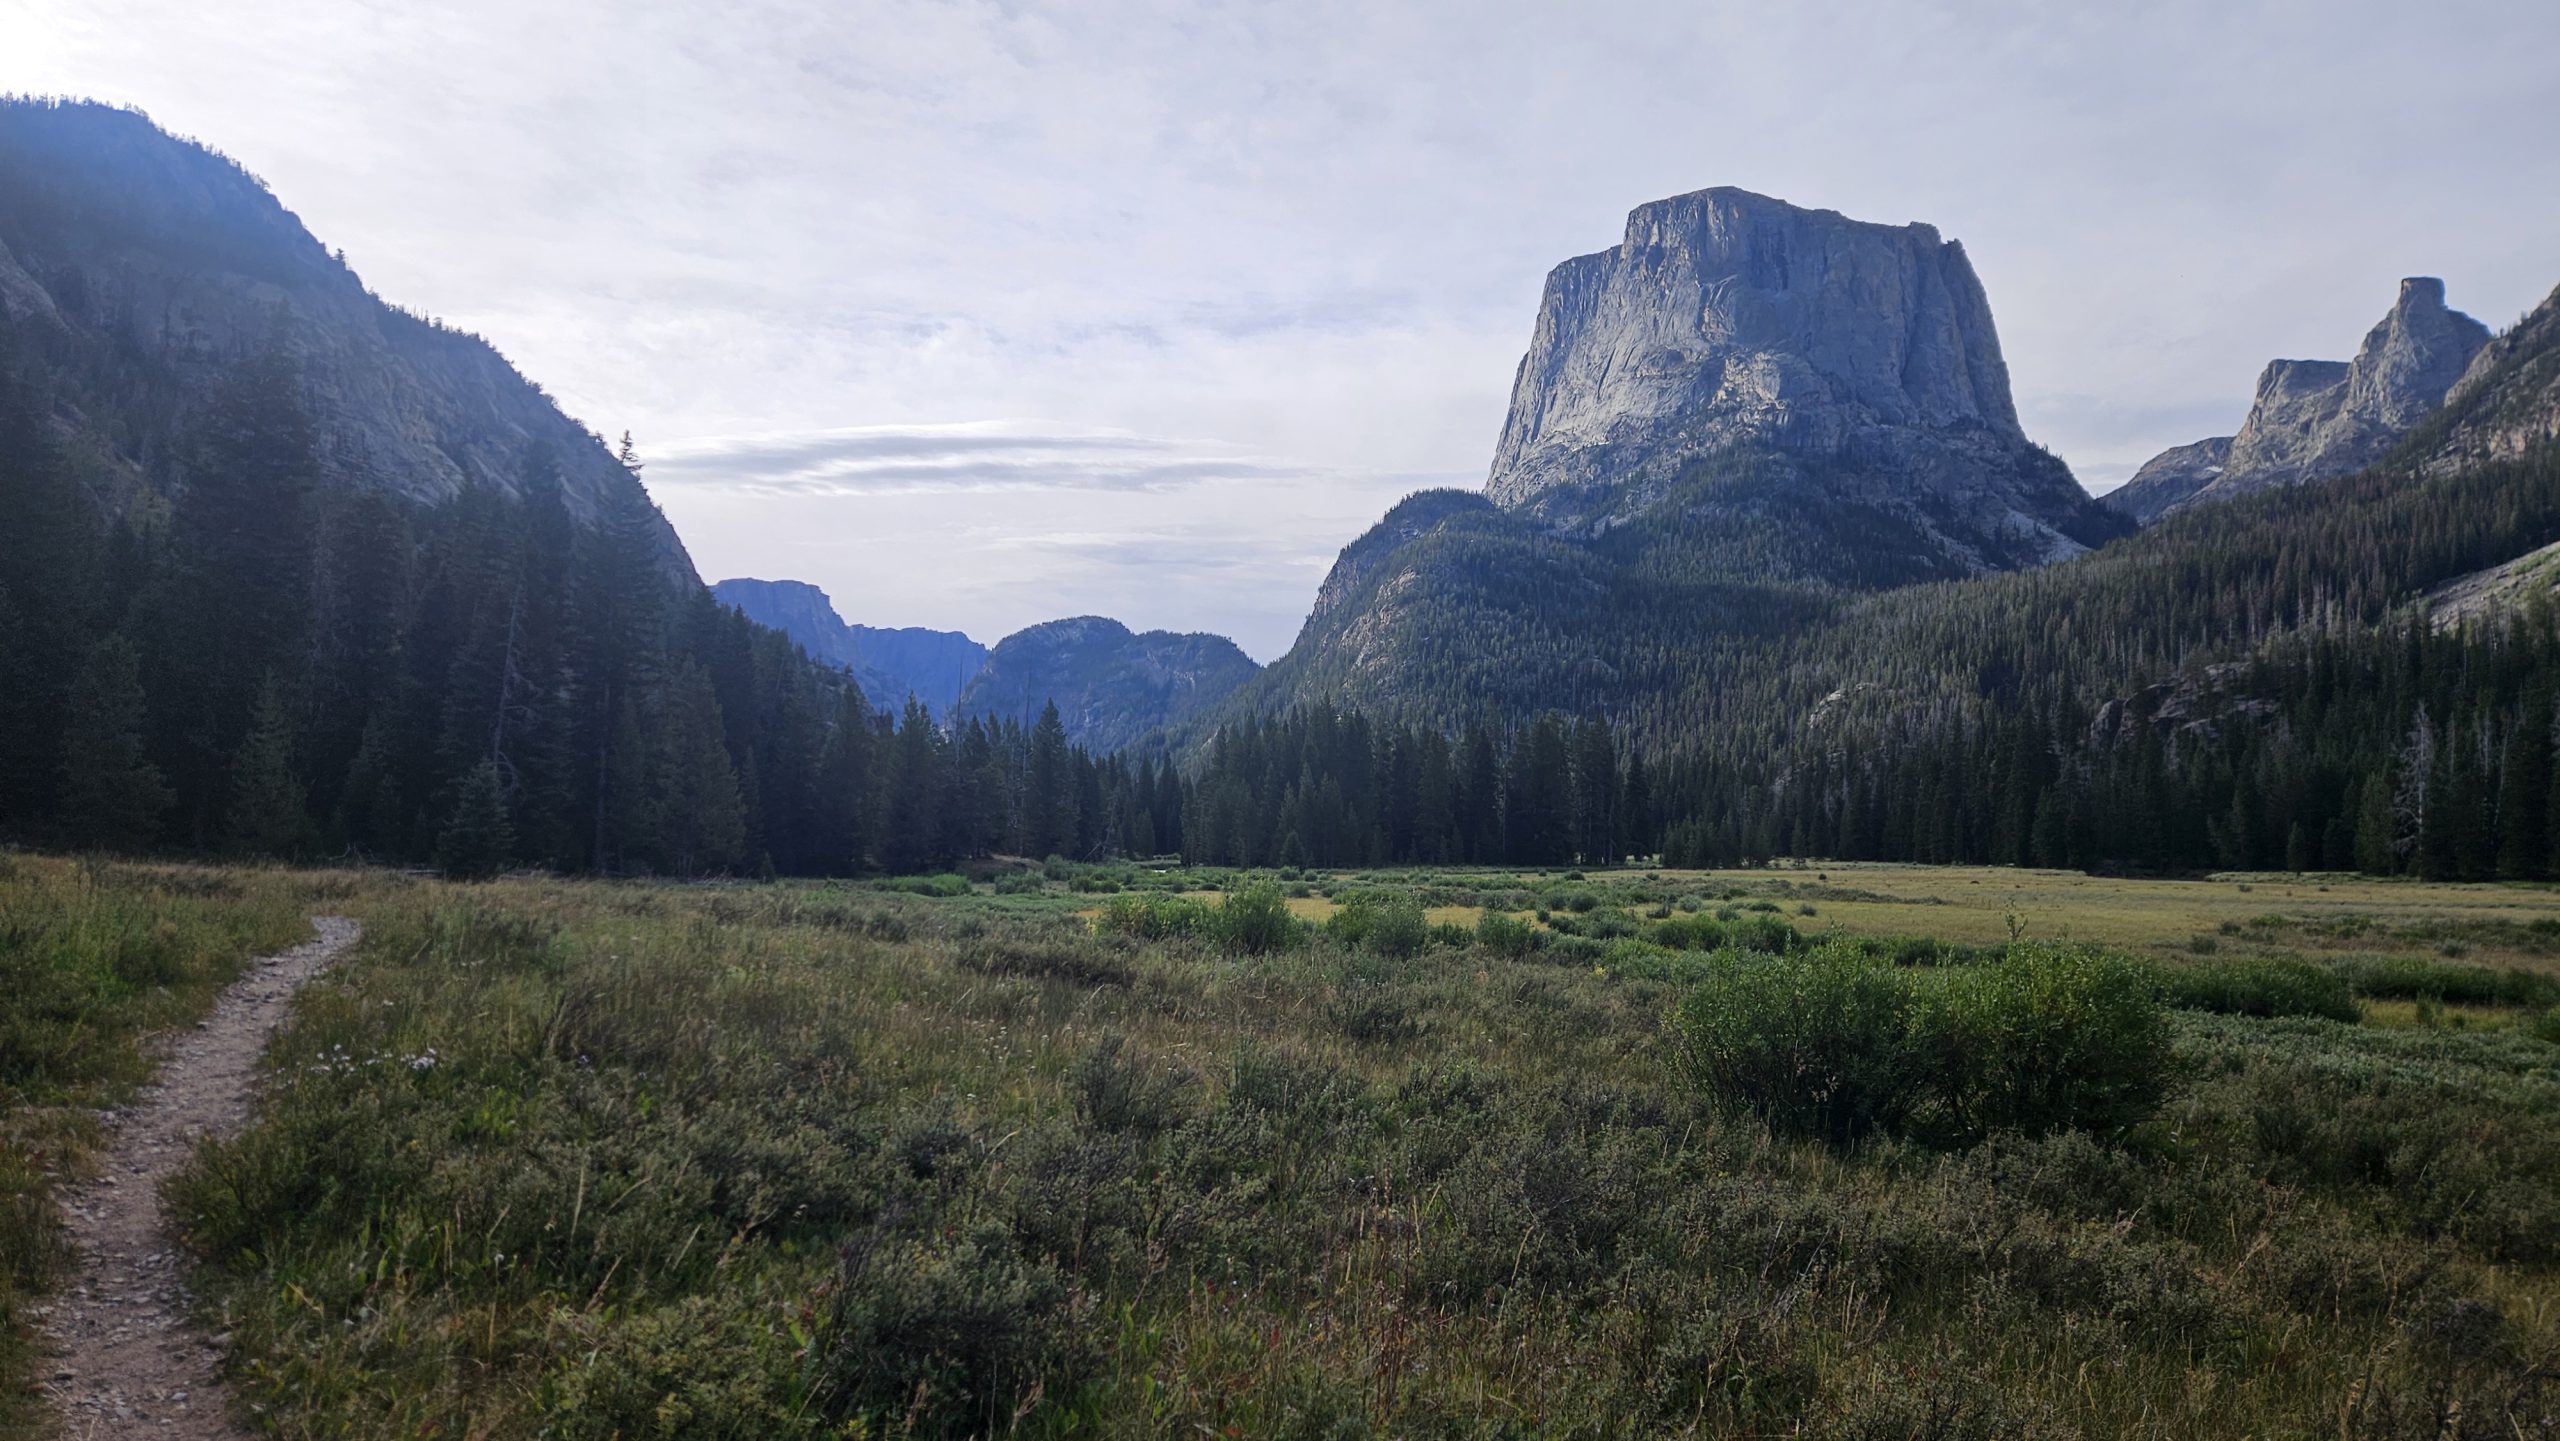
This path is traveled often. Soon I come across a group of at least 10 that are headed out to summit square top mountain. I catch up to them quickly and finally someone says, “Hey, let’s pull over and let this guy pass.” It’s amazing how quick you are as a thru-hiker and don’t even realize it. The water in the river is an aqua color, must be from the minerals or glacier water. There are several crossings with logs and even a few bridges. What luxury! Trails are often kept up much better when they’re this close to a road. At the start of the river valley, there was a campground that can be reached by road. As I neared I saw many RVs and even heard vehicle traffic. This can be somewhat frustrating, but I also understand what a beautiful place this is and possibly it shouldn’t just be limited to those who can get here by foot. It definitely changes things though when you see a parking lot full of cars and you hear the noise of a motor instead of that of a stream or the wind blowing through the leaves of a tree.
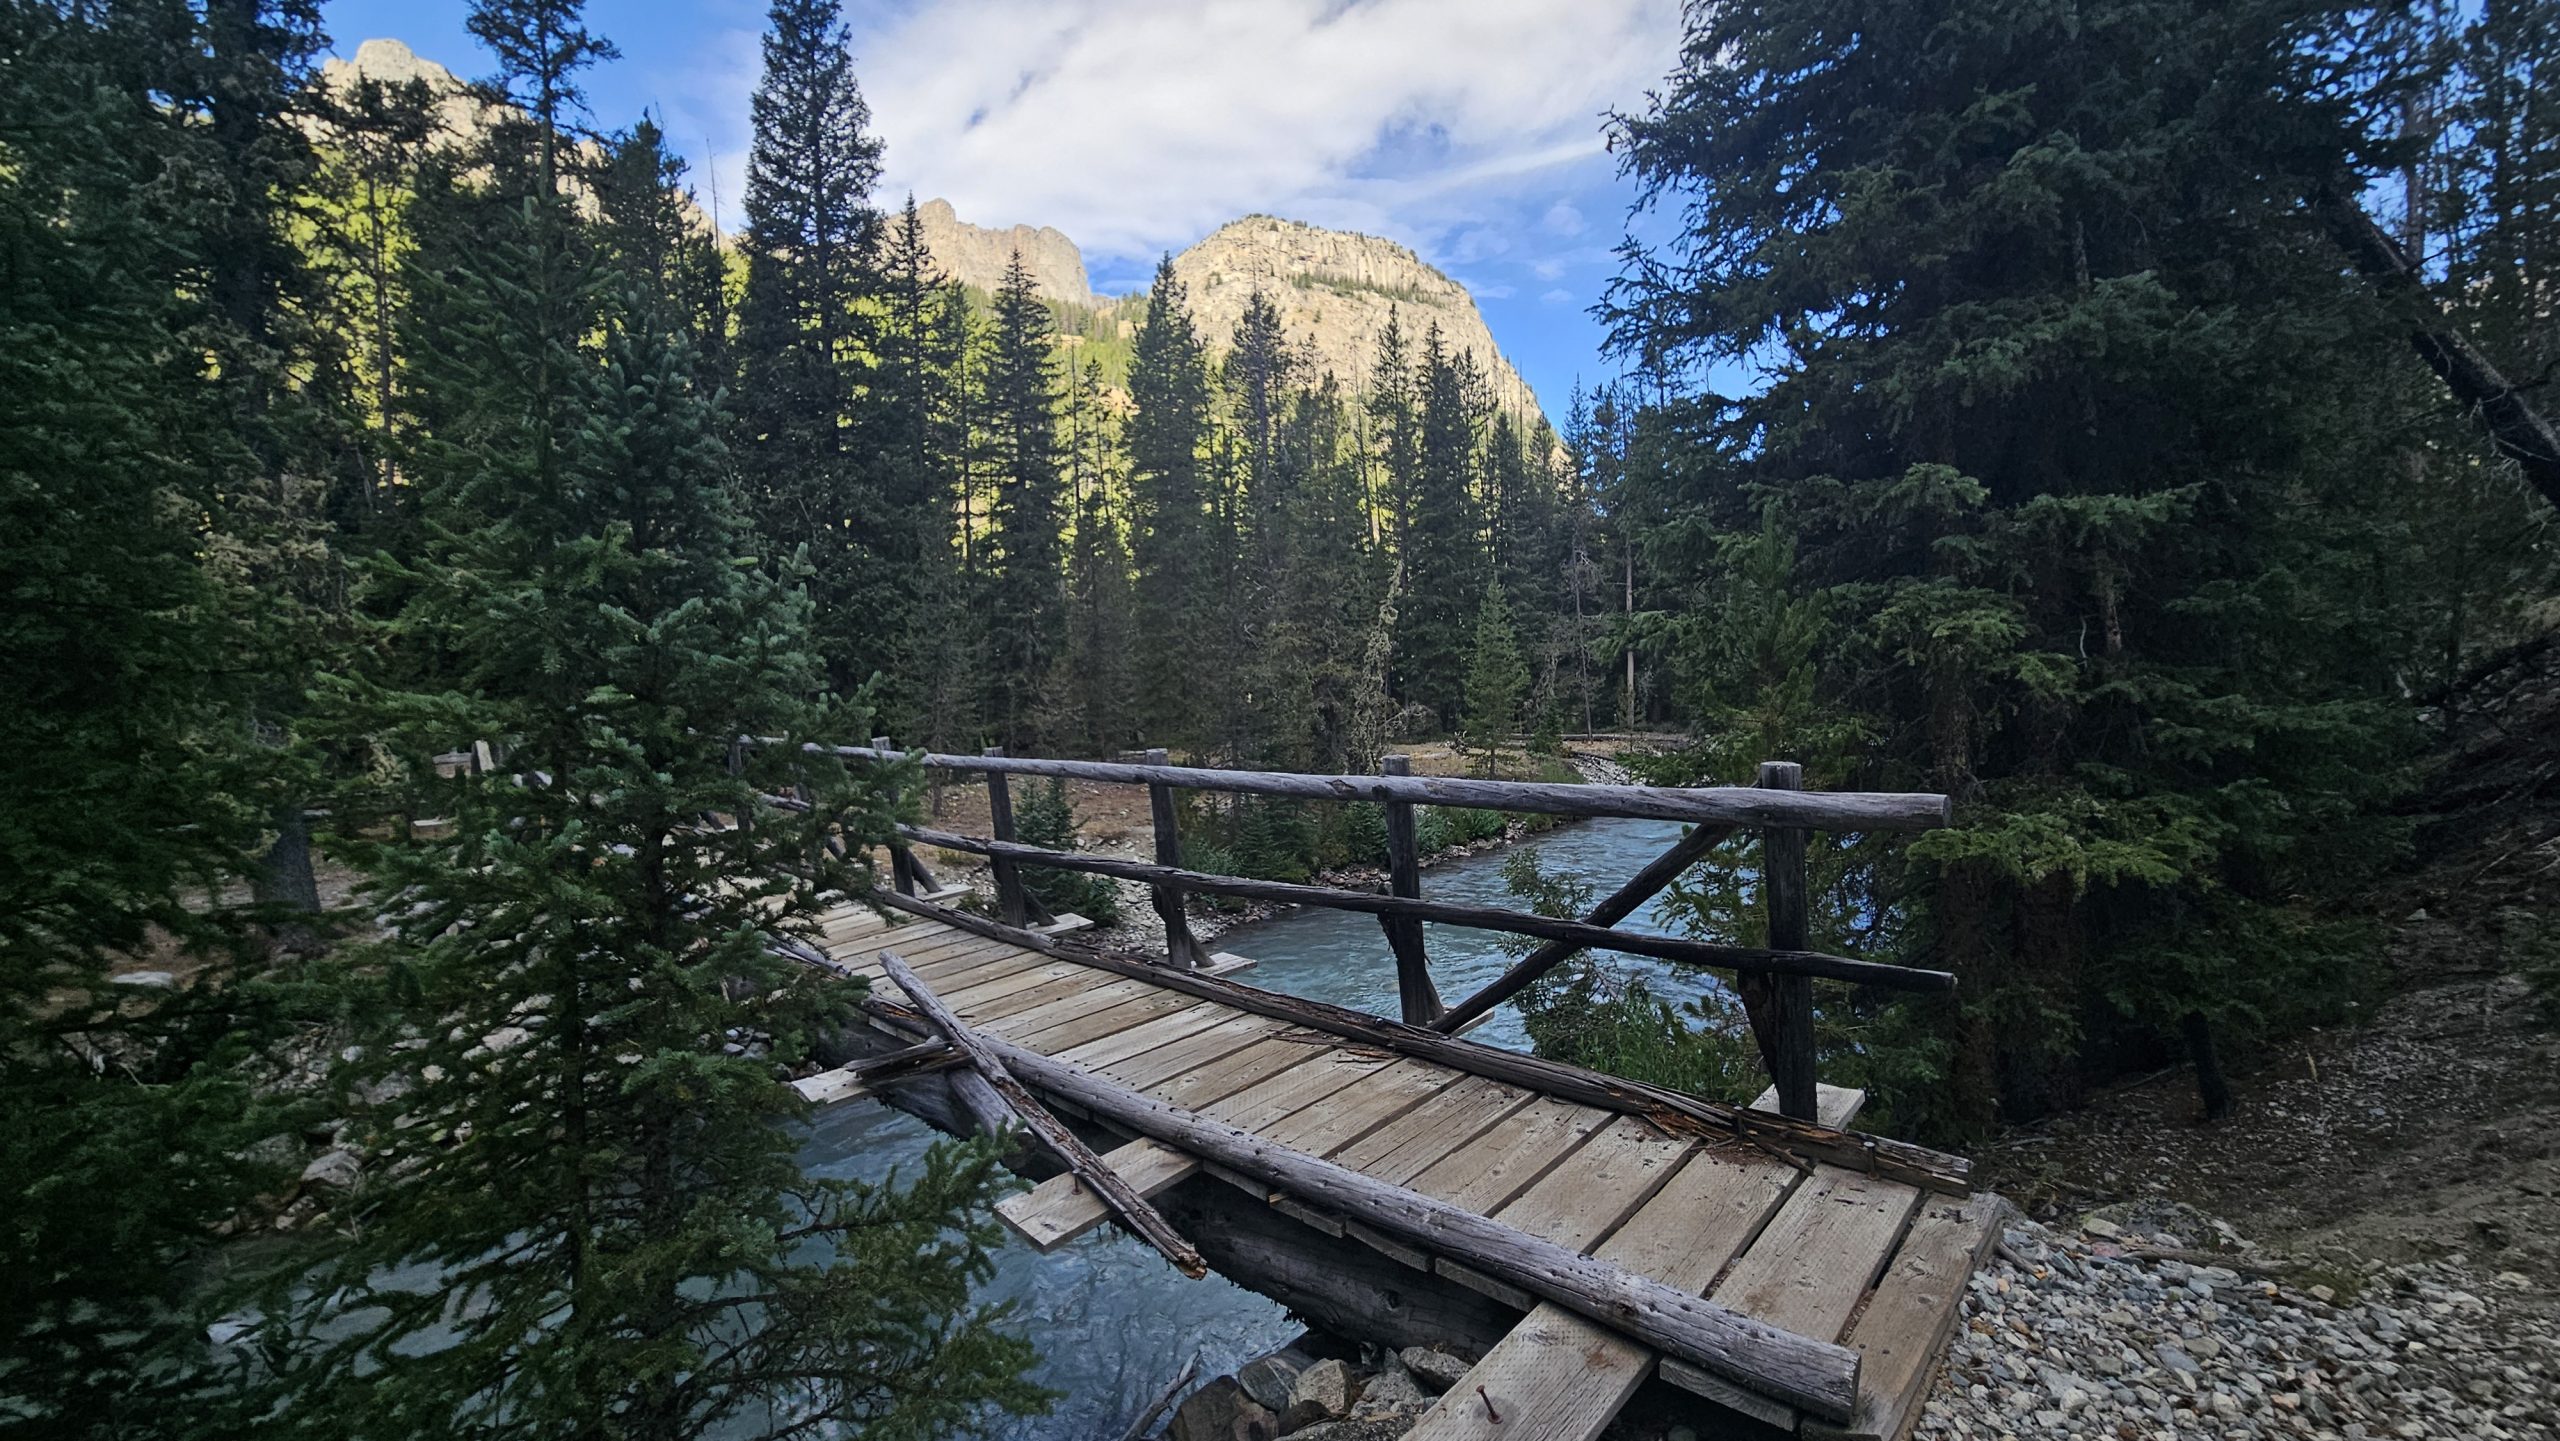
Prayer Walk
As I walk, I pray for those that pop into my mind. Those who are praying for me, supporting me, those who have reached out to me with prayer requests, and whoever the spirit leads me to pray for. I pray for myself as well to be a witness and to be able to know and experience Jesus, as well as for strength for the day and a good mindset.
I drink my last bit of coffee breakfast and continue walking past the stream. The great thing about following water for many miles is that you don’t have to worry when you run out. I know that in a mile or 2, there’ll be more water and for now, I’ll enjoy the lighter pack. Water weighs about 2 pounds a liter! That’s a lot!
The miles come quick this morning. Mostly flat and in the forest with coolness still surrounding the valley floor. The trees also provide ample shade. I will most likely get to Knapsack Col Junction around noon and be doing the climb in some of the hotter parts of the day. I did not time this out correctly. Hopefully, we’ll get some clouds and possibly wind to help keep myself cool.
The Junction
I end up arriving to Knapsack Col Junction a little after 11. 13 miles in just over 4 hours! That’s pretty good. I will have plenty of time whether it’s hot or not to get up-and-over the col.
As I start off on the alternate, I’m low on water and luckily find a small stream 1.2 miles. After filtering water and digging through my pack to find the one granola bar that has caffeine in it I set off. I passed some hikers coming down from the col. A group of guys that went over, camped, and came back today. The trail quickly turns to rocks underneath and then to boulders, with cairns to follow the way. Deciding that my trekking poles are more hindrance than good, I stash them on the side of my bag and continue using hands and feet to scramble up, around, and over boulders. Hopping from rock to rock I ascend.
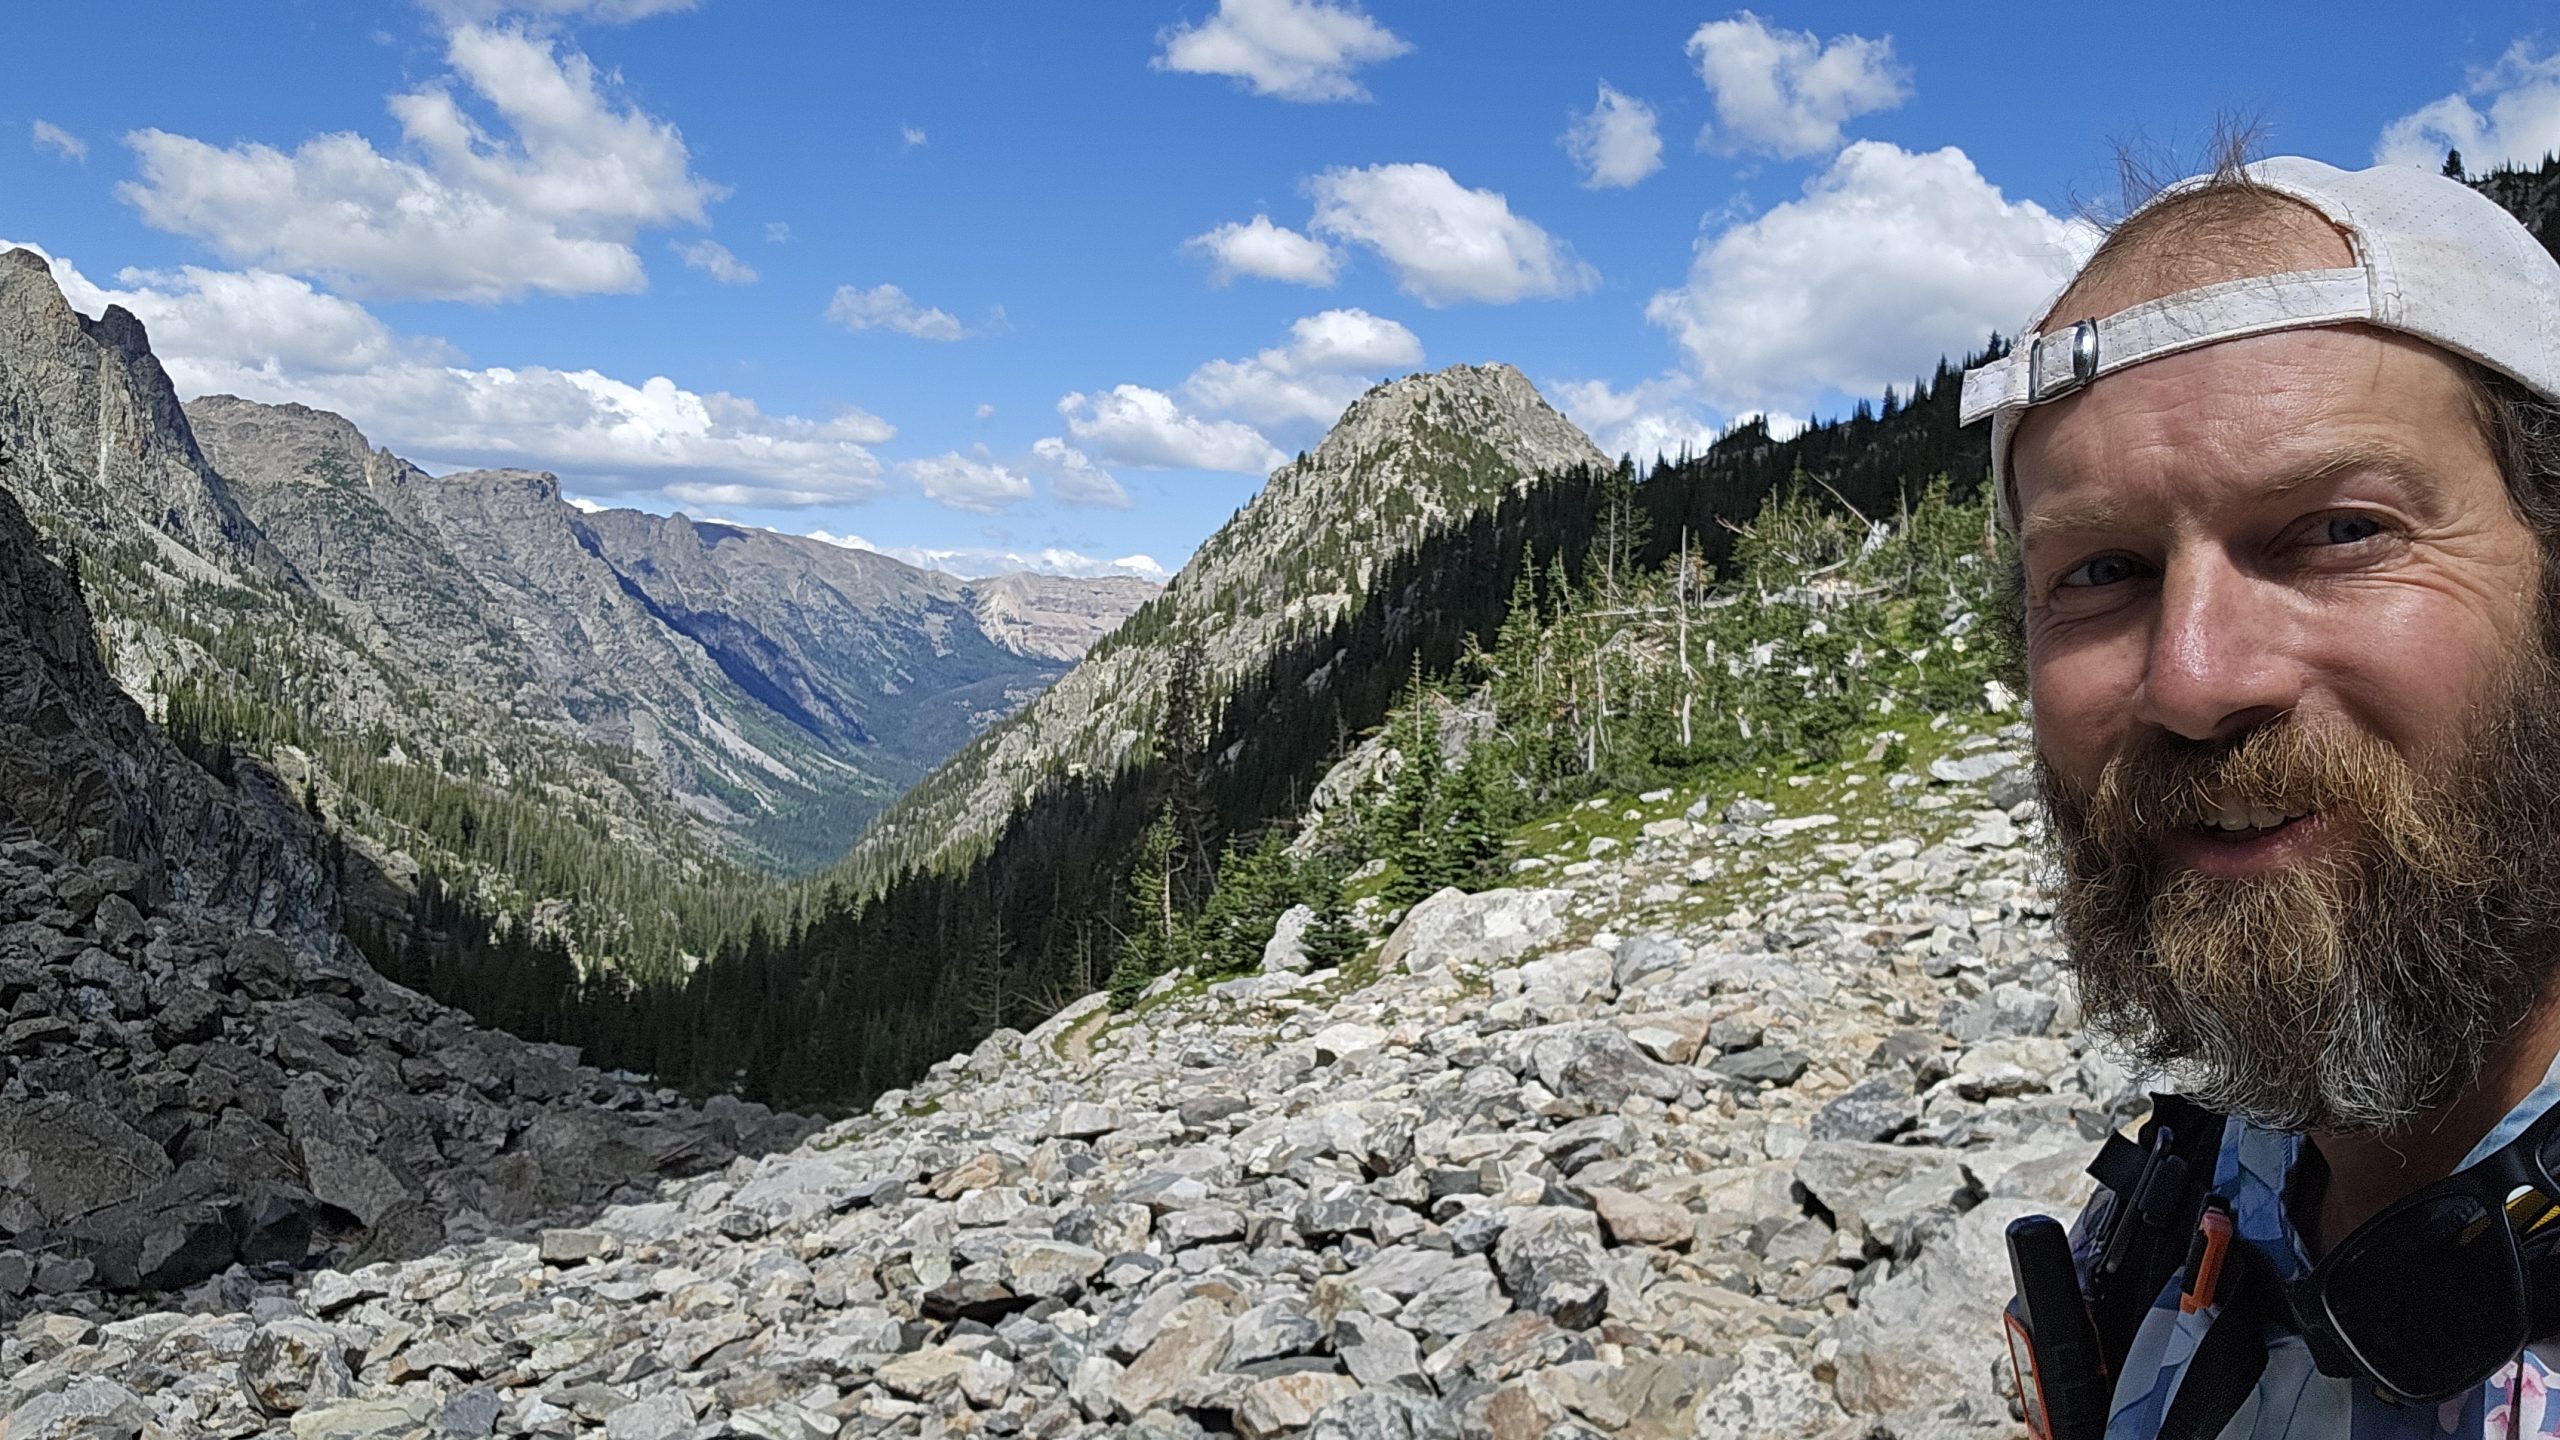
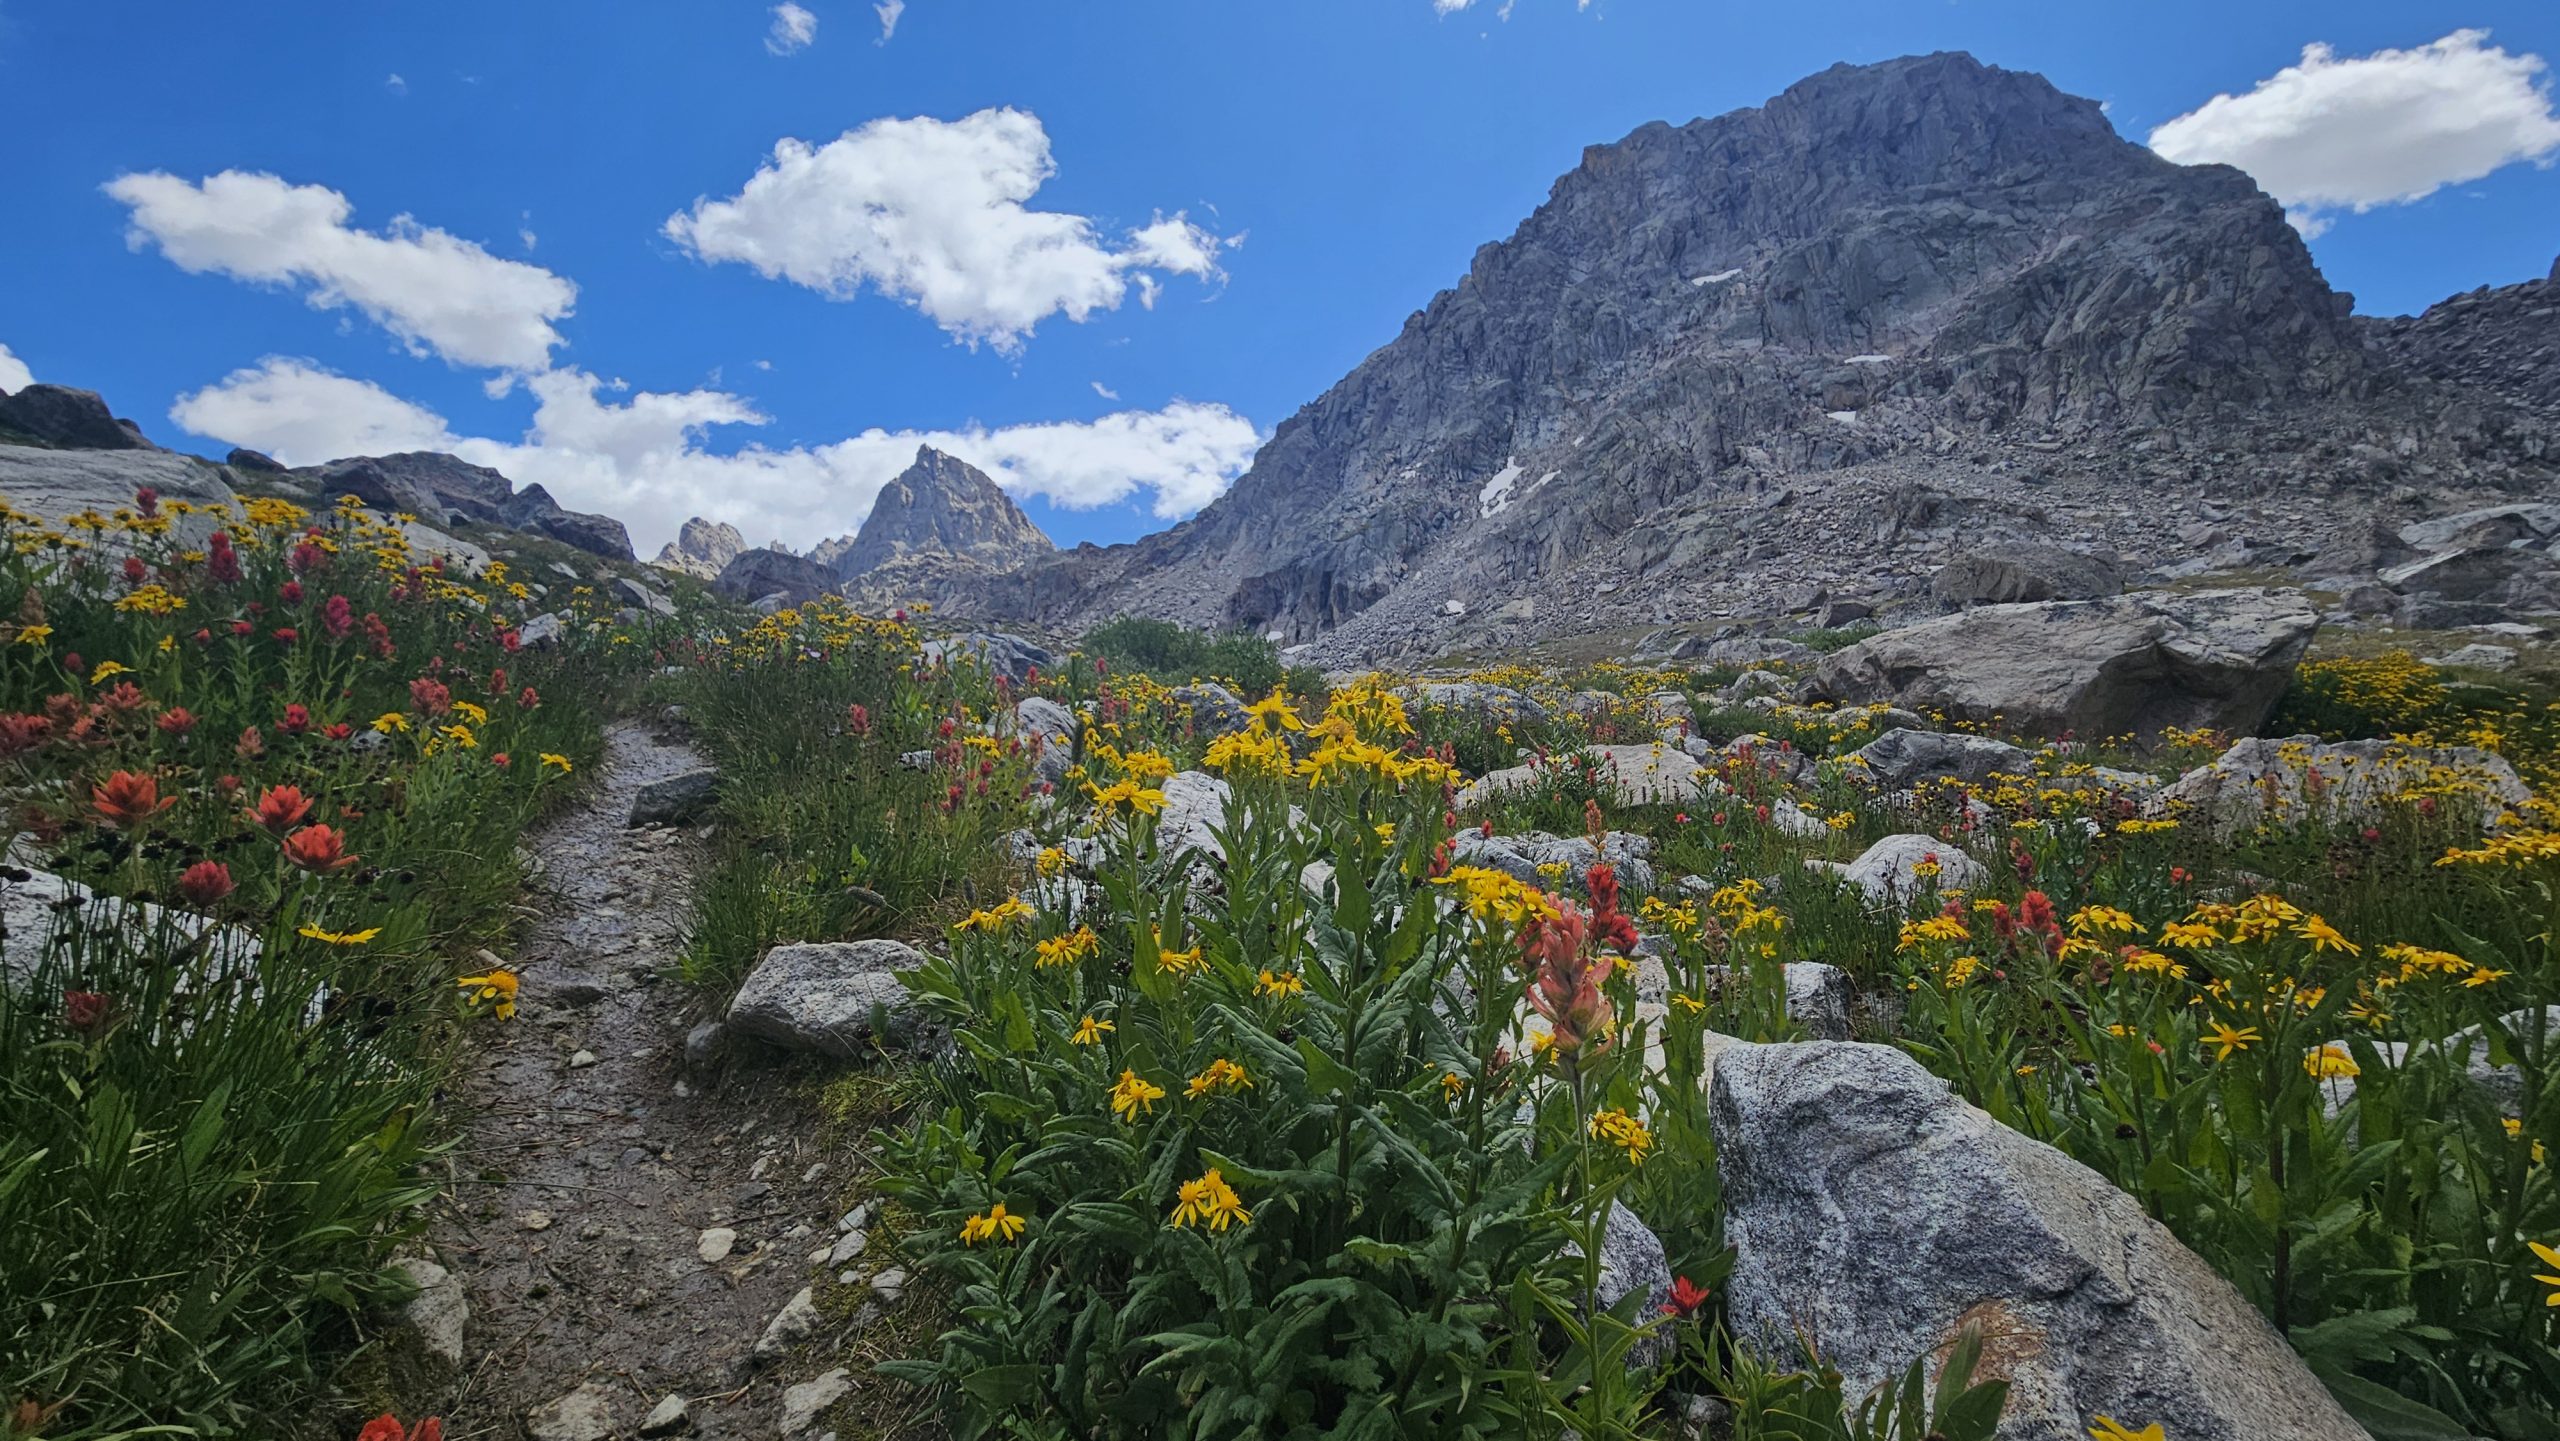
As I near the top of the first part of the climb a small stream trickles across the trail. The mountains open up to my left and I’m greeted with yellow, purple, blue and red wildflowers. Peeks above loom majestically.
Mountain Beauty
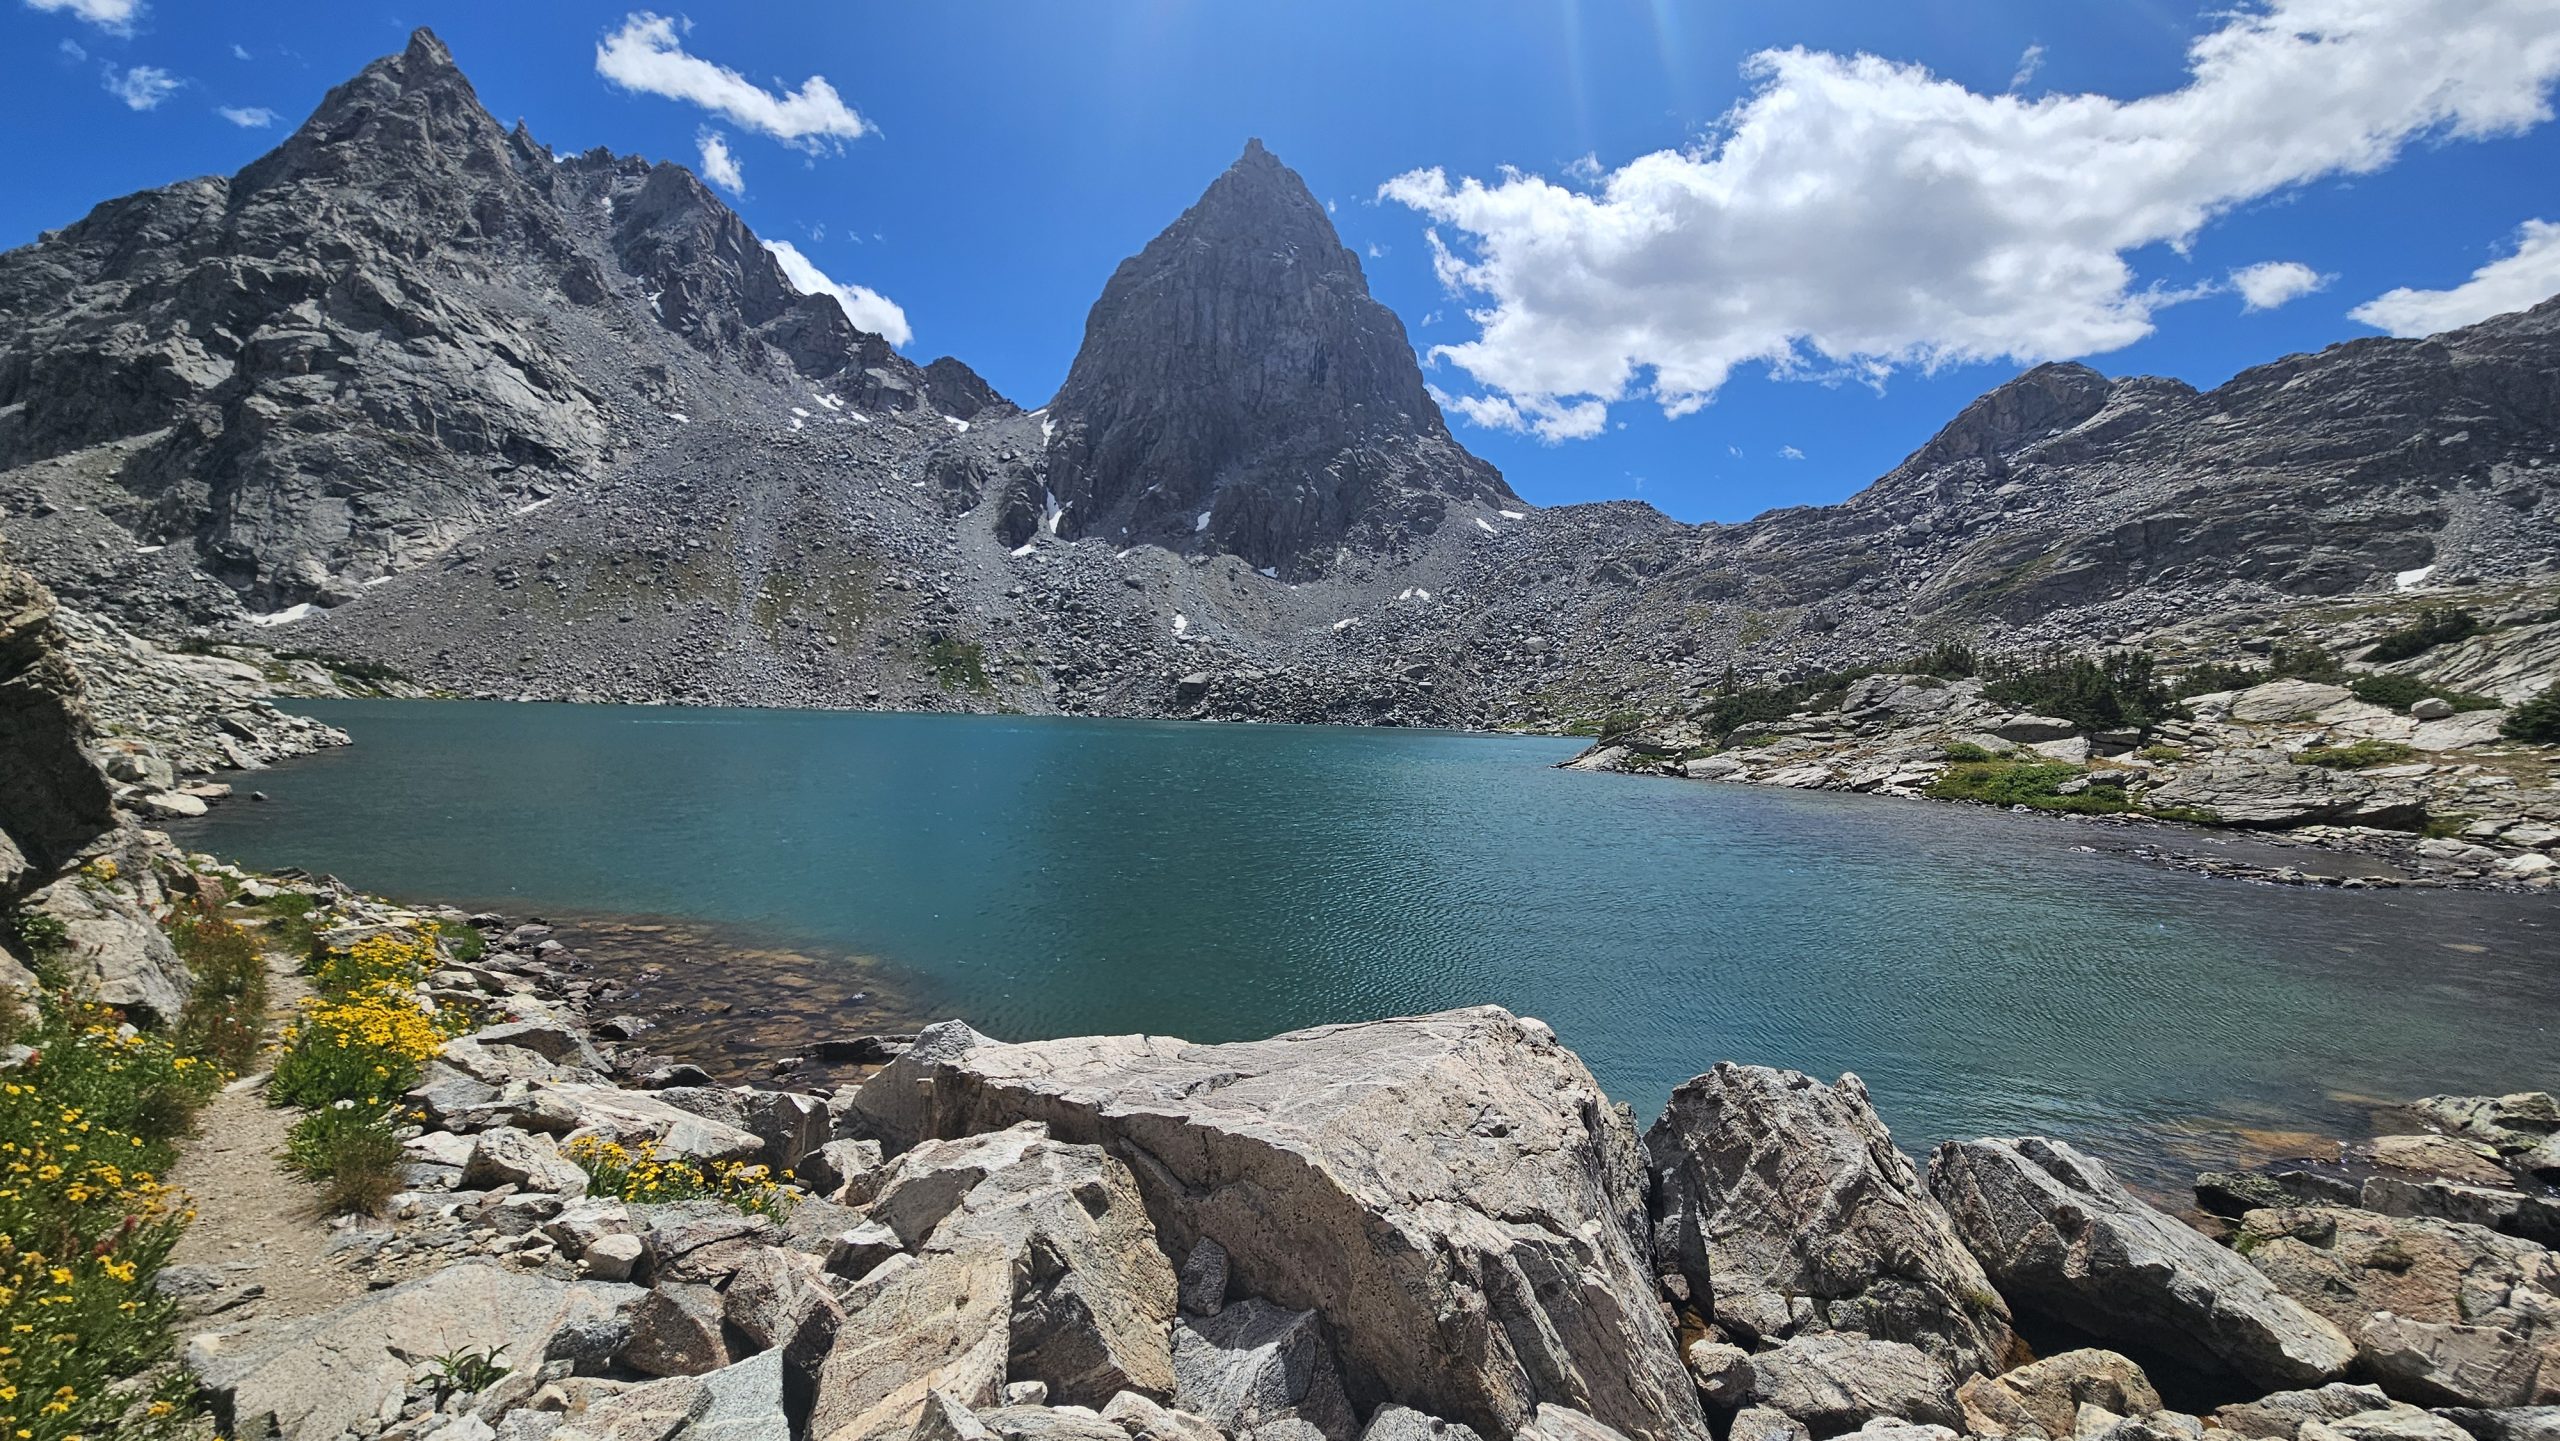
As I climb higher there’s a small mountain lake. I’m sure it is freezing and with the wind and clouds I’m not even tempted for a swim. I decided to touch the water and confirm its coldness.
The trail flattens out momentarily before dropping down to another Alpine lake. The color is unreal. A Greenish blue. A stark contrast to its surroundings. Granite rock marked with blotches of green grass and patches of snow still lingering from the winter.
Soon enough, the trail begins upwards yet again.
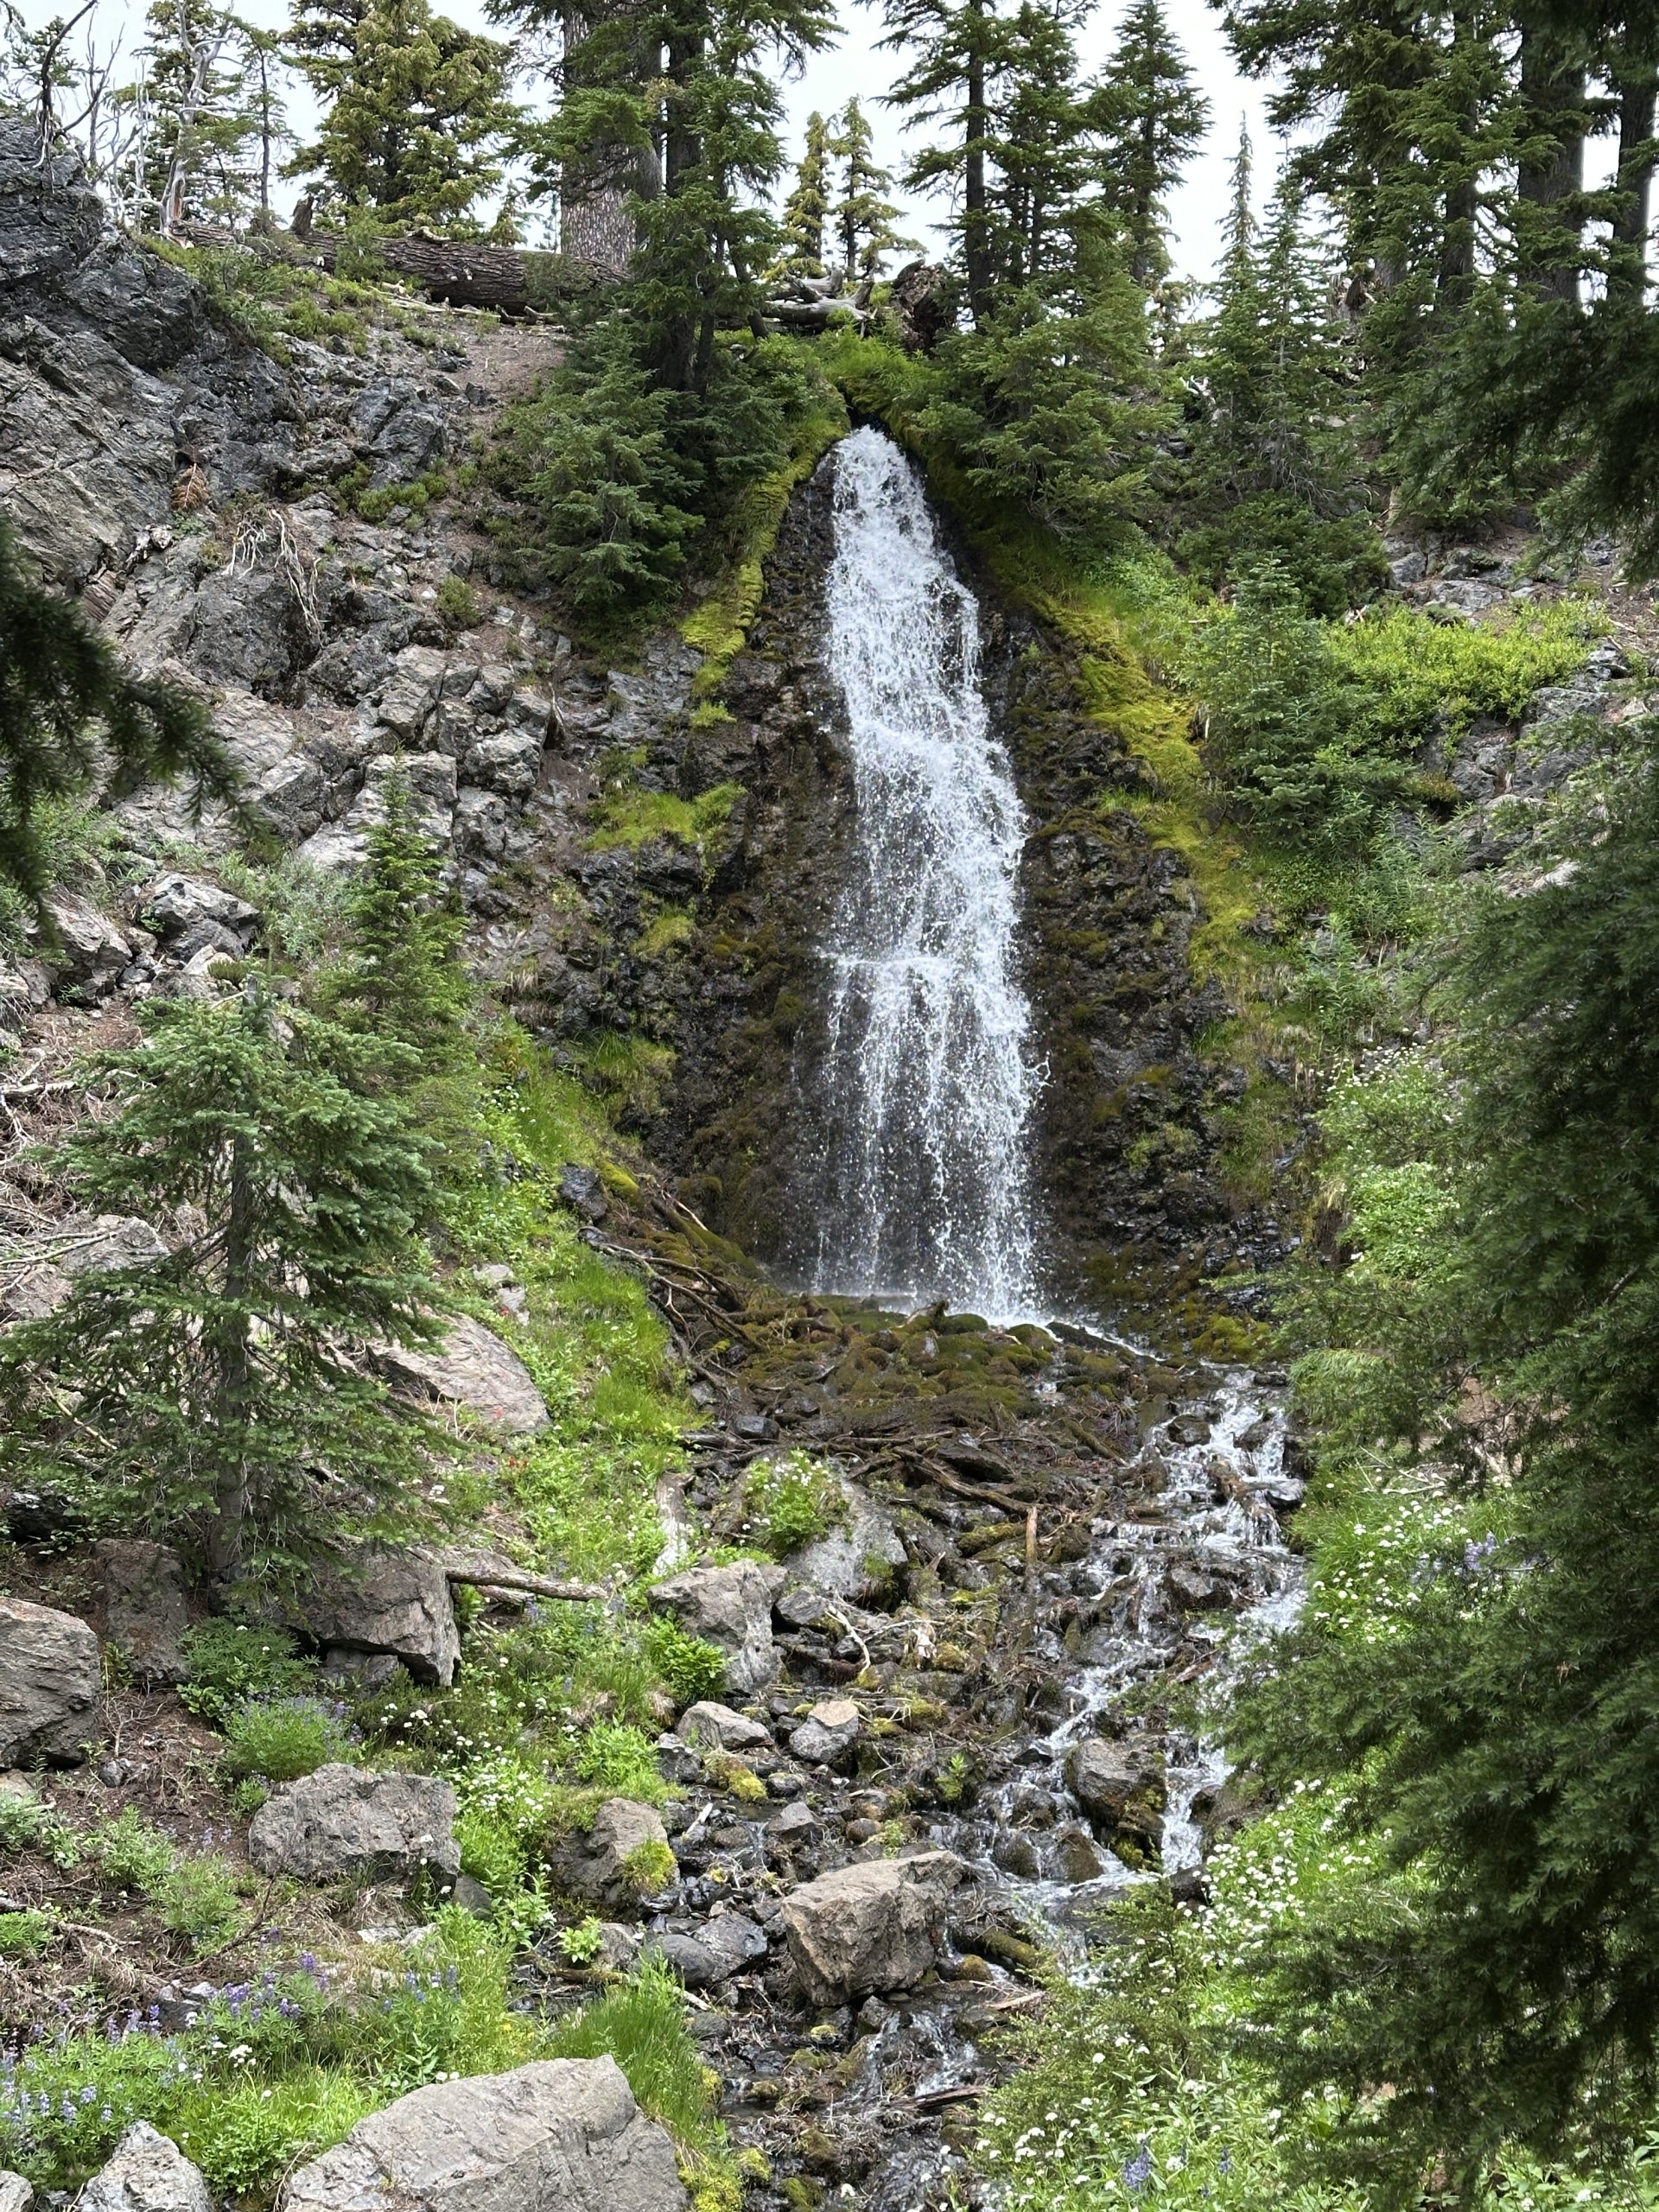
As I crest a small knoll, suddenly I hear the sound of rushing water. I look up to the right to see a waterfall, beautiful.
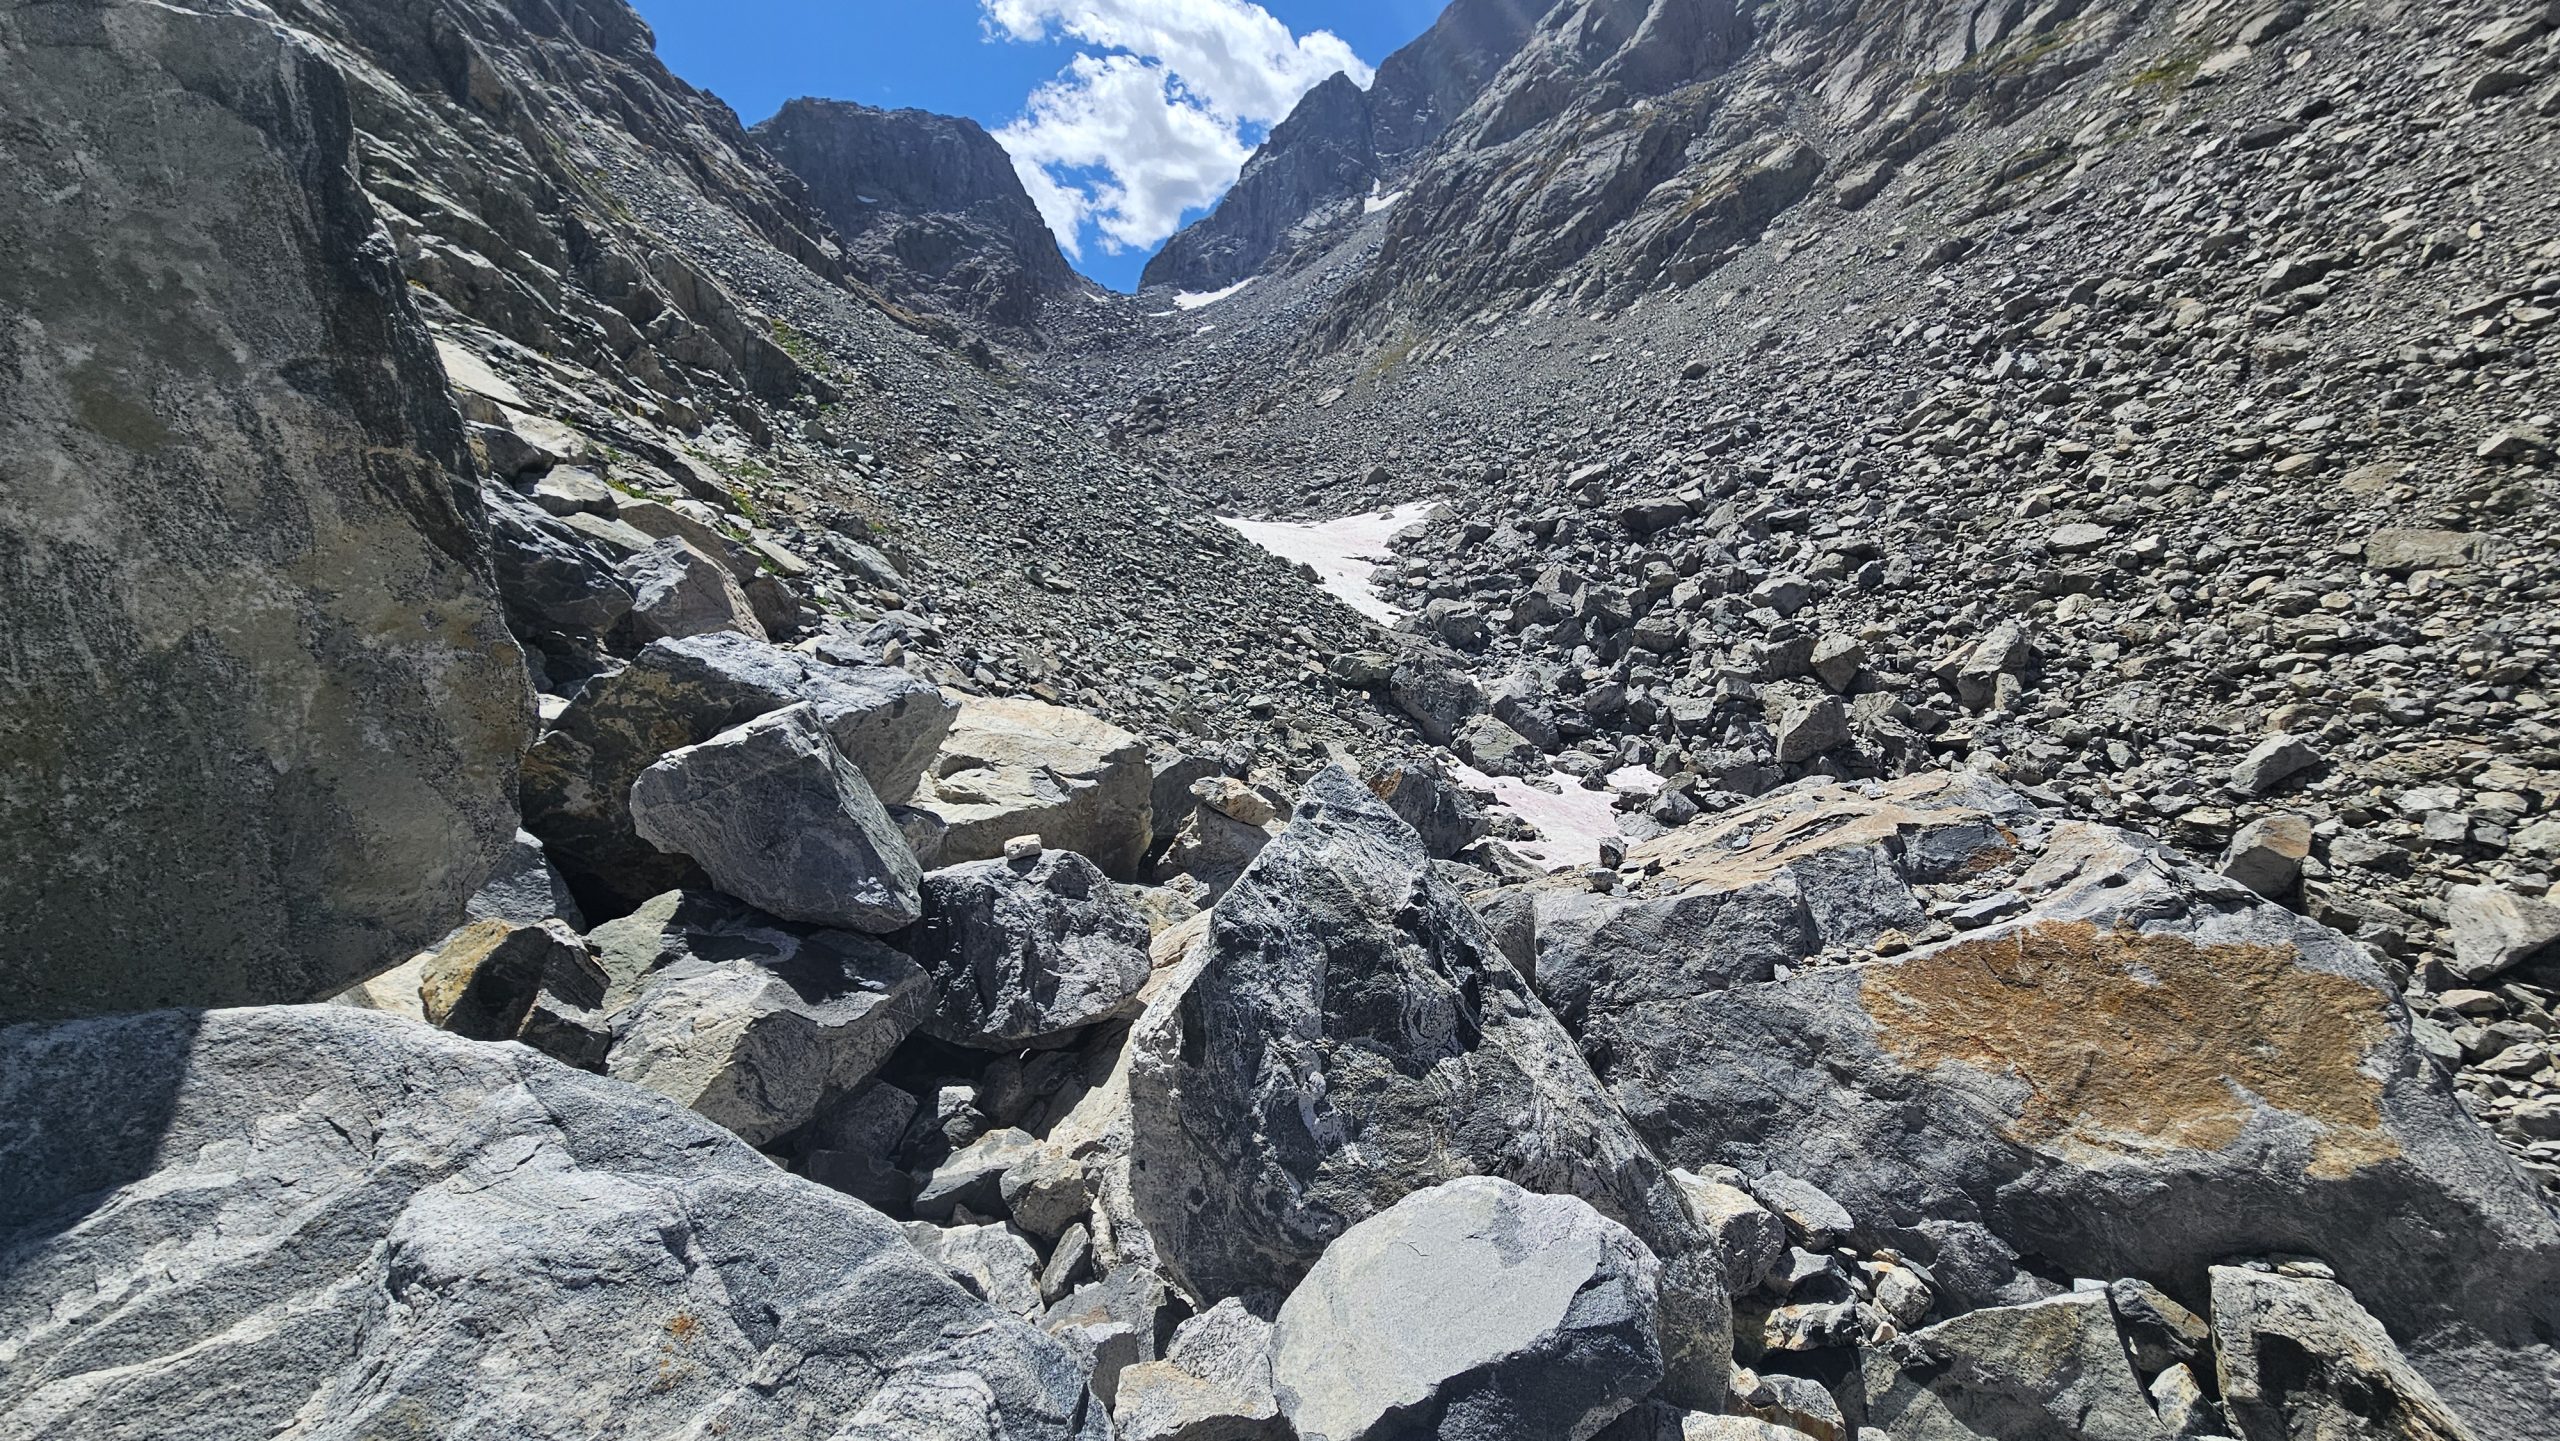
What Trail?
After a time of climbing, the rocks and boulders begin again and I ascend rock hopping for a while. Eventually I check my map to see my progress and find that I am off of the trail. Luckily for me, I can loop around the rock structure ahead crossing some snow patches that have pink and red bacteria on them. I find my way back to the trail. It gets steep and real windy. Loose rock crumble beneath my feet as I make my way to the top. I take frequent 5 second breaks to catch my breath and also route check my next steps. As I reach the col I realized I’m off trail by a good 40 feet and I’ve climbed higher than I needed to. I also see a northbounder coming up the opposite side.
I stop, take off my pack, and start eating chips. Coco and I, the northbounder, start talking. He said he tried to follow the line on the map as best as possible and he should have just gone up the valley. He recommends that I just do that. After chatting for 10 or 15 minutes we decide it’s time to continue making miles. We head off in our separate directions, him north and me south. I can see where he came from and that route looks treacherous. I see another one that goes straight down the mountain and I choose that. The route is fine if not steep up until a certain moment where all rocks beneath my feet are loose gravel. My one foot slides as I lean into the mountain. My other foot somewhat sturdy. I ask the Lord for help. I slowly regain footing on semi secure rocks. Other than this brief moment the rest of the way down is good. I didn’t know this but the route I took is the twin glacier route.
I follow a mountain stream/glacier runoff. There’s a large snowfield that probably will never melt this summer.
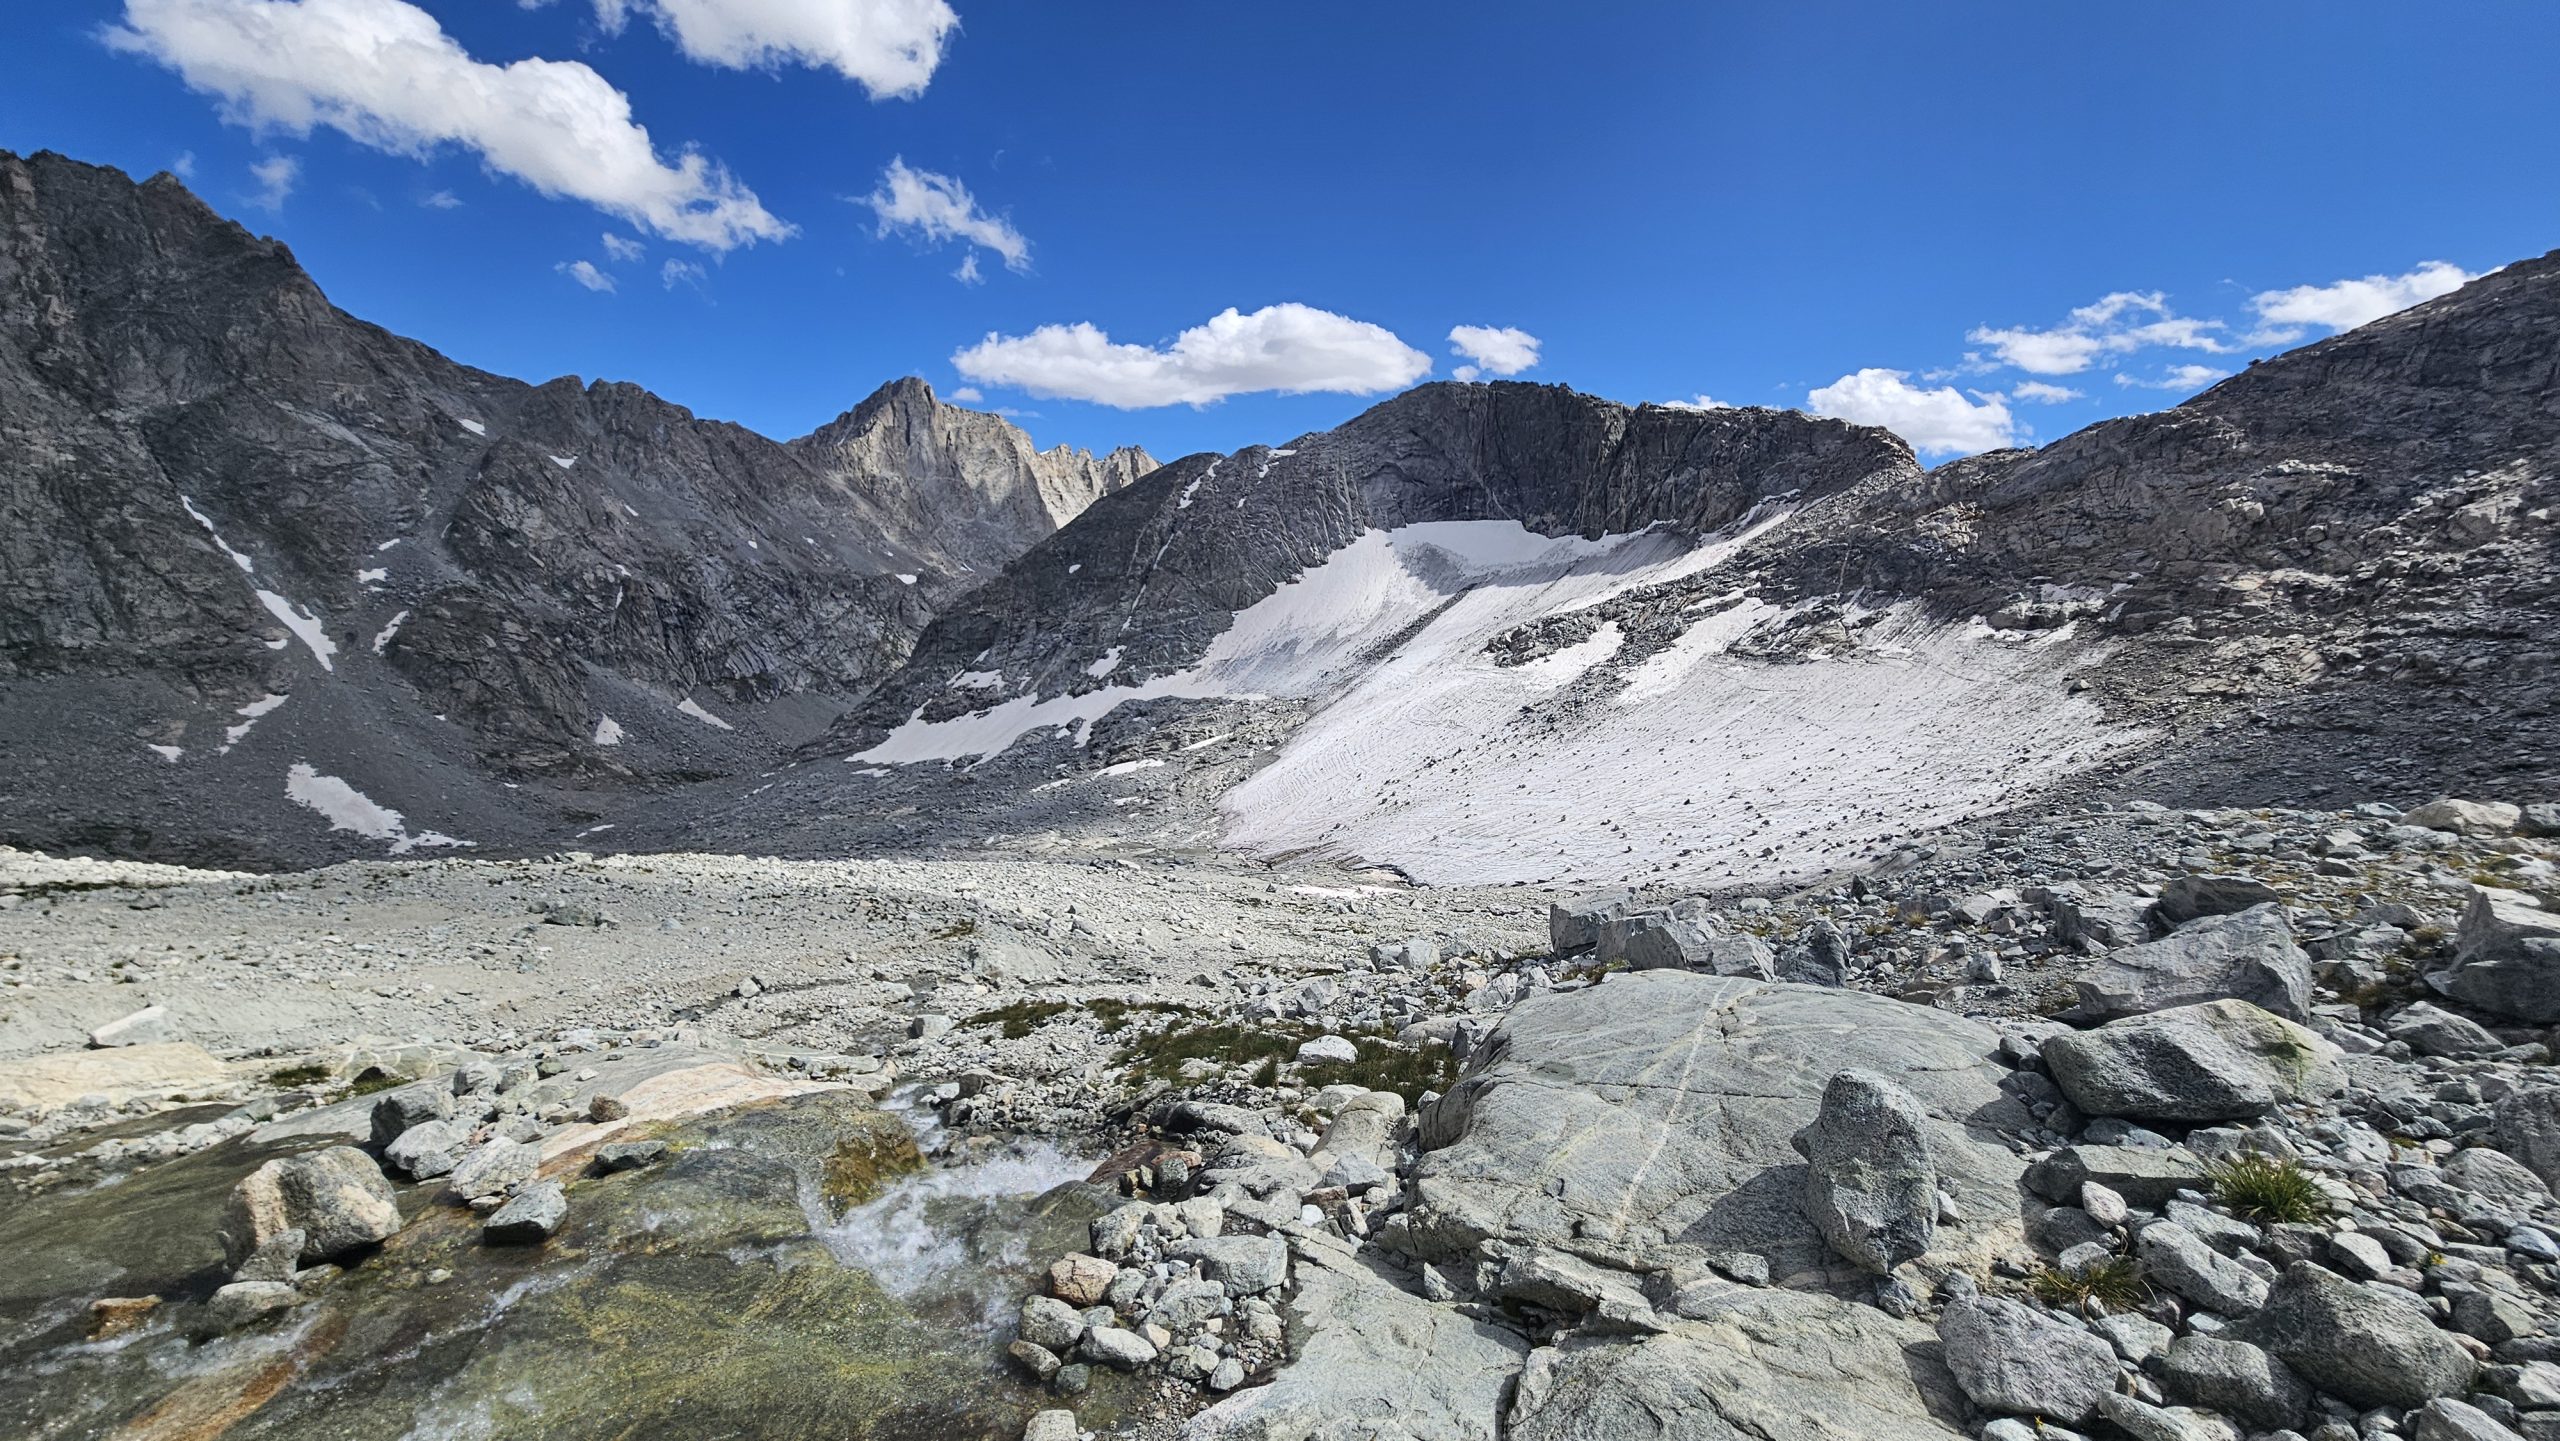
Low Lands
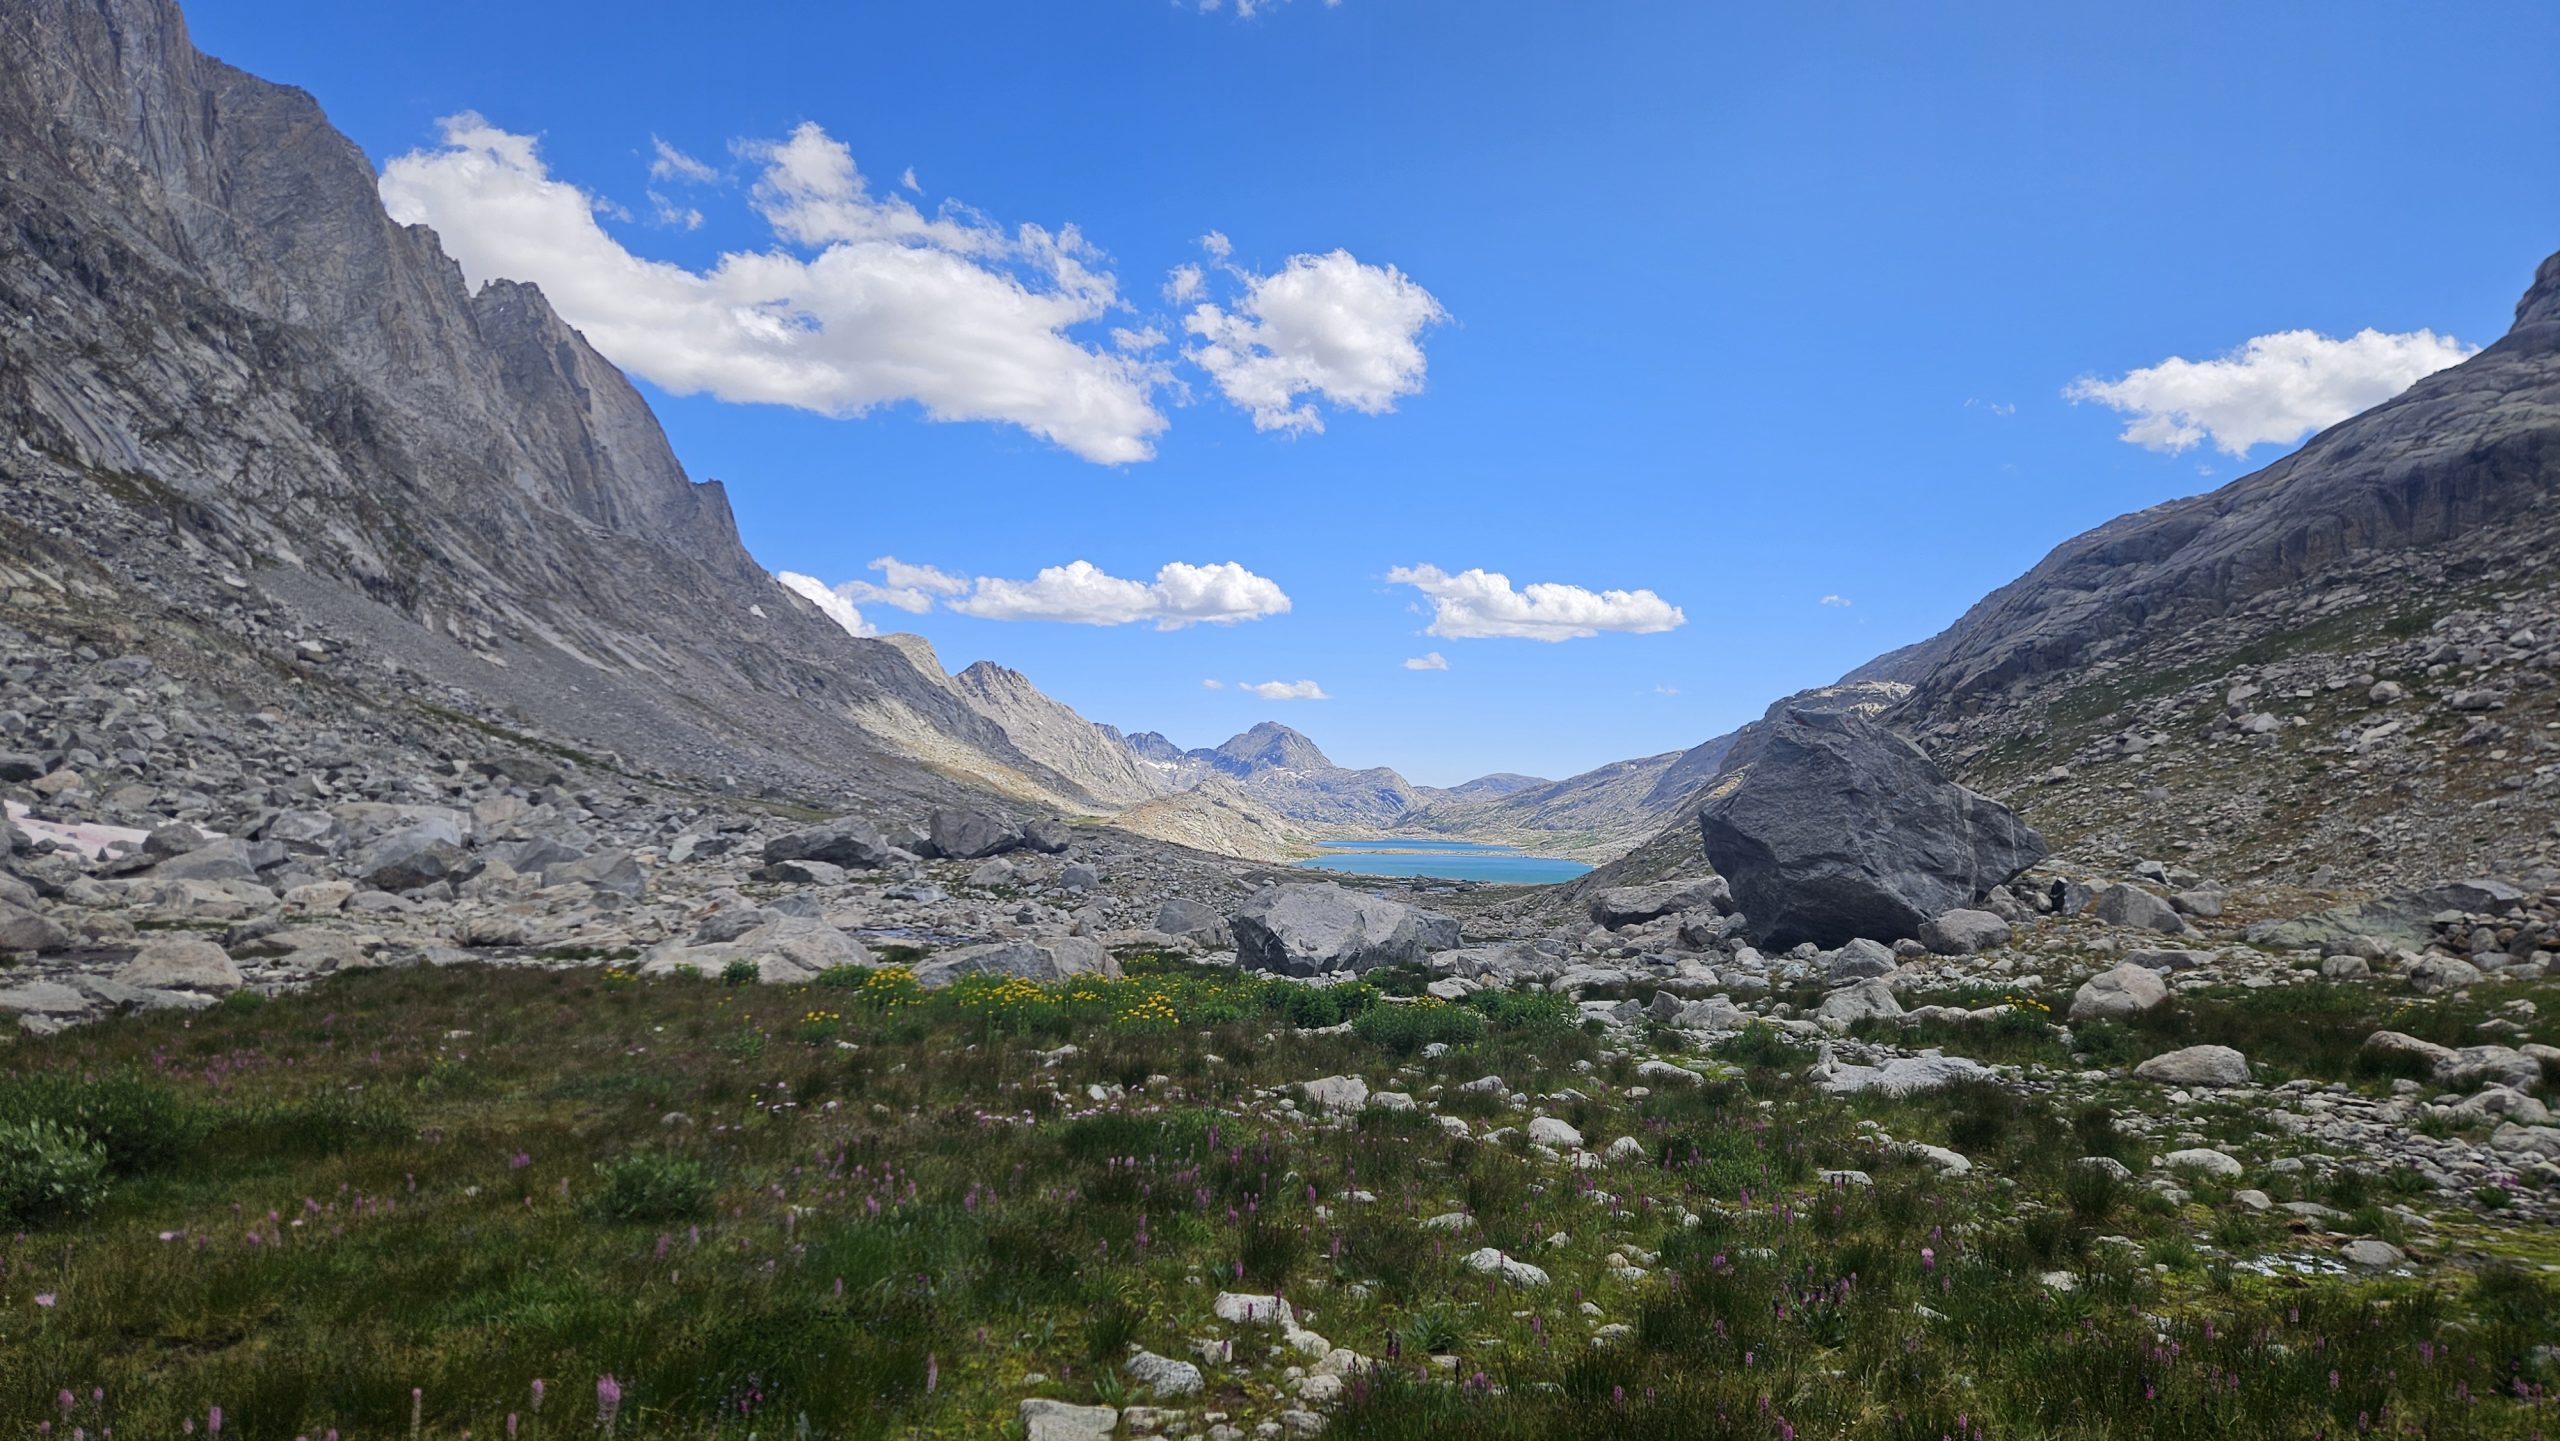
As the trail gradually descends, the wind picks up. I spy several lakes in the distance. The trail will continue to follow alongside these lakes all the way back to the red line of the CDT. There are about 6 or 7 I think. I pass several tents set up with no people in sight. It’s very windy and I don’t think I could pitch my tent here even if I wanted to.
I continue on past the lakes and eventually come to a group of about 6 guys hiking up the mountain. Another hiker comes up with a pack on and ask me about Knapsack Col. He’s a friend of Coco and said he’s just slow. As I think more about how far away town is I debate on stopping early. The thought becomes more and more appealing. As I pass a stream I walk my way up it and talk to a day hiker about some lakes and the pass that he came from. I head off trail and soon find a flat spot with a gorgeous view of a lake bellow surrounded by mountains. It’s a bit windy but the ground seems stable and my stakes go in deep.
Camp
It’s only 6 o’clock, which is pretty early for me to stop, but I figure either hang out here for the evening or just get closer to town to get in early. I don’t feel I need to get into town early tomorrow. In fact I wouldn’t go in at all if I had enough food, but I need to resupply, so I must go into Pinedale.
Even stopping at 6 PM I only have about 12 miles to the trailhead to hitch into town. I should be there before noon, which is plenty of time to resupply and charge things up. There’s a hostel in town that I will most likely stay the night at and head out the next day after a big breakfast of course. Until next time, happy trails.
This website contains affiliate links, which means The Trek may receive a percentage of any product or service you purchase using the links in the articles or advertisements. The buyer pays the same price as they would otherwise, and your purchase helps to support The Trek’s ongoing goal to serve you quality backpacking advice and information. Thanks for your support!
To learn more, please visit the About This Site page.
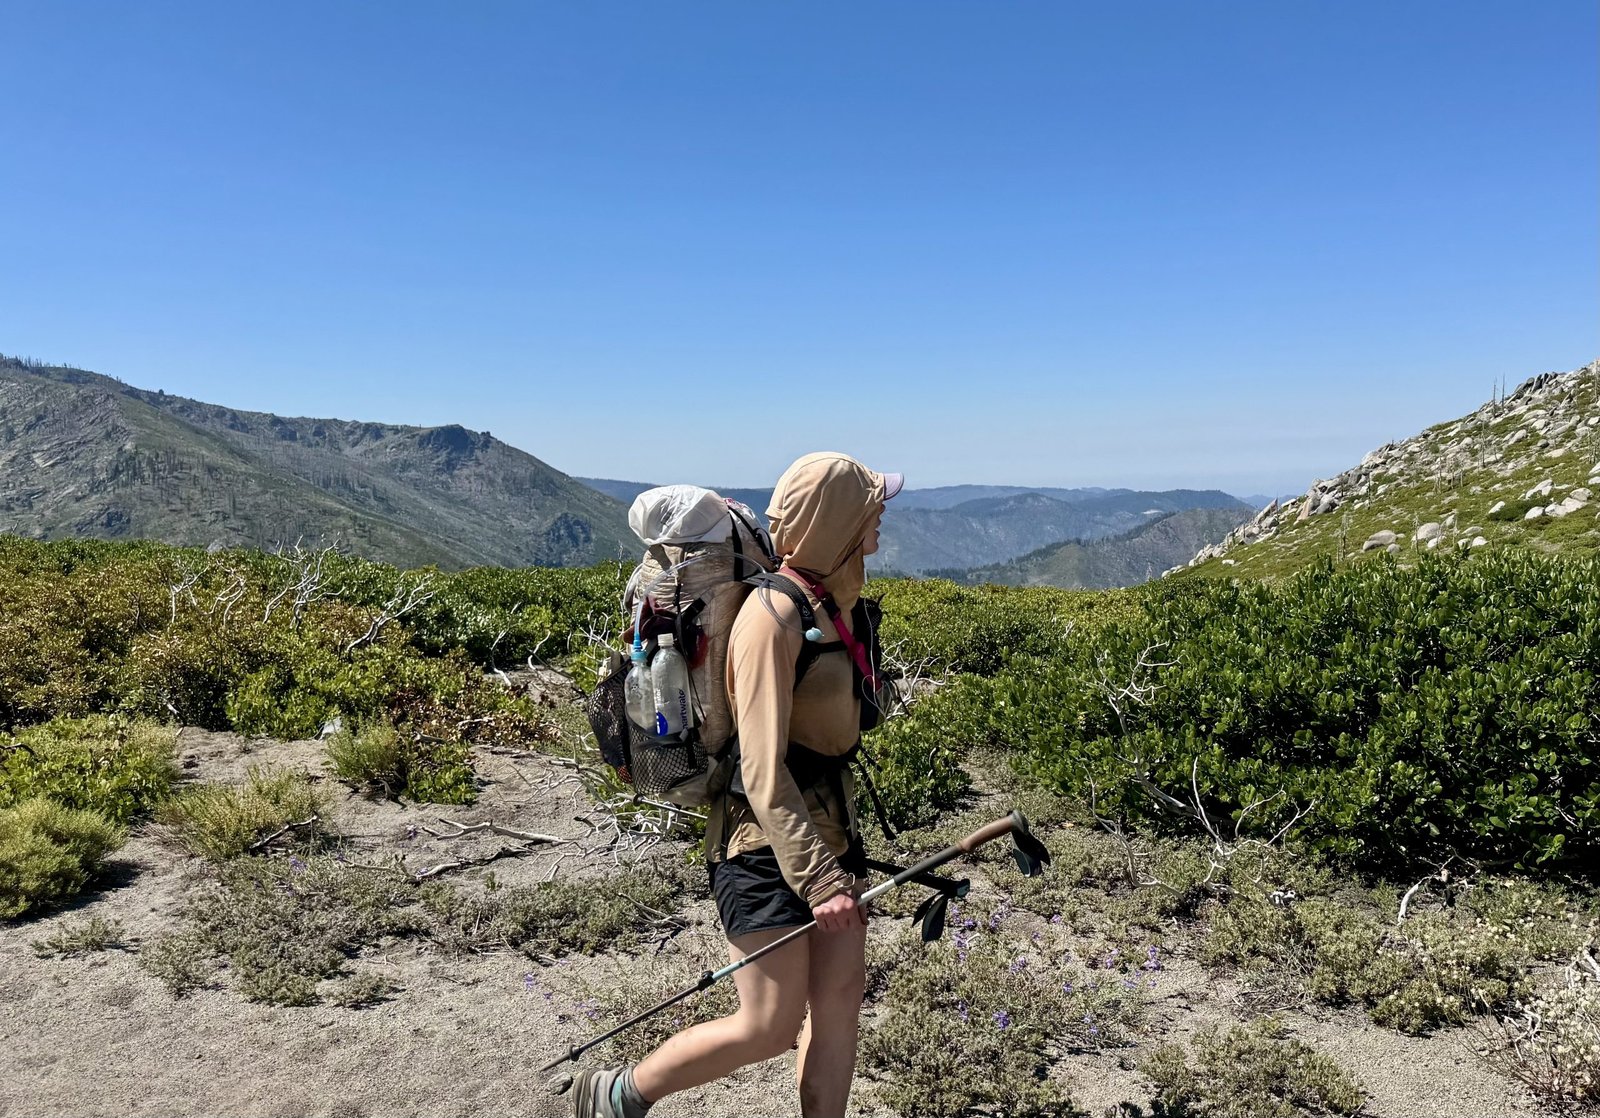
Big progress was made this week. First, our trail family reassembled looking almost identical to the group we were back in Julian, almost 1250 miles ago! Second, someone que Bon Jovi, because, by some miracle, we are now over halfway through the PCT, closer to Canada than Mexico. Wildfires still hang in the forefront of our minds, but other than evidence of old burns, we continue to evade this threat.
Day 92
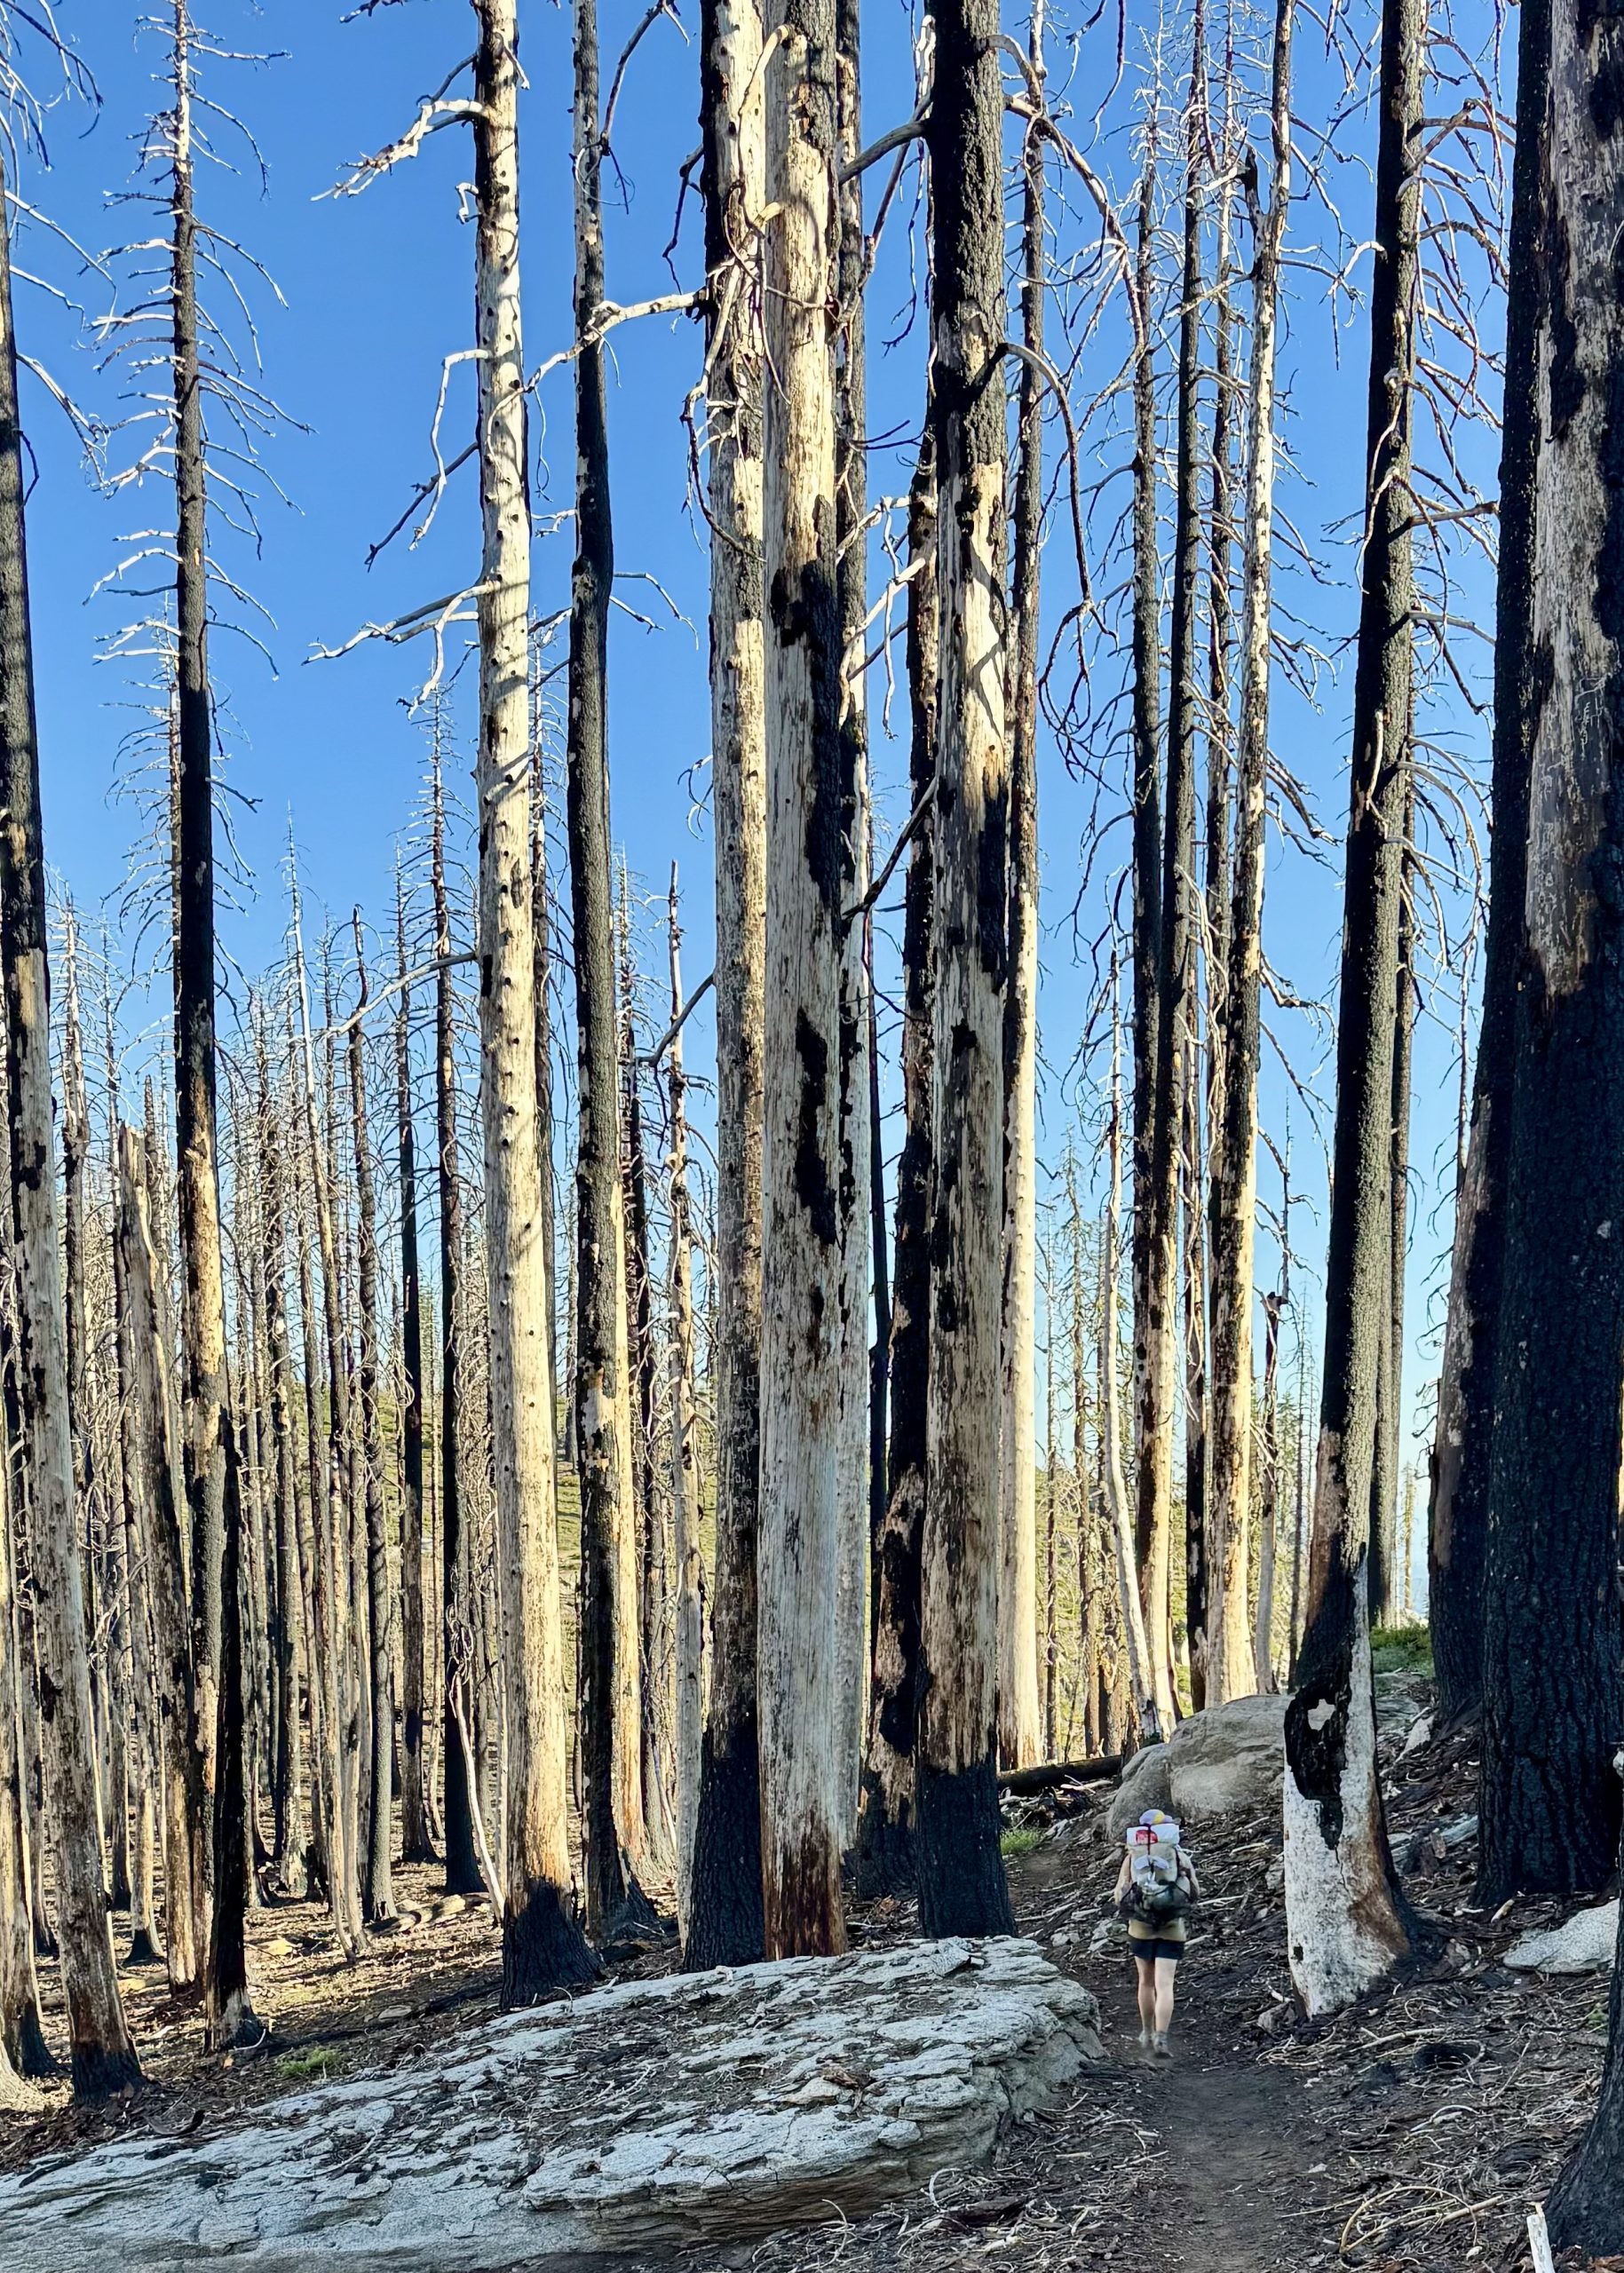
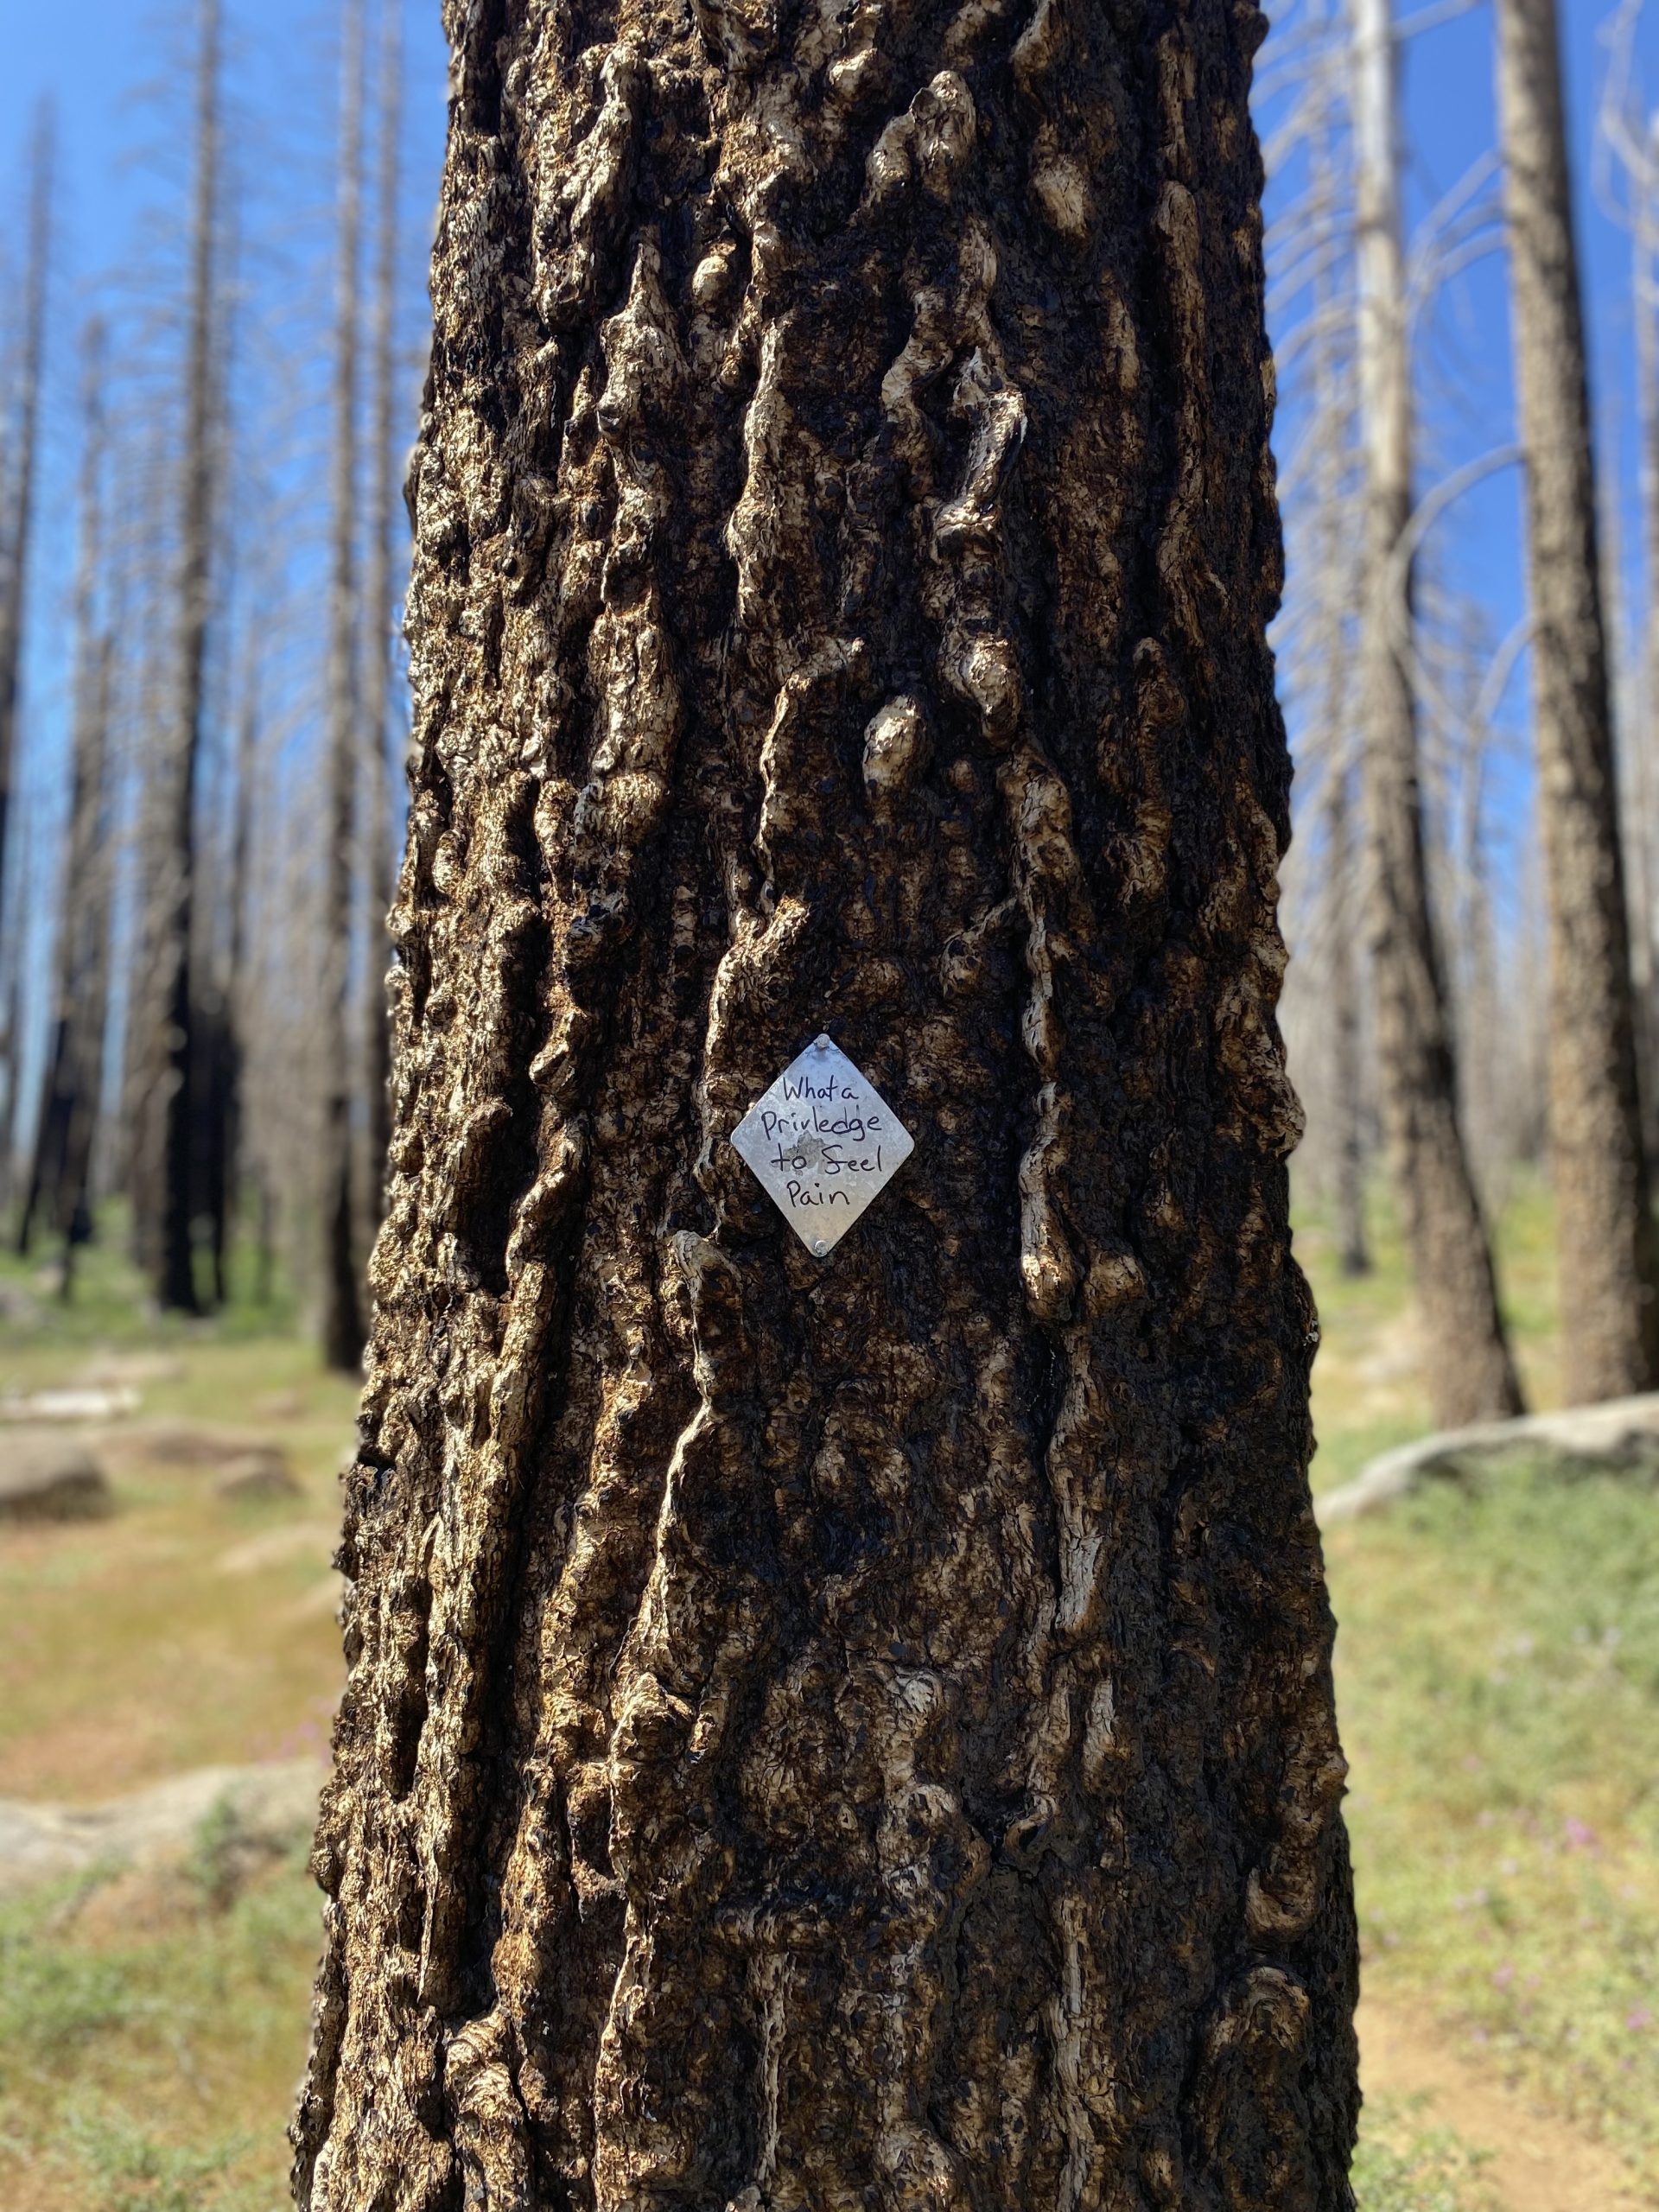
We woke and started the day with a climb, the hazy sky providing views of rolling blue hills. The early sun so low in the sky it reflected in the lakes appearing as silver mirrors. On trail, we moved through burn-scarred areas. Charcoaled trees nothing more than stick figures, but below an abundance of new, thriving life.
Once at the peak of our climb we proceeded downwards and would find ourselves descending 6000ft (1800m) to get to the town of Belden. Dan and I had a package at Caribou Crossing, so we left the others and flagged a ride down the road. The man who picked us up seemed normal enough until a cop car pulled up behind us. Our driver began swearing and calling out his licence would be revoked. At one point, he rolled up the windows and I wondered if he would do a runner if they tried to pull him over. Luckily they never did and we continued into Caribou but I still wonder what he had in the car to make him so jumpy.
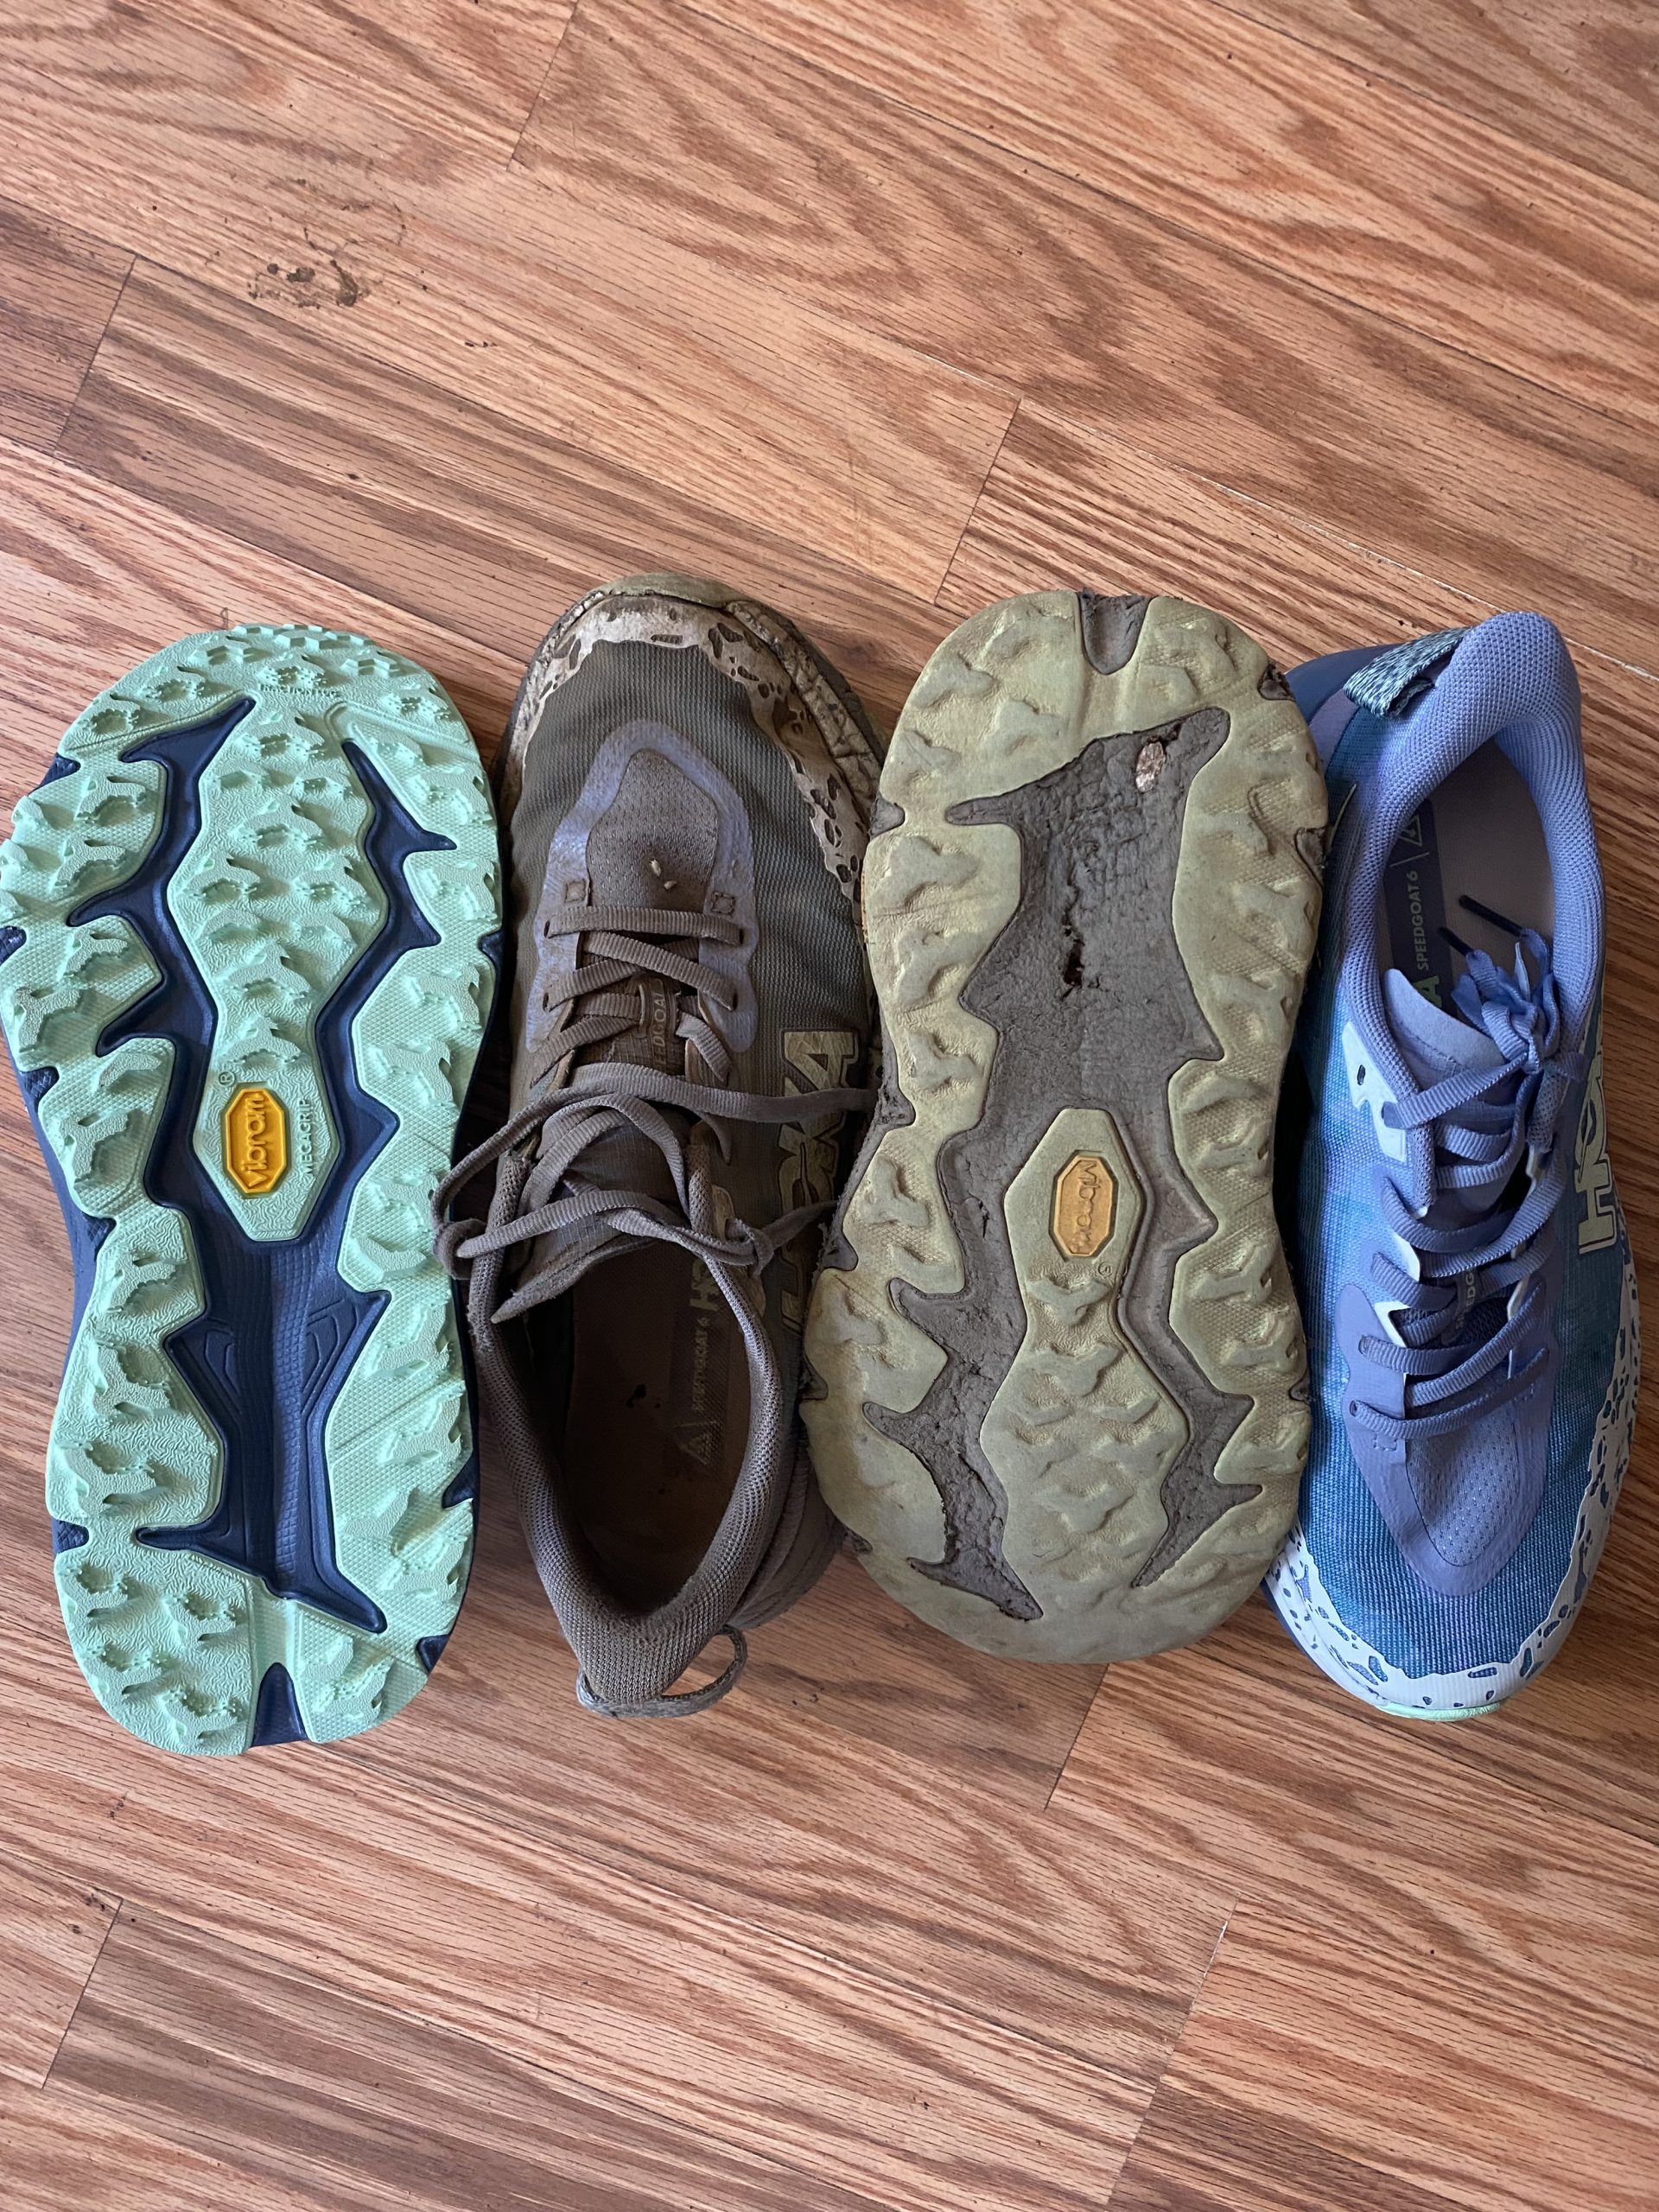
We picked up our resupply and much needed new pair of shoes. The Sierra had been brutal, wrecking our tread to nothing. It was painfully hot, slightly cooler outside in the shade with a breeze than within the sweaty store.
The laundry had taken longer than we anticipated, so by the time we headed back to trail we were an hour behind the others and had a 1.5 mile road walk before we even made it to trail. Daylight was dwindling quickly but despite this, the heat of the day remained. Hot wind licked our faces and the ground seemed to retain a days worth of sun.
The hike out of Belden was brutal, gaining almost 6000 feet (1800m) of elevation over 13.5 miles. We decided to camp 4 miles below the others, making a 2 mile dent in the climb. It was simply too hot, even in the fading light it continued to stifle us.
Day 93
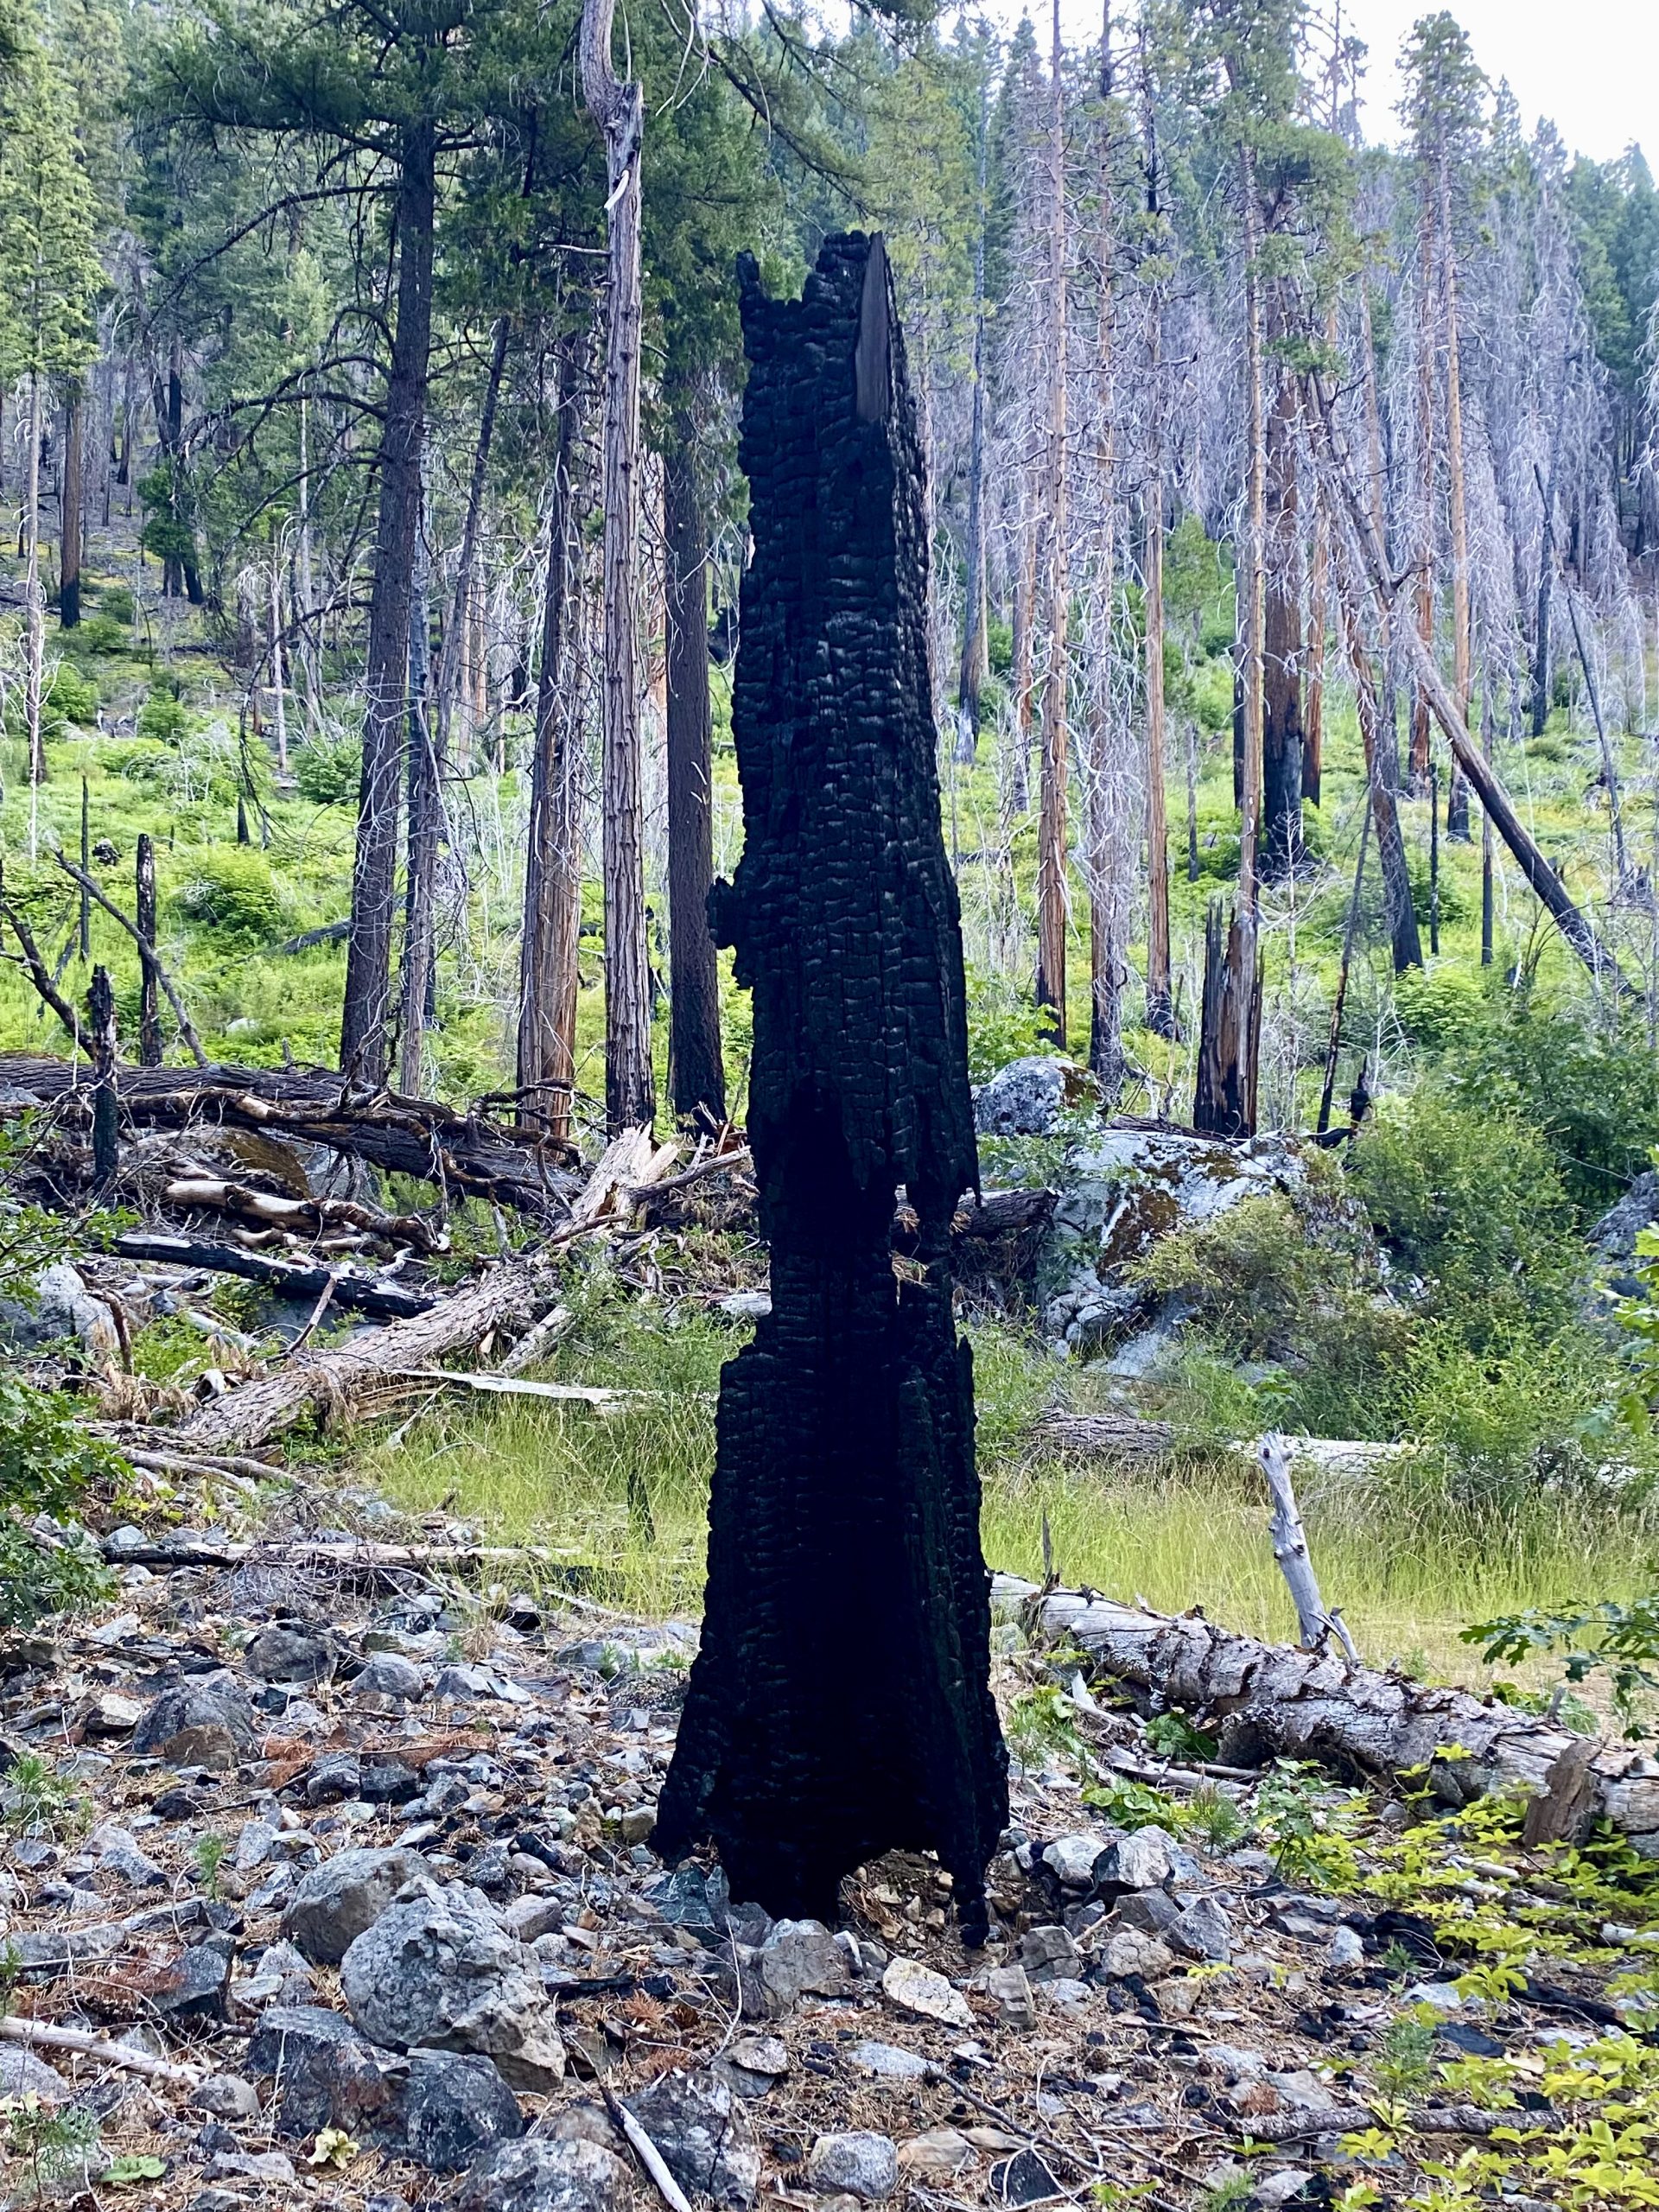
By the time dawn reached us we had already been powering up the mammoth climb for an hour and a half. The path was thick with a mix of ash and mud, the trees leafless, the remaining stumps half blackened, half ghostly white. We would pass through sections dense with felled trees, having to navigate around or over them. It made for difficult walking, particularly as there was no shade and intense heat.
Ten miles in and we entered the Cascades, leaving behind the Sierra. The field we travelled through was rich with green grass and boggy in areas. The change from burnt area to this was sudden. I hadn’t realised the absence of birdsong within the burn until entering the meadow.
Soon we were back in burn zone, our legs now grey from the combination of dirt and ash. The view from the top of the climb was harrowing. The surrounding peaks appeared brown, their skeletal, bare trees suggesting more fire damage. Seeing how far the devastation spread made the threat feel colossal.
After 16 miles we broke for lunch at a spring and hid in the shade. By this time the trail family were all back together and we had entered living forest again. We spent a couple of hours here, resting and eating. The final 8 miles were fairly easy following undulating trail that trended downwards.
We made camp above Robbers Spring. Water had become sparse again and required a 0.6 mile round trip to replenish our bottles. A lone deer appeared to have a circuit running the perimeter of our camp, judging by the tread marks and the amount of times he encircled us. He would keep us company most of the night!
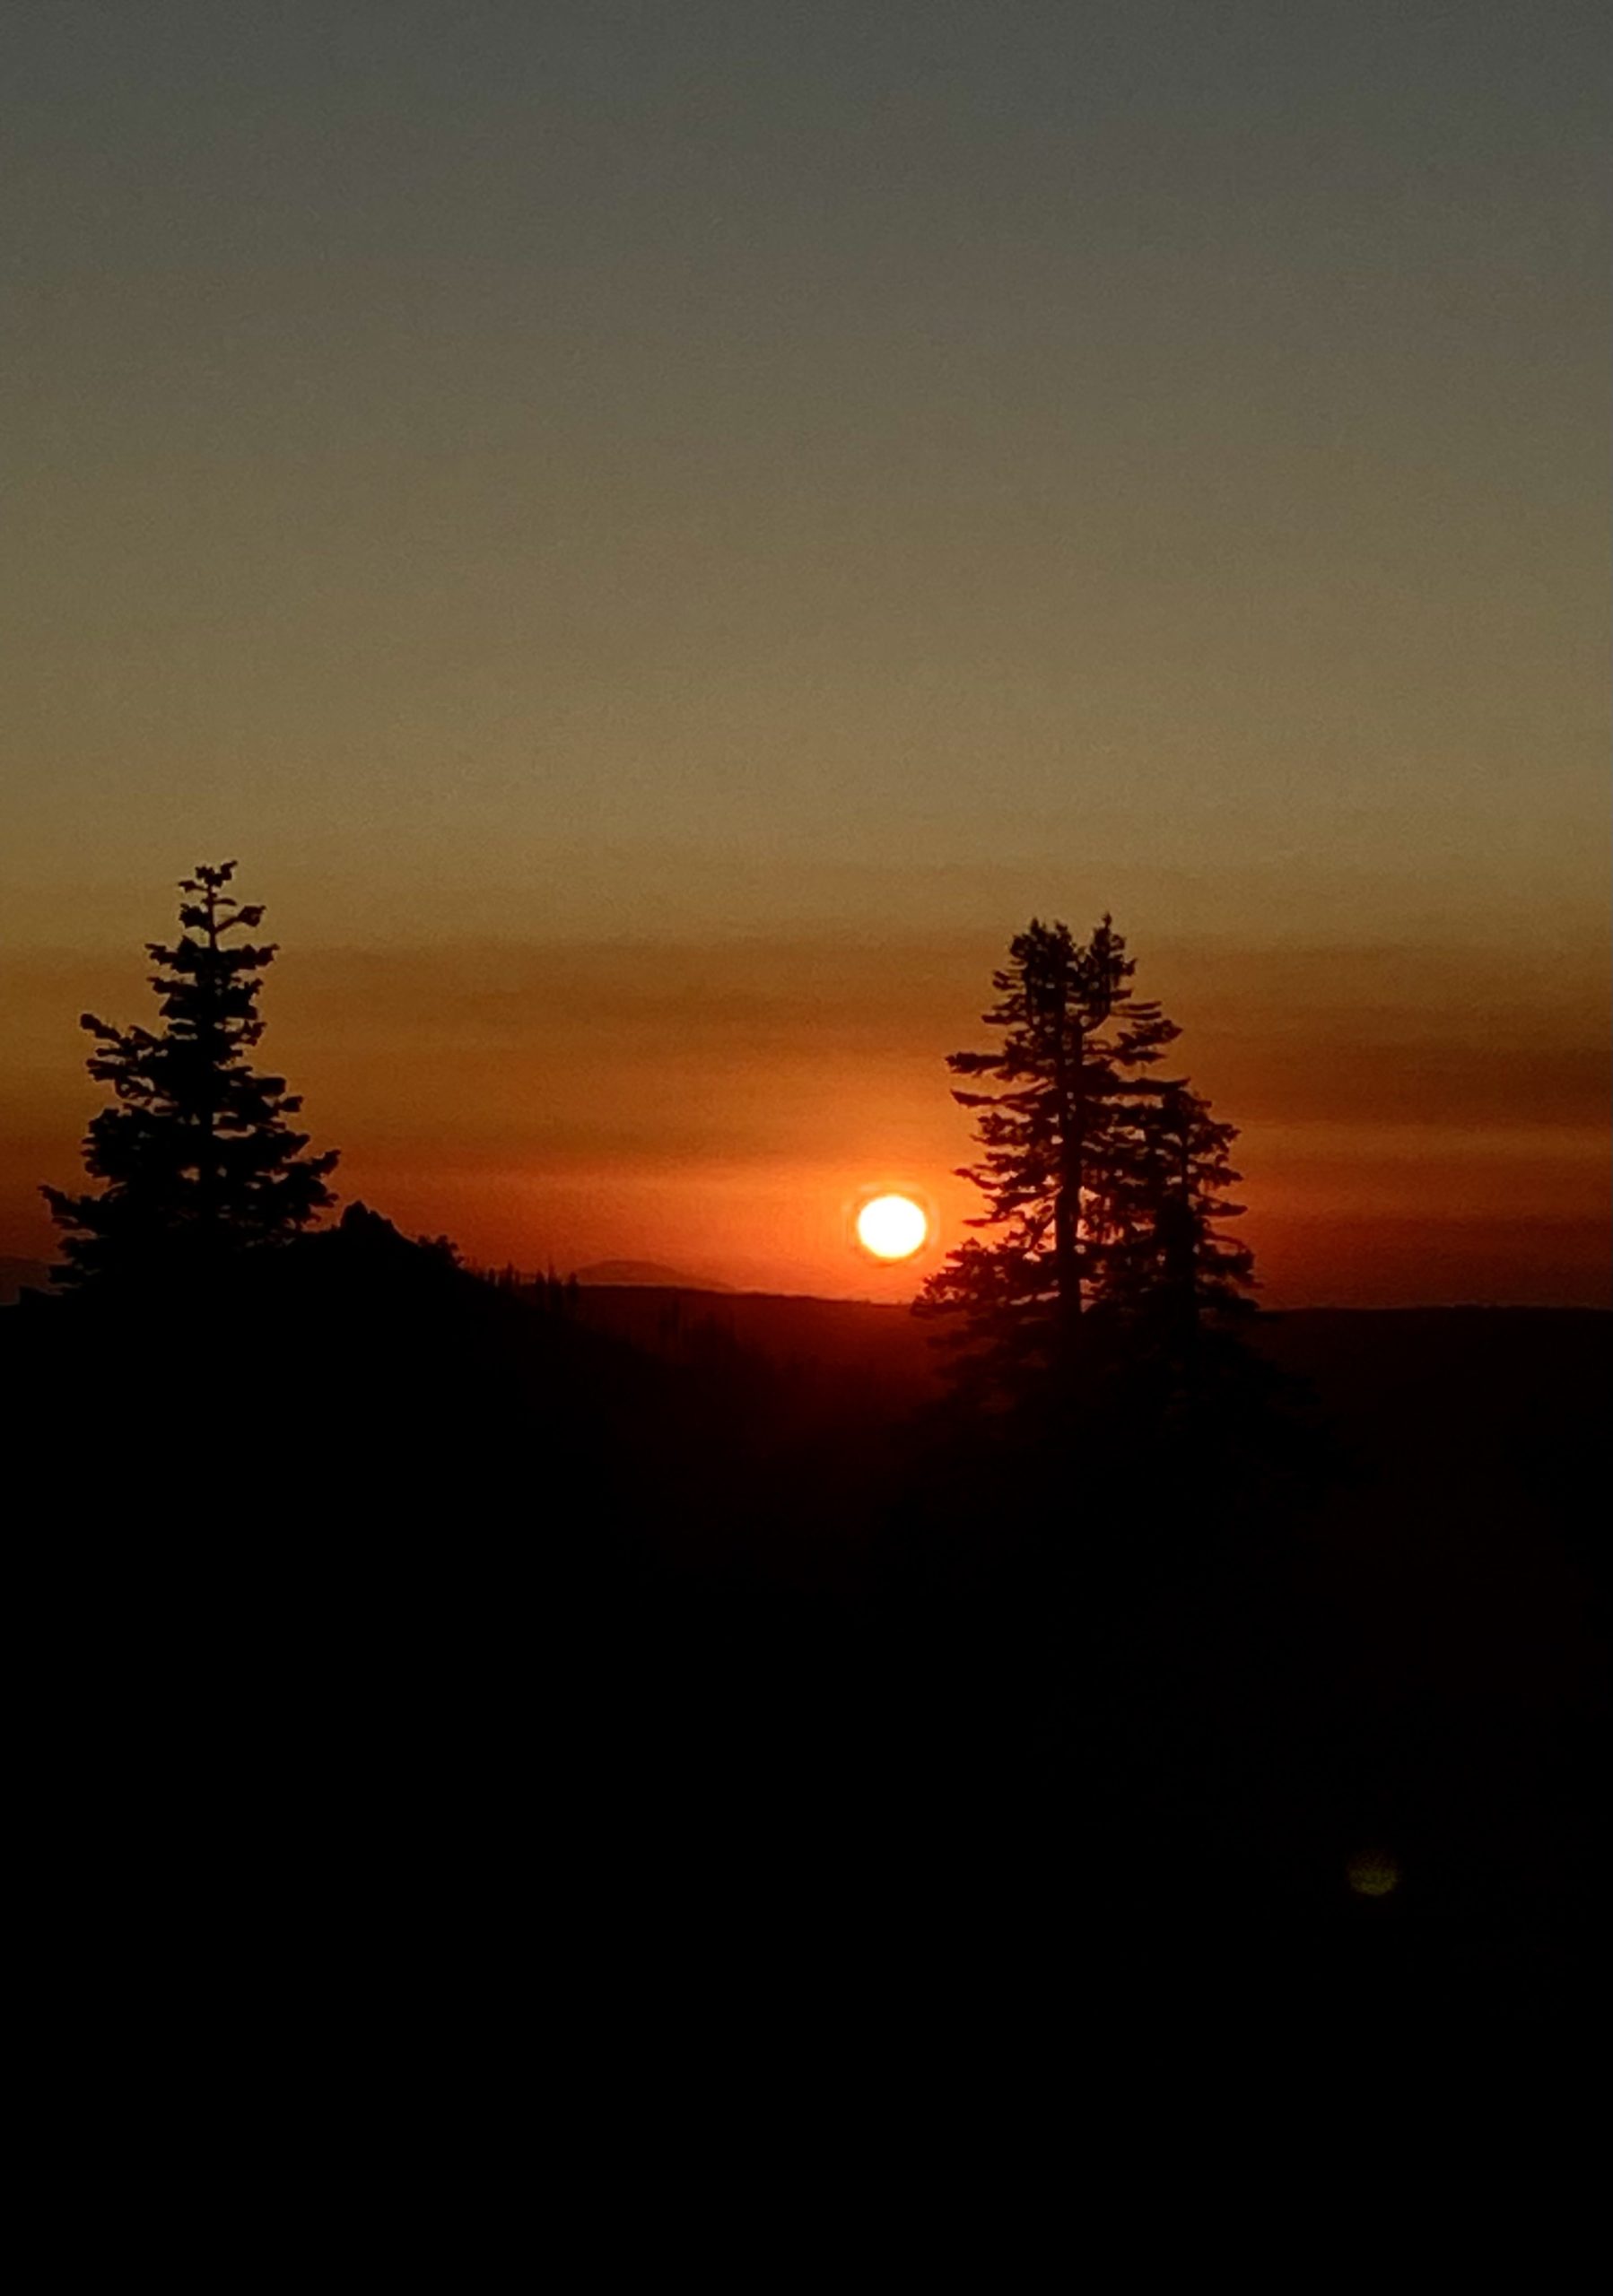
We sat eating on the ridge line of camp watching the sunset light up our surroundings a golden orange. The colour of the sky continued to burn even as we settled into our tents for some much needed sleep.
Day 94
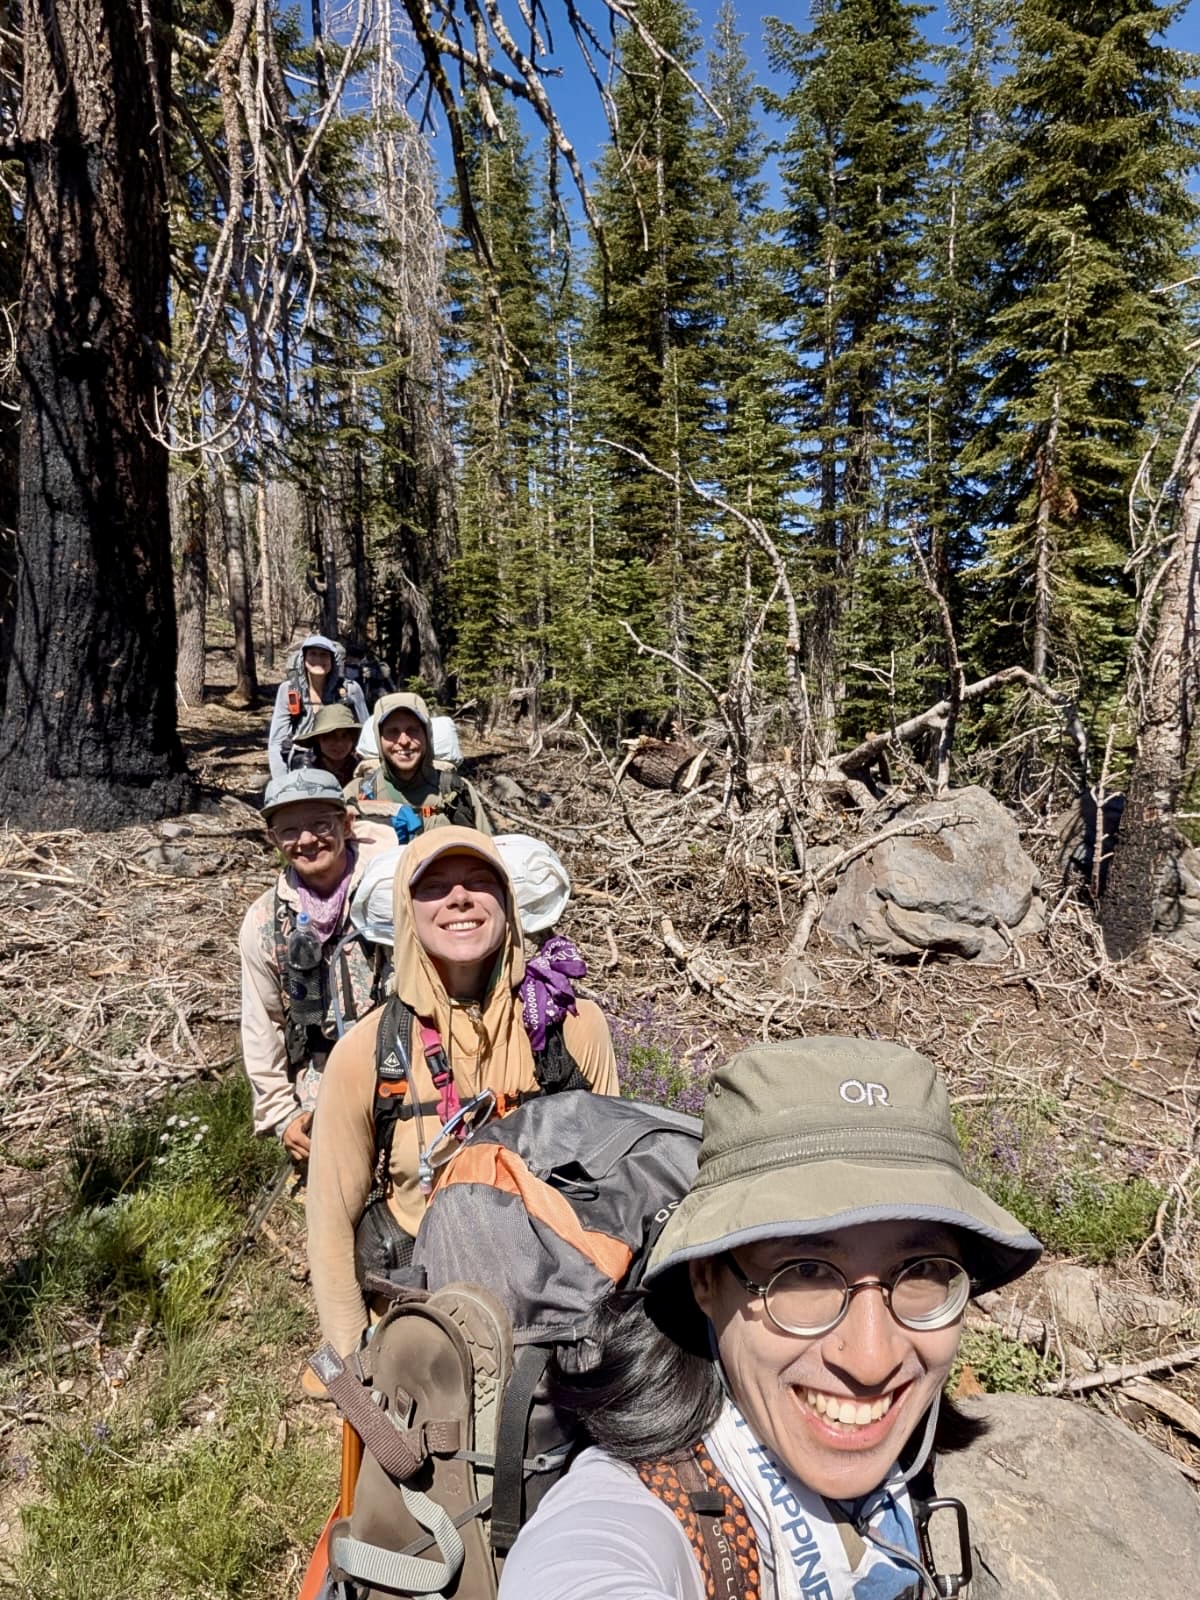
We had planned to leave early, but as my 5am alarm sounded I silenced it, unable to hear anyone else rustling in their tents suggesting we all felt the need for a lie in. It turned out to work in our favour. As an hour later we were just finishing breakfast as Kaleidoscope wandered into camp. They had been a couple of days behind walking with a friend from home, but having smashed out 30 mile days had managed to catch up.
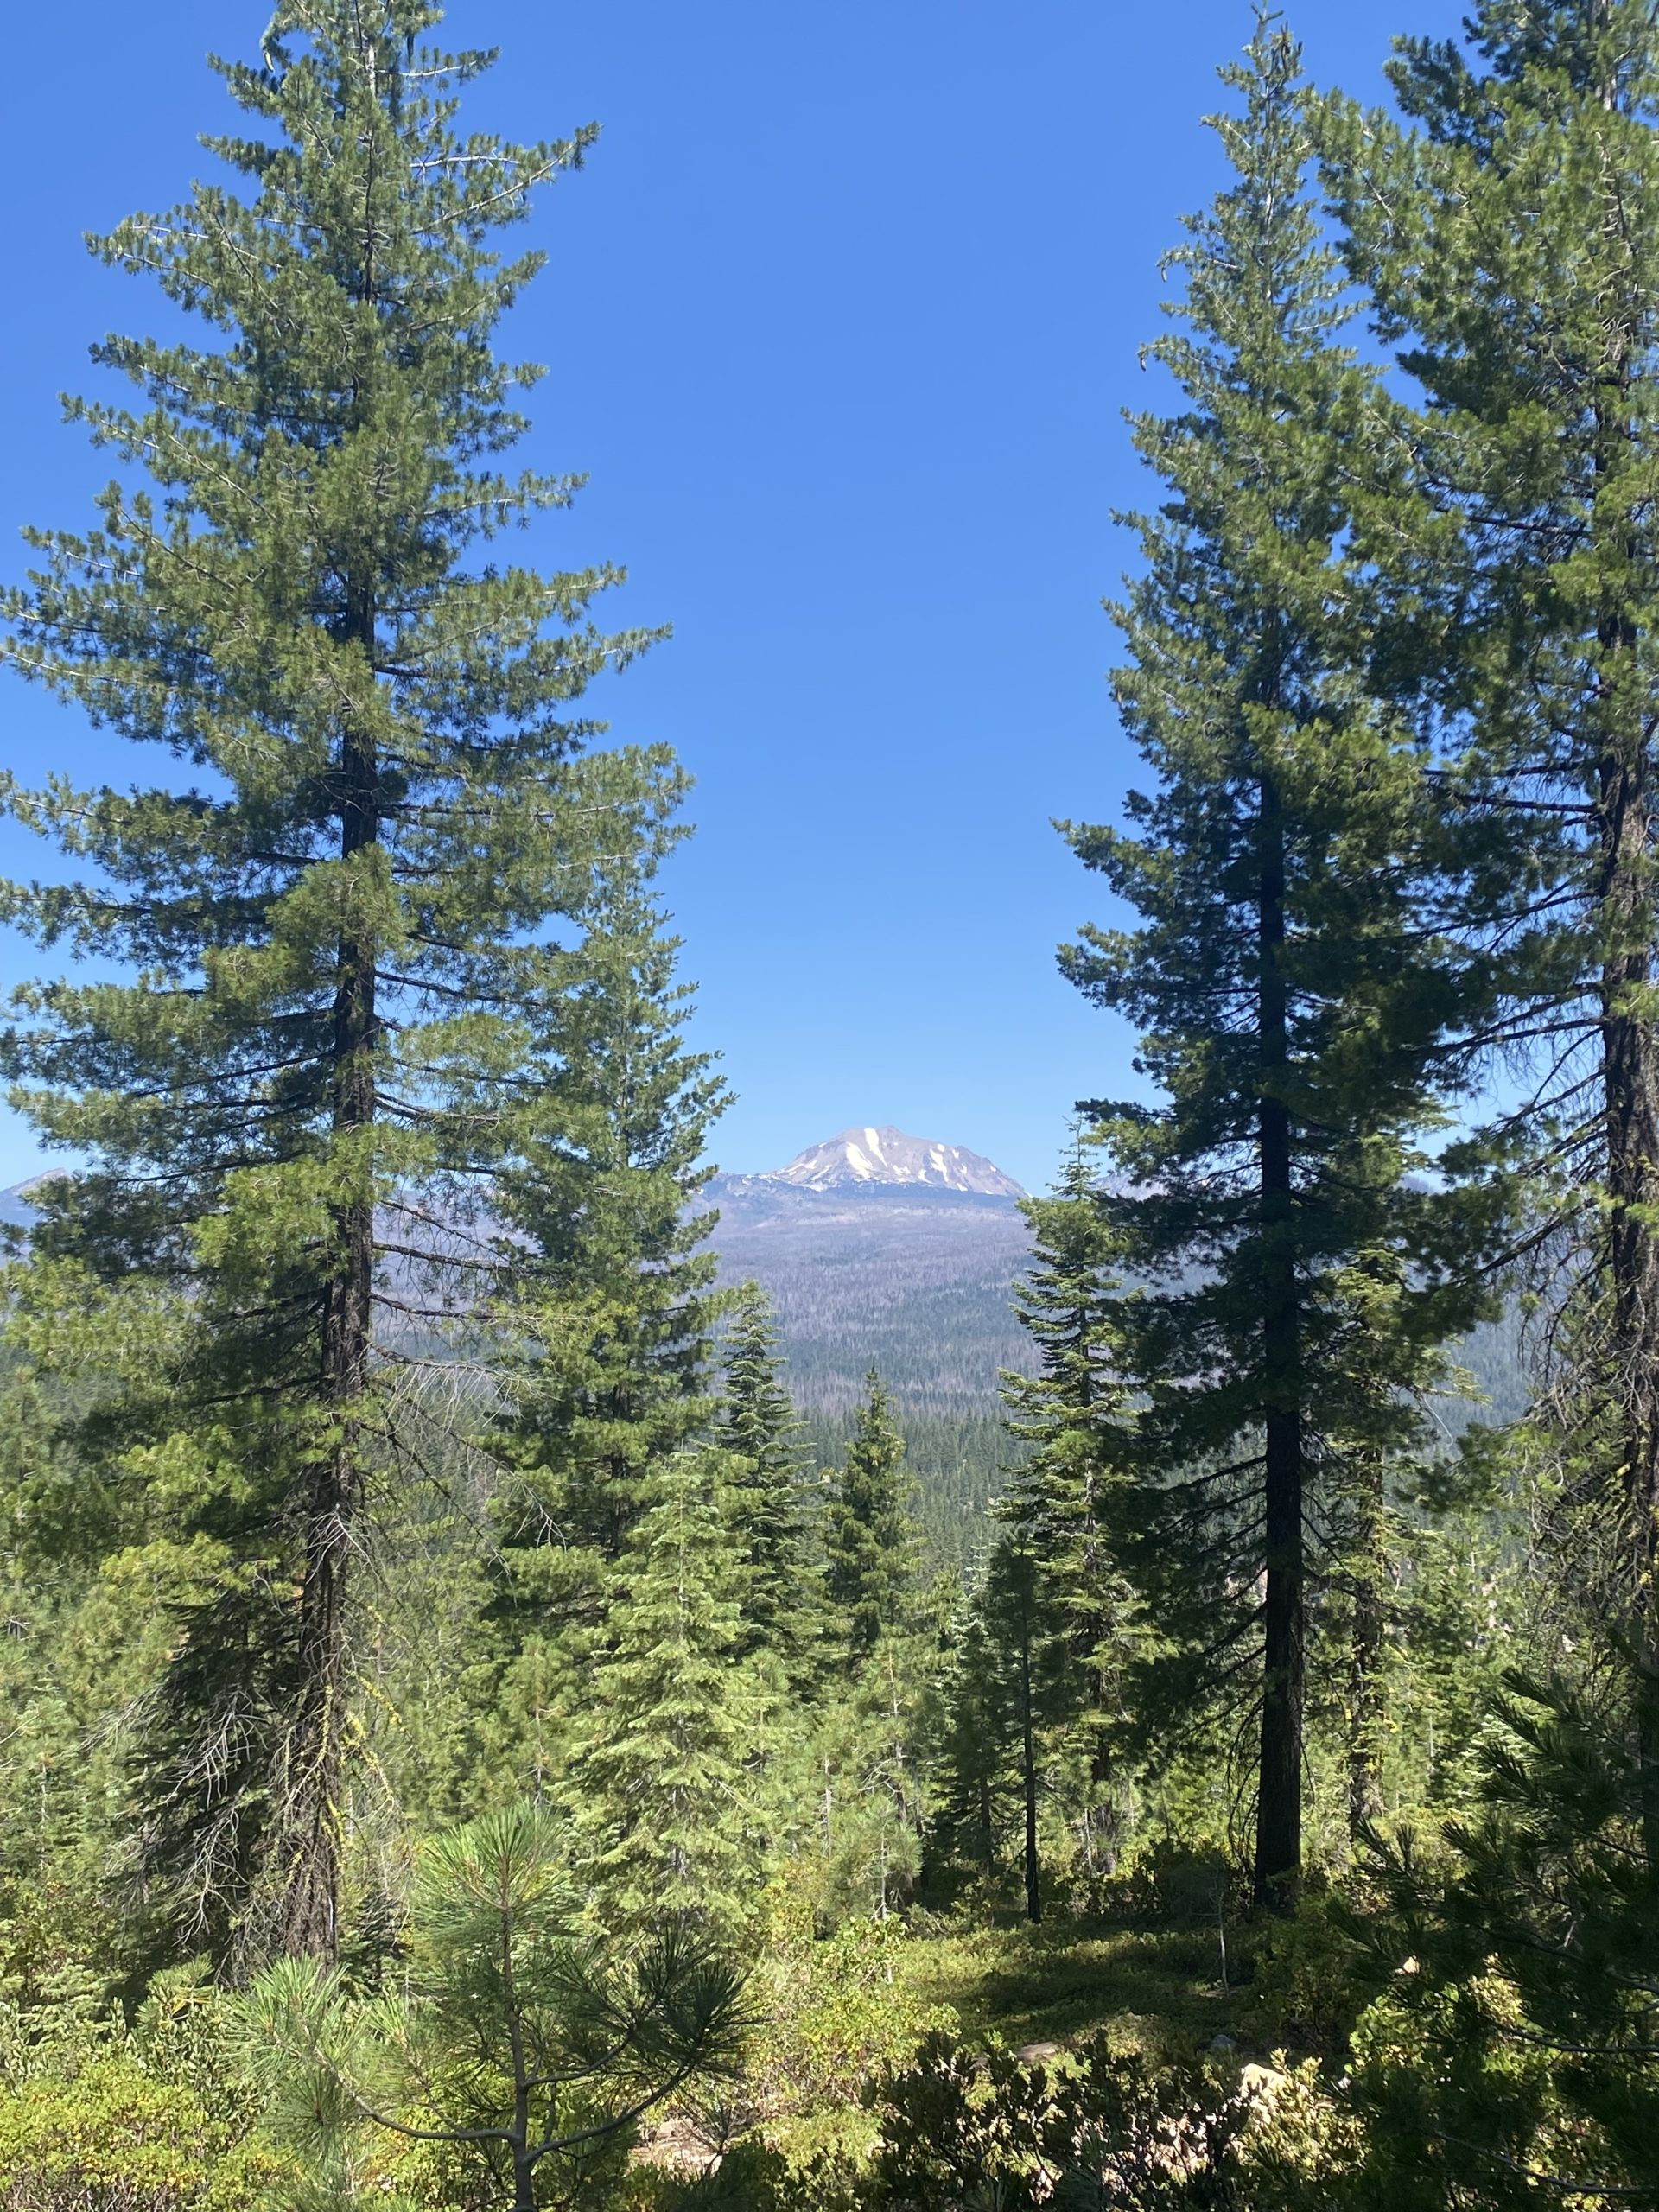
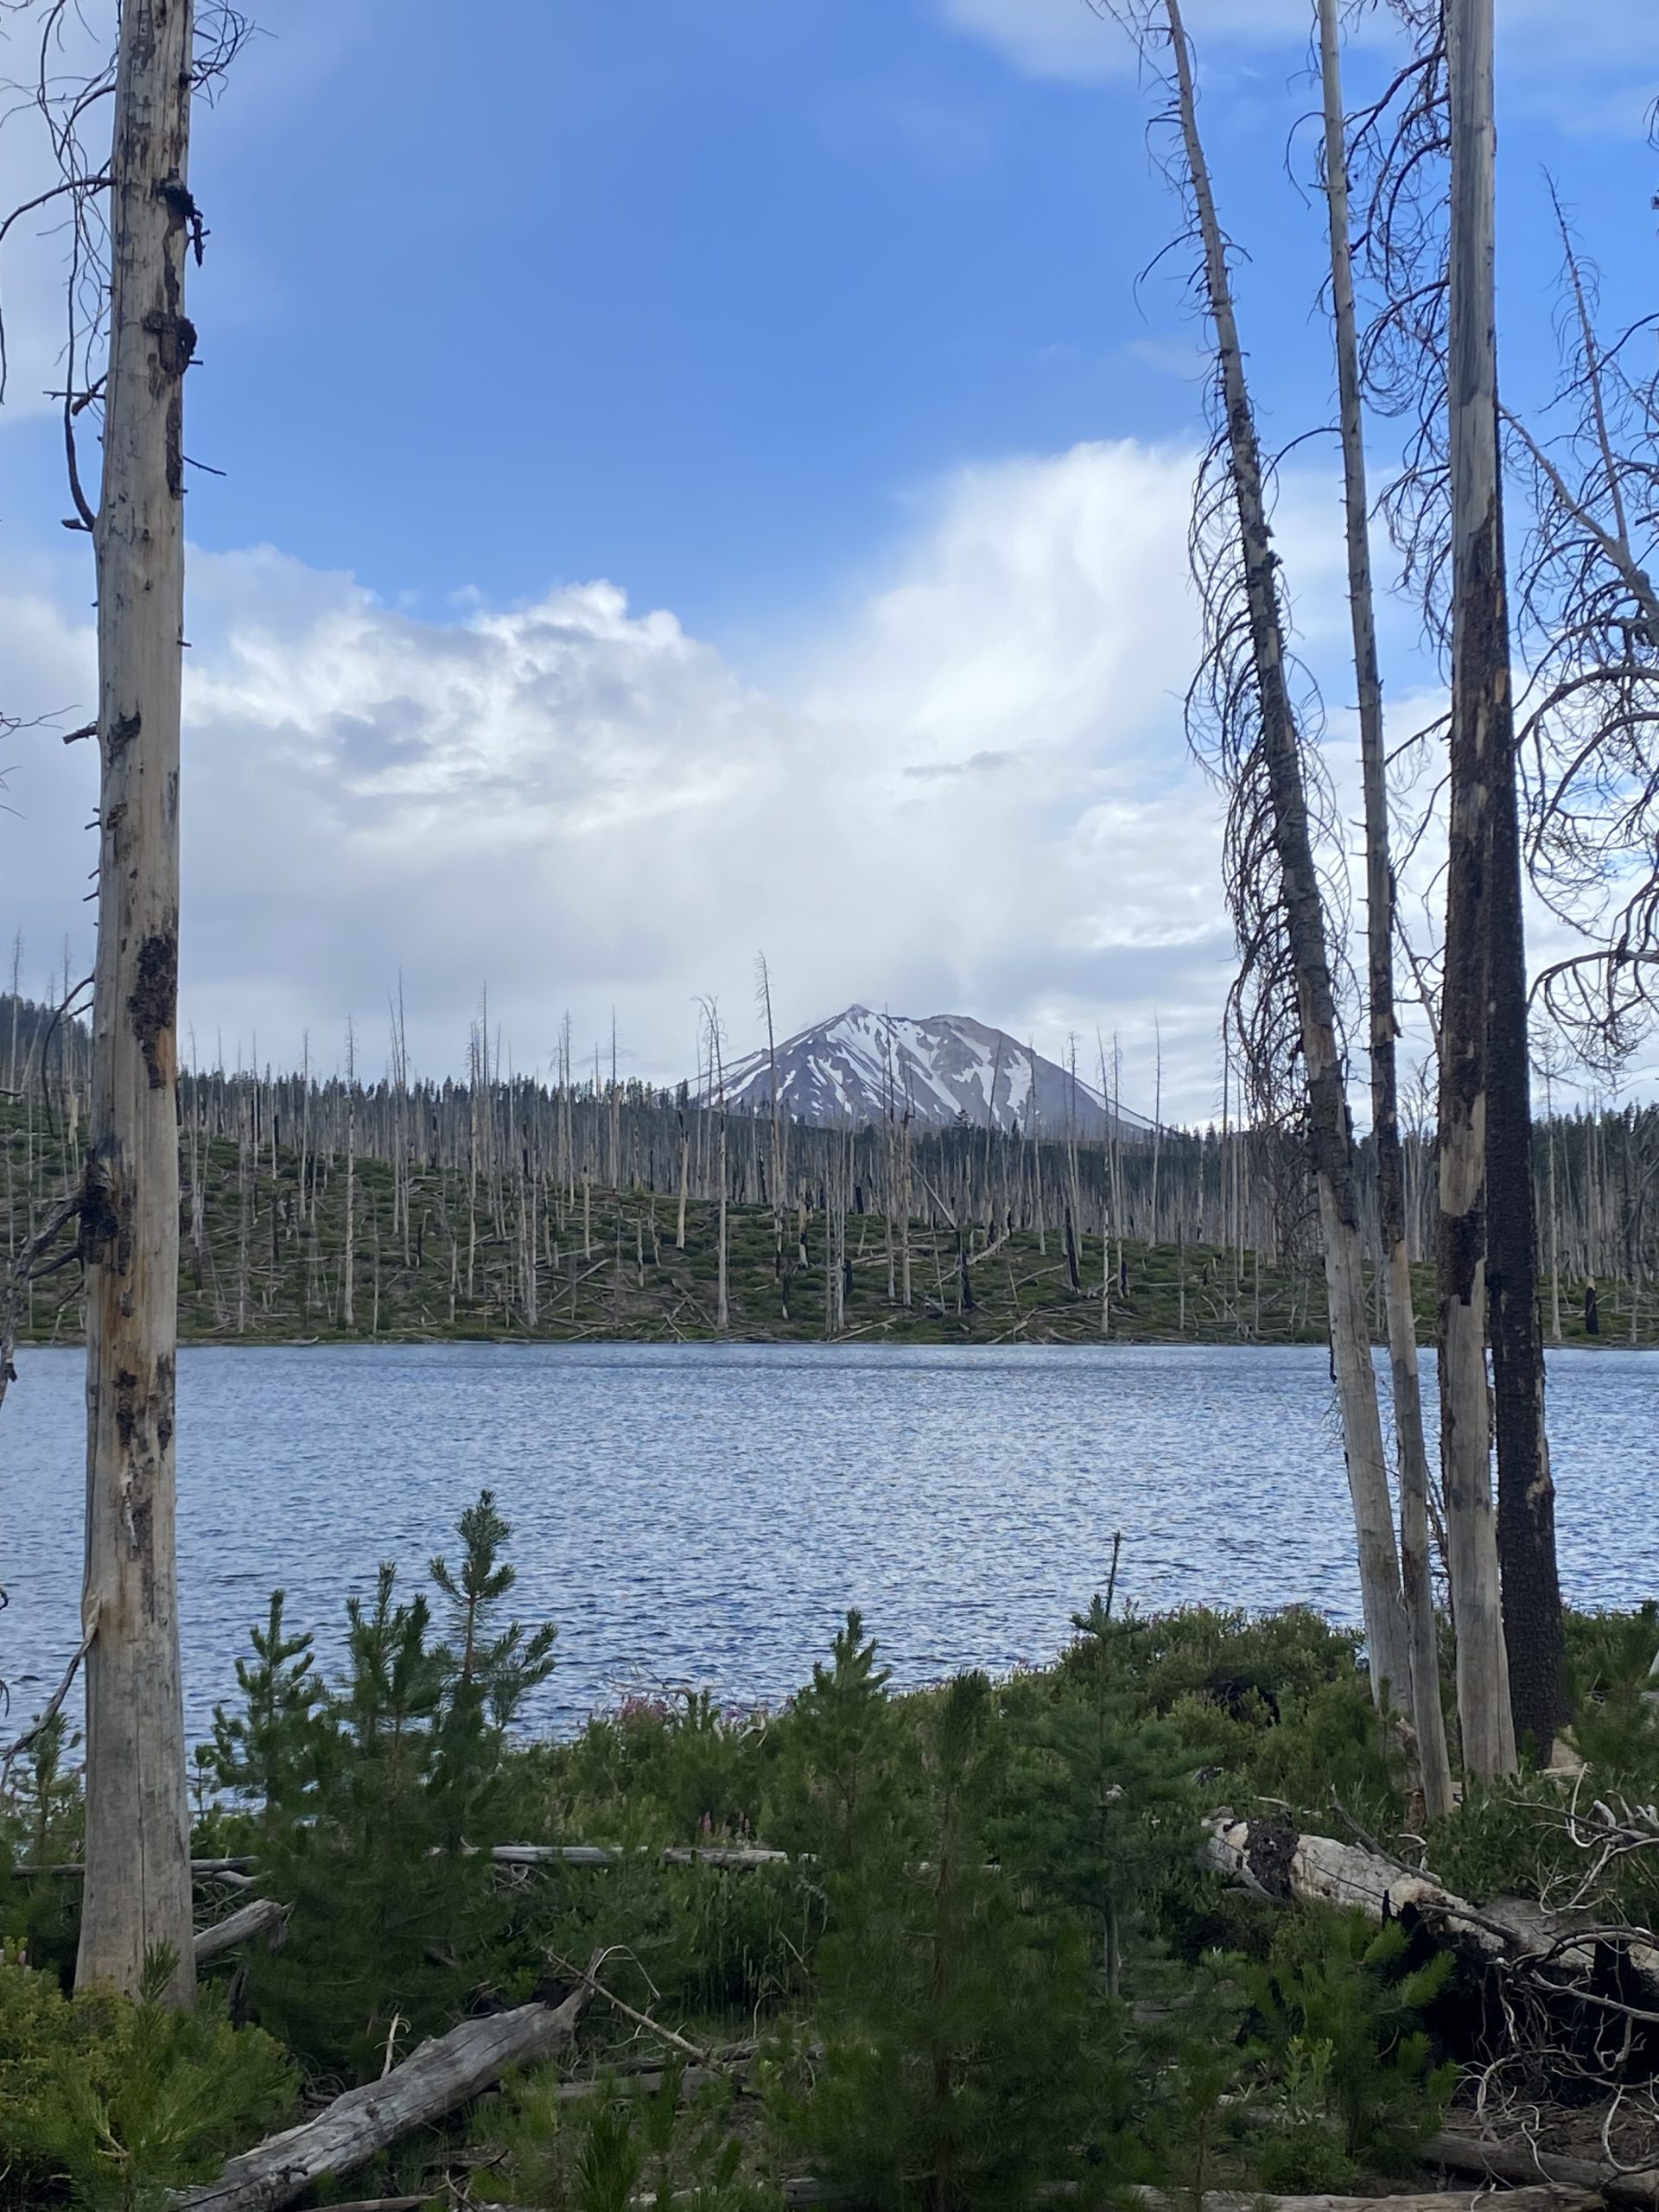
It was a wonderful surprise, especially considering we would be hitting the halfway mark of the PCT. The seven of us set off. The route to the mid-point taking us up an exposed ridge then down through lush forest which faded to low, overgrown bush. Views of Mount Lassen kept sneaking up on us, its snowy white peaks hazy in the smoky sky.
A mile from the marker we waited for one another so as to walk the final mile in unison. In keeping with our tramily name, The caterpillar, we marched in a single line and soon we were there, exactly 1325 miles to Canada and 1325 miles to Mexico: a single step to either side dictating which we were closer to. We cracked out the whisky, toasting to our achievement before chatting merrily and enjoying the photo opportunity.
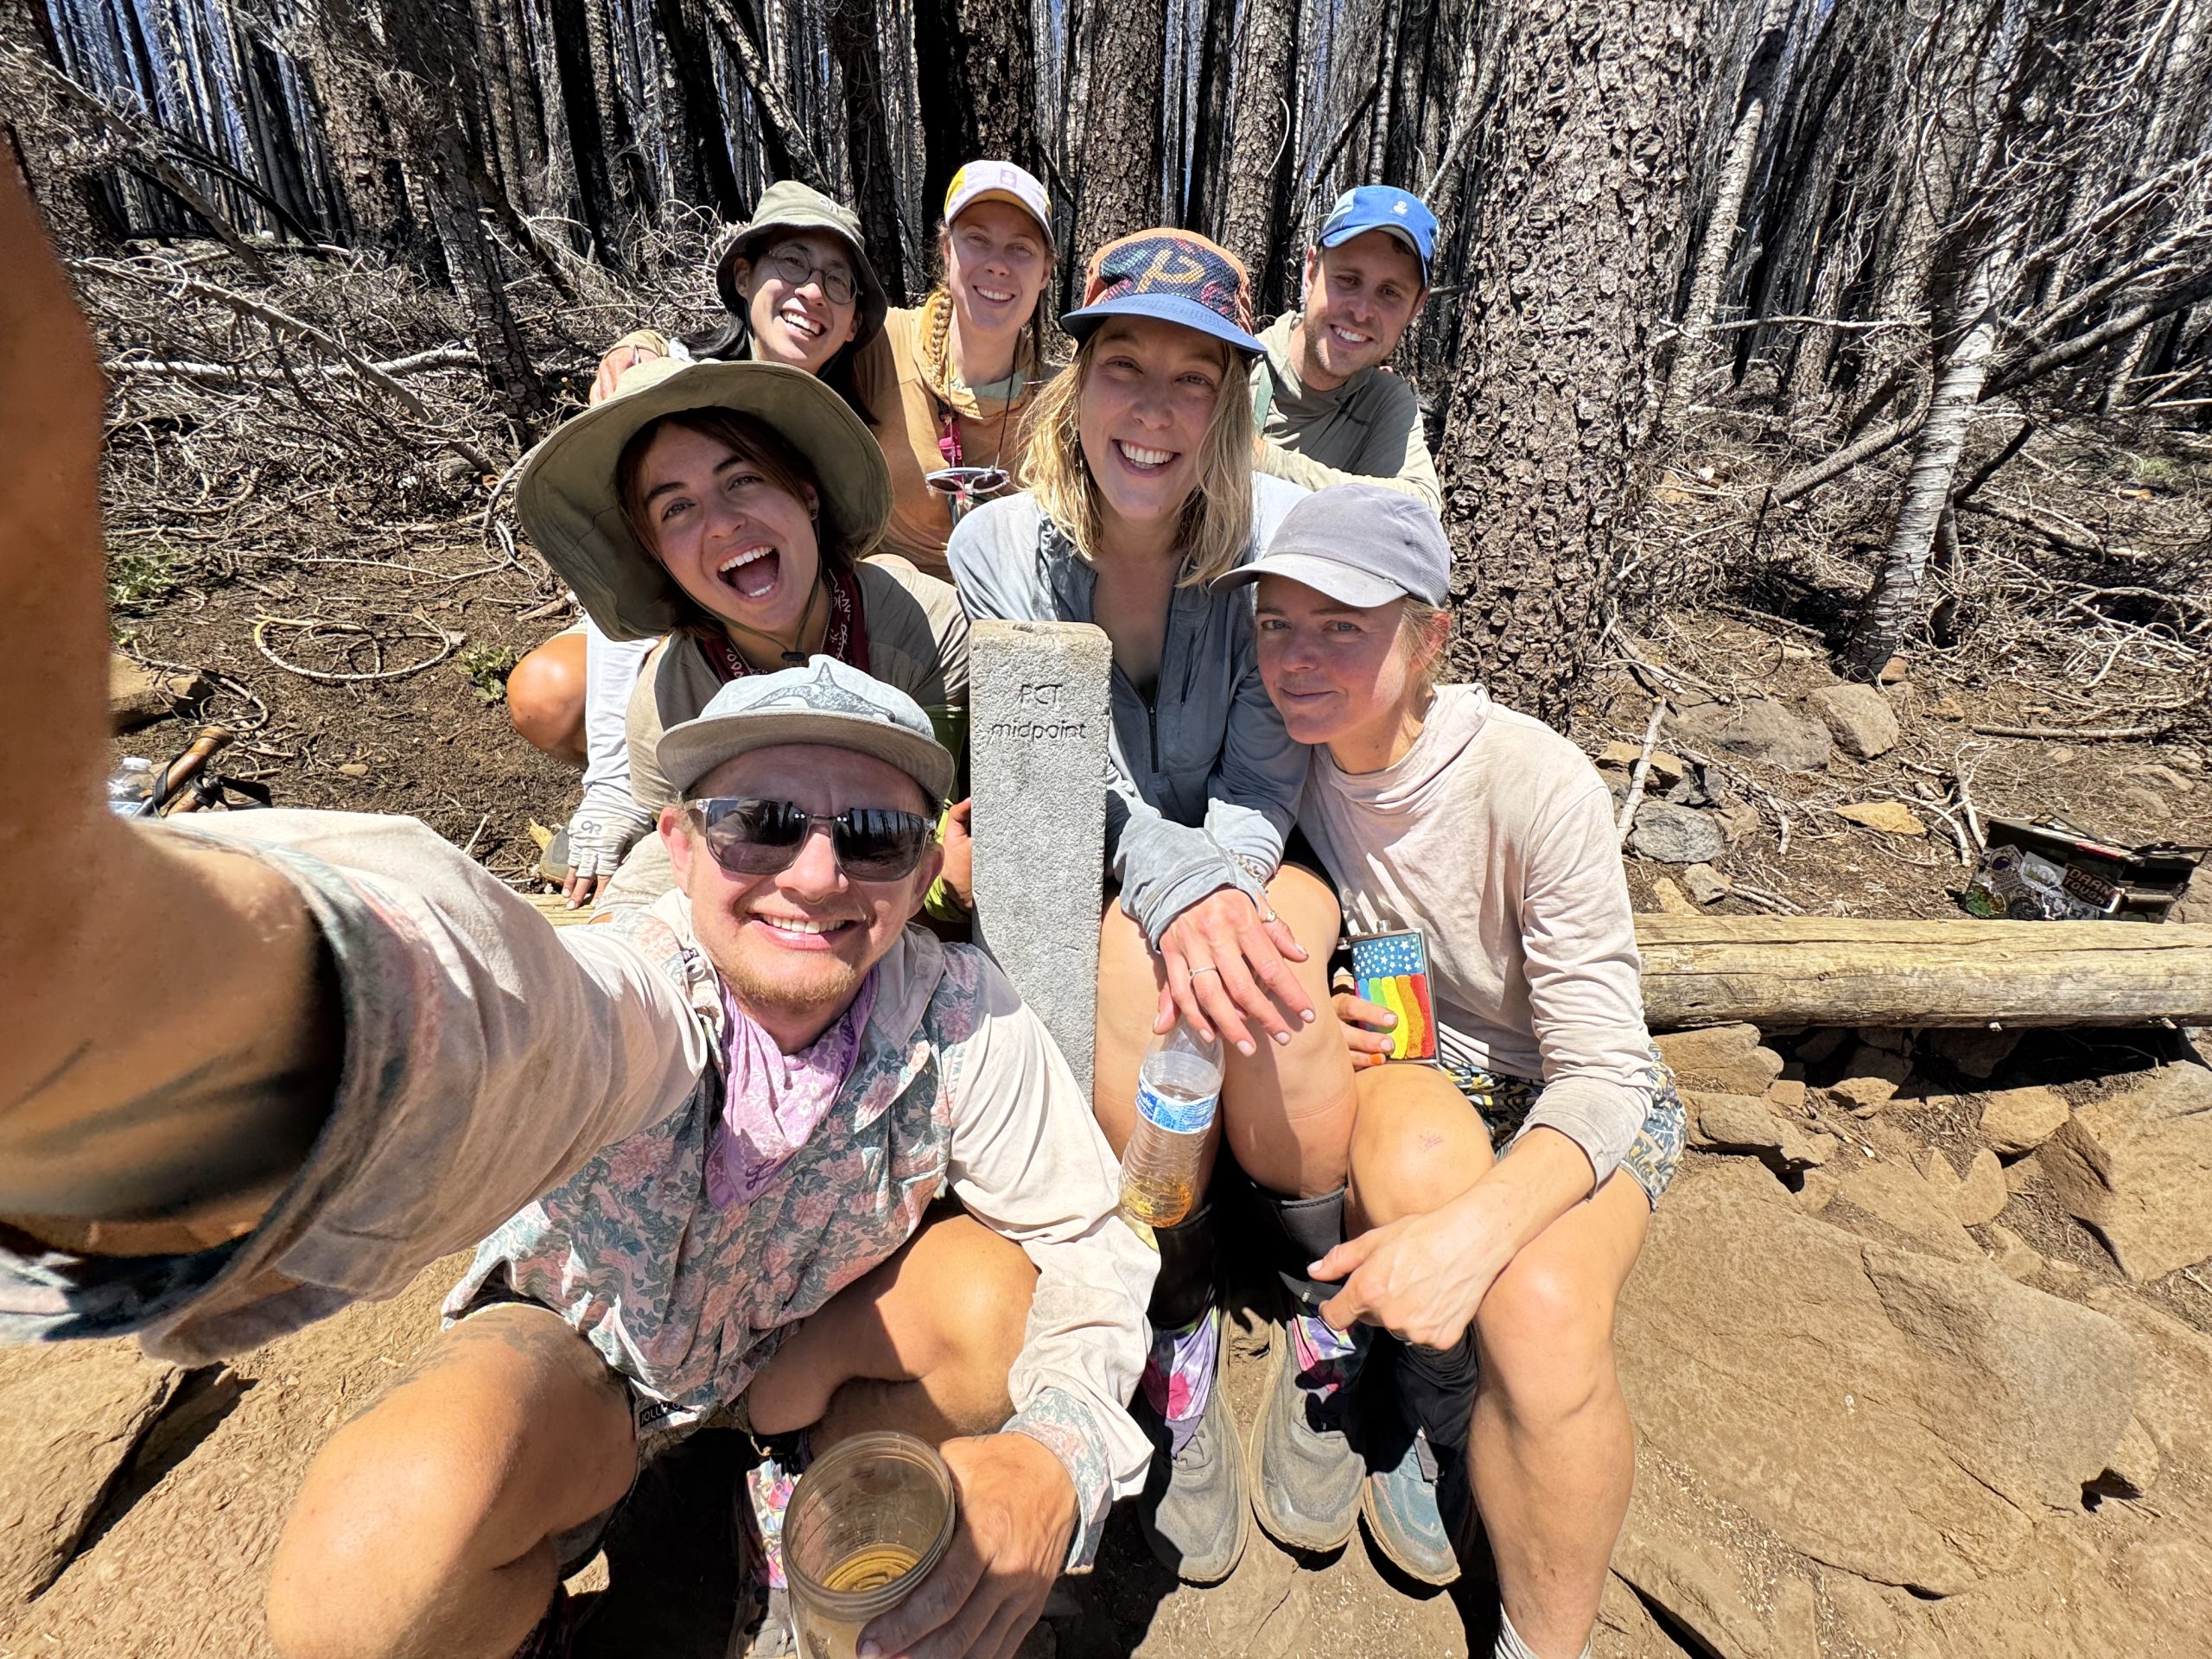
All seven of us had started on the same day. In fact, Dan and I had met them all at some point on that first day. We had also all split up from one another at some point on trail. Now, to find ourselves all together again 93 days later baffles me.
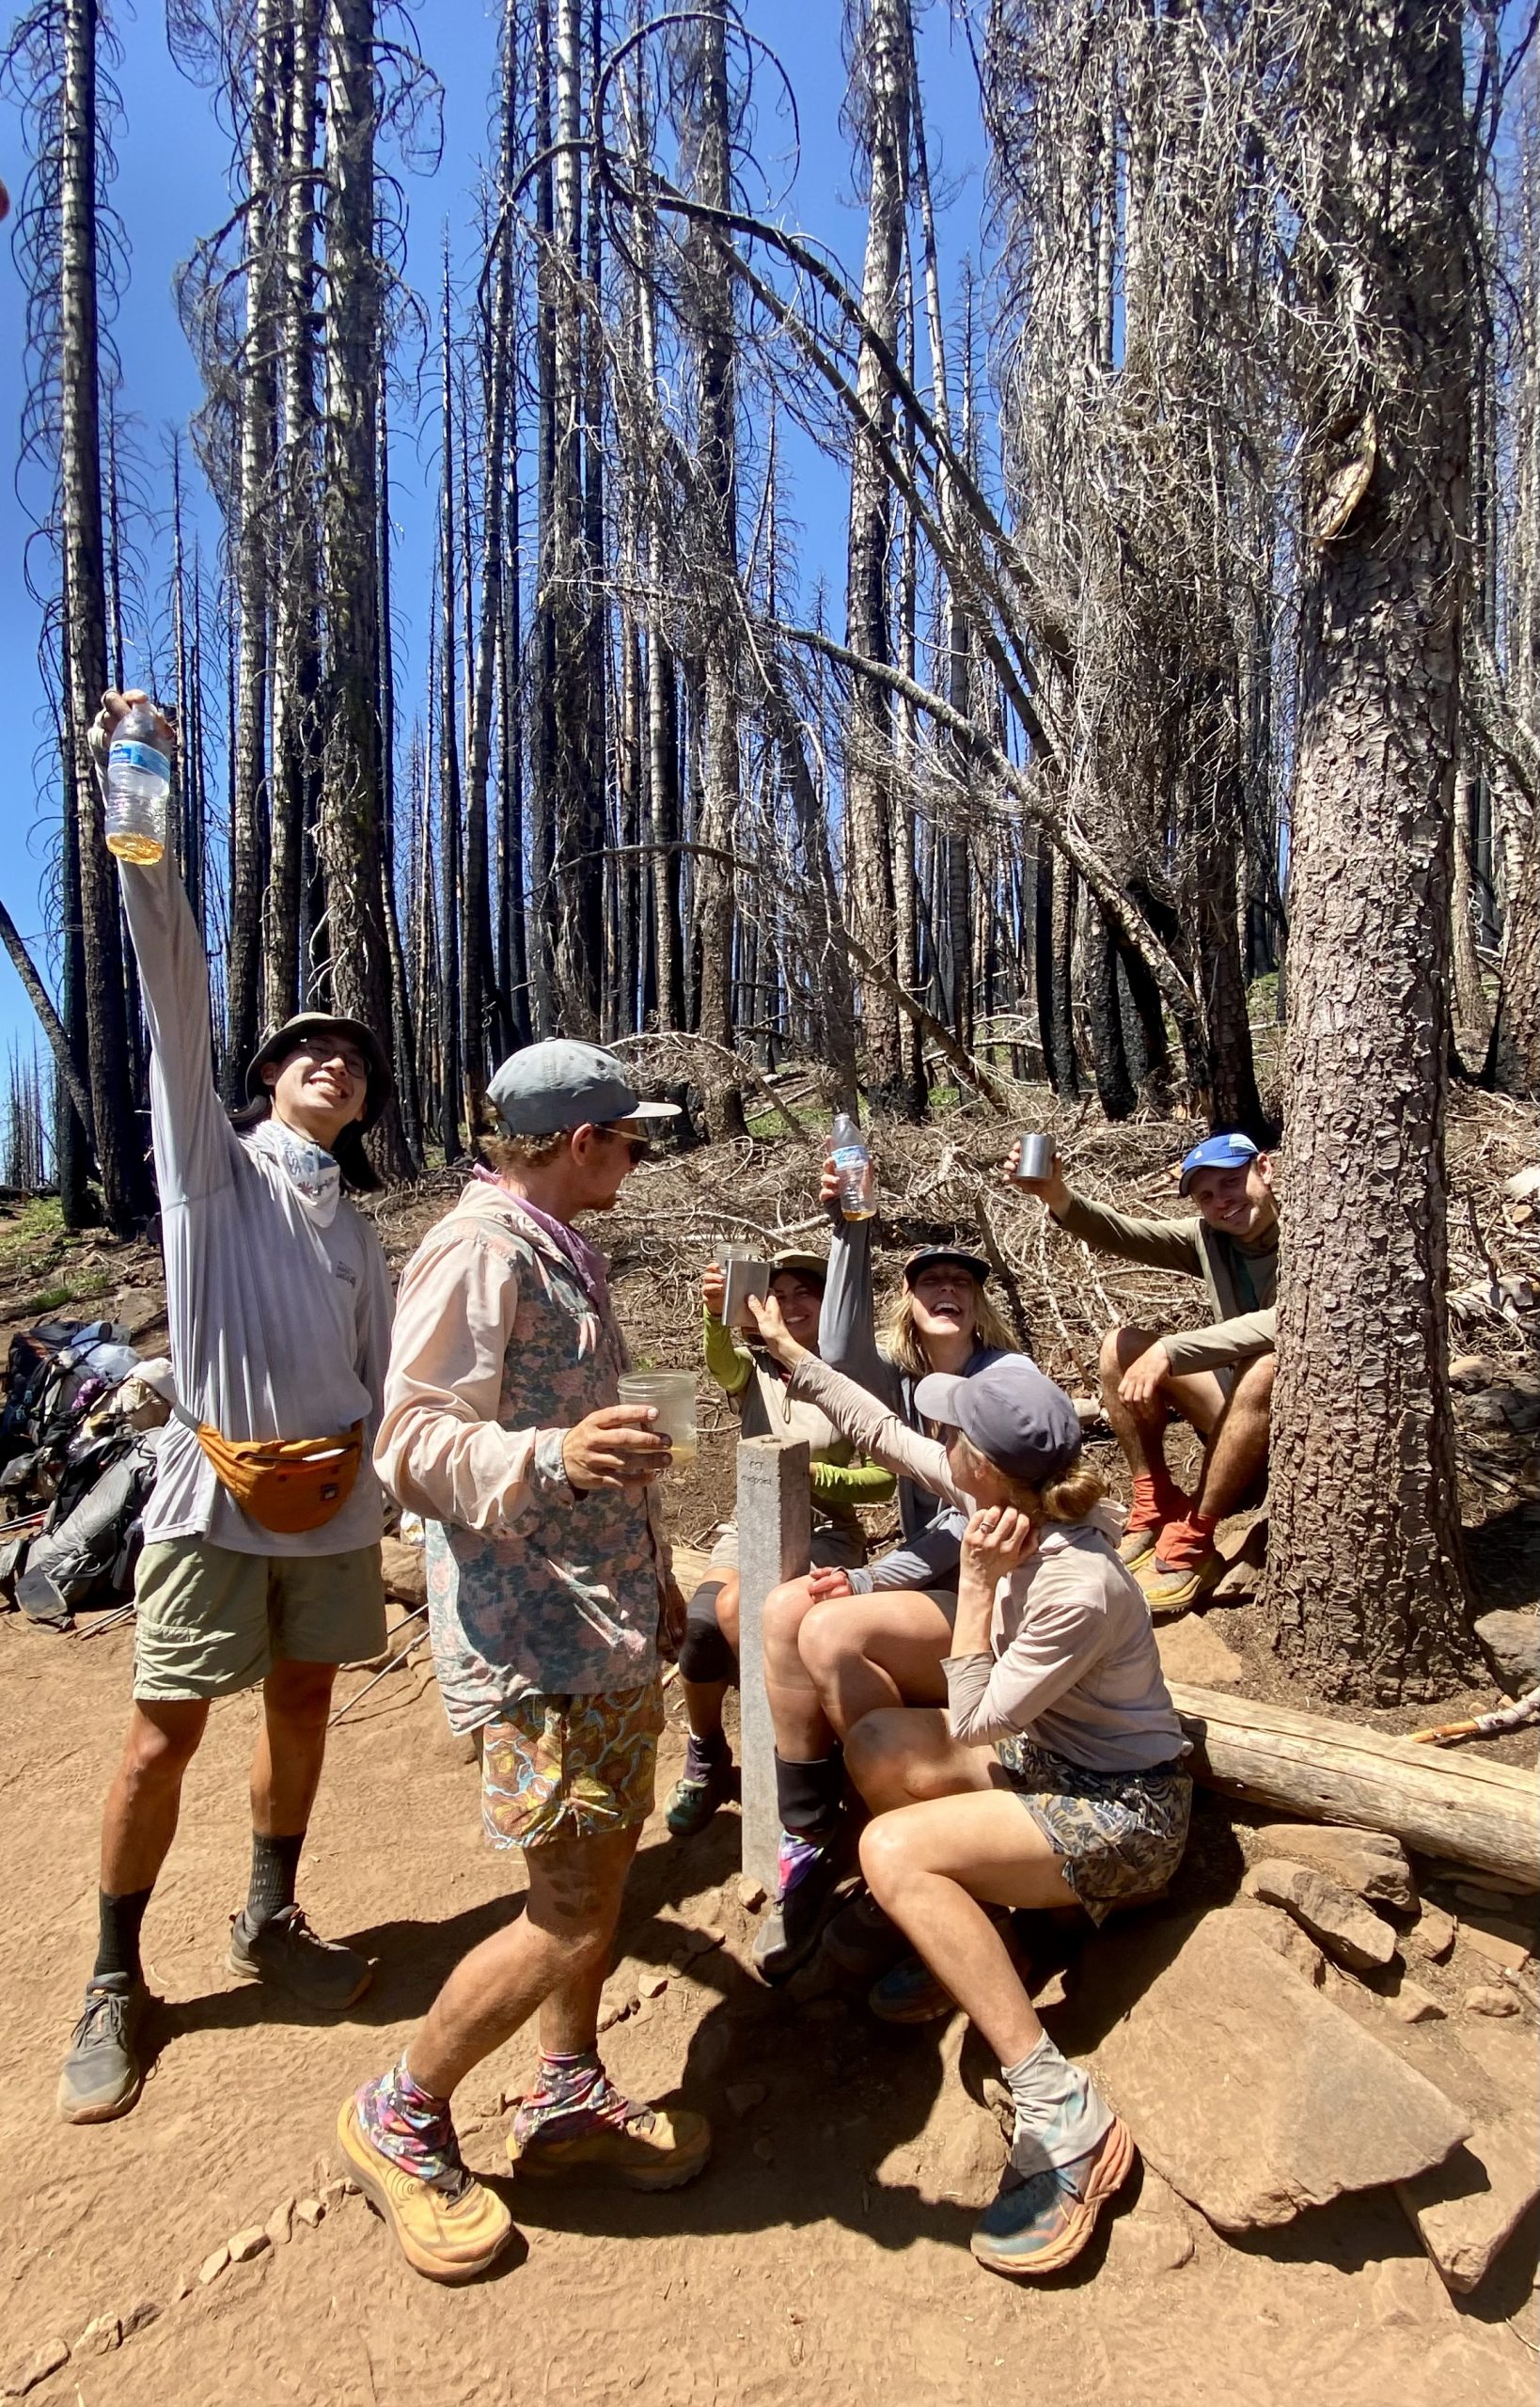
Don’t let the smiles fool you, we’re all internally having a moment of panic knowing we have to repeat this distance!
And so, we started the second half of our walk to Canada. As we descended through the burn zone I considered how I was feeling. A nagging, panicking part of my brain reminded me that it had taken us over 3 months to get halfway, and with a six month visa we needed to get a wiggle on. The more mellow part of my brain argued back that the distractions of the desert and the slow slog of the Sierra were behind us meaning we could make up miles going forward. I suspect the time it has taken us to get this far will be drastically cut in this second half.
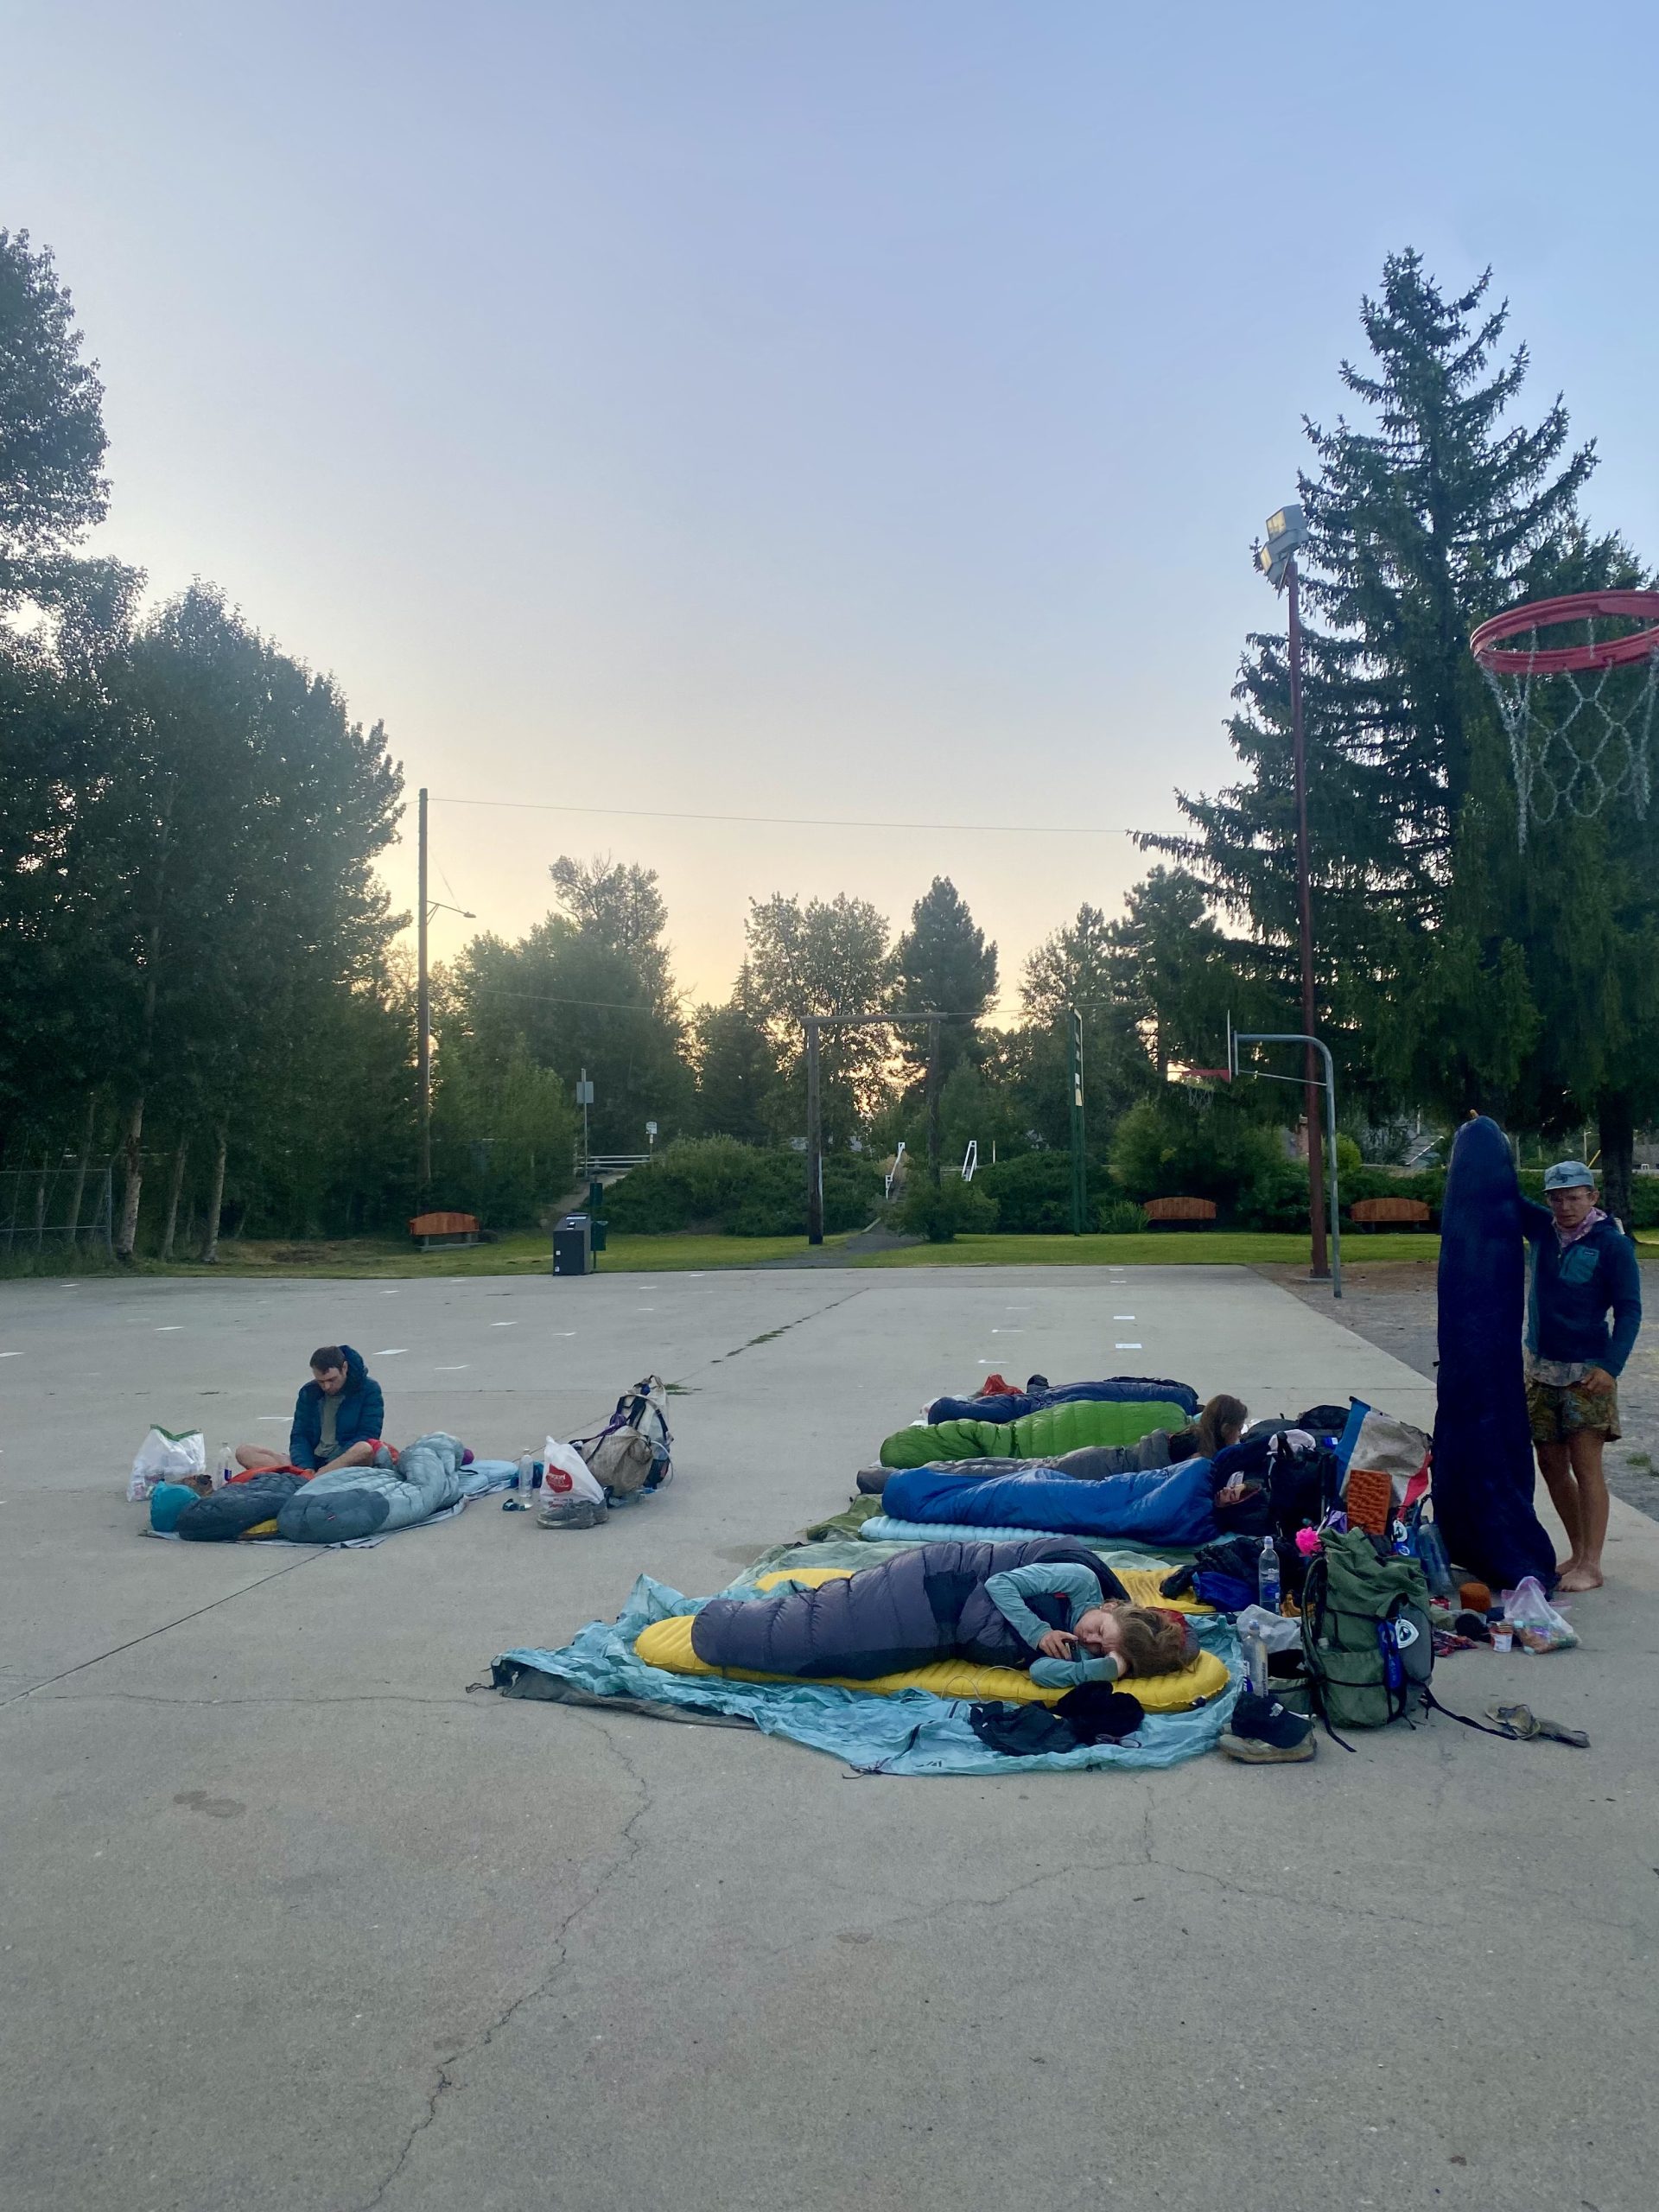
We arrived at the roadside, and while Dan and I had no plans to visit Chester, the others convinced us to join them. We hitched in, showered, did laundry and enjoyed milkshakes. Evening creeped in and we headed to the park to camp. Arena and Rebecca had now joined us meaning eight of us slept side by side under the stars while Sweet Rolls stayed at a nearby bed and breakfast. Luckily we had decided to cowboy camp on the basketball court instead of the grass surrounding it. As we were settling down, an awful clunking and rapid clicking sounded, which turned out to be the sprinklers.
Day 95
As expected, no one had slept particularly well on the basketball court. We made a swift exit, packing away and heading to the grocery store. A coffee and some rice pudding for breakfast and we were hitching back to trail.
The path was brutal. We were immediately thrown back into burn zone. Low level thorned shrub occupied the floor, cutting at our legs.
Just before entering its National Park, we got glimpses of Mount Lassen, and for the first time the view was unobstructed by smoke. The edges of the elongated volcano crisp and defined against the blue sky.
As we were walking through a section of the trail drenched in ash and lined with frail dead trees I heard Frodo shriek and run backwards. A dead tree had threatened to fall, swaying violently towards trail as the wind hit. We took it in turns, timing our passage to safety during breaks in the wind.
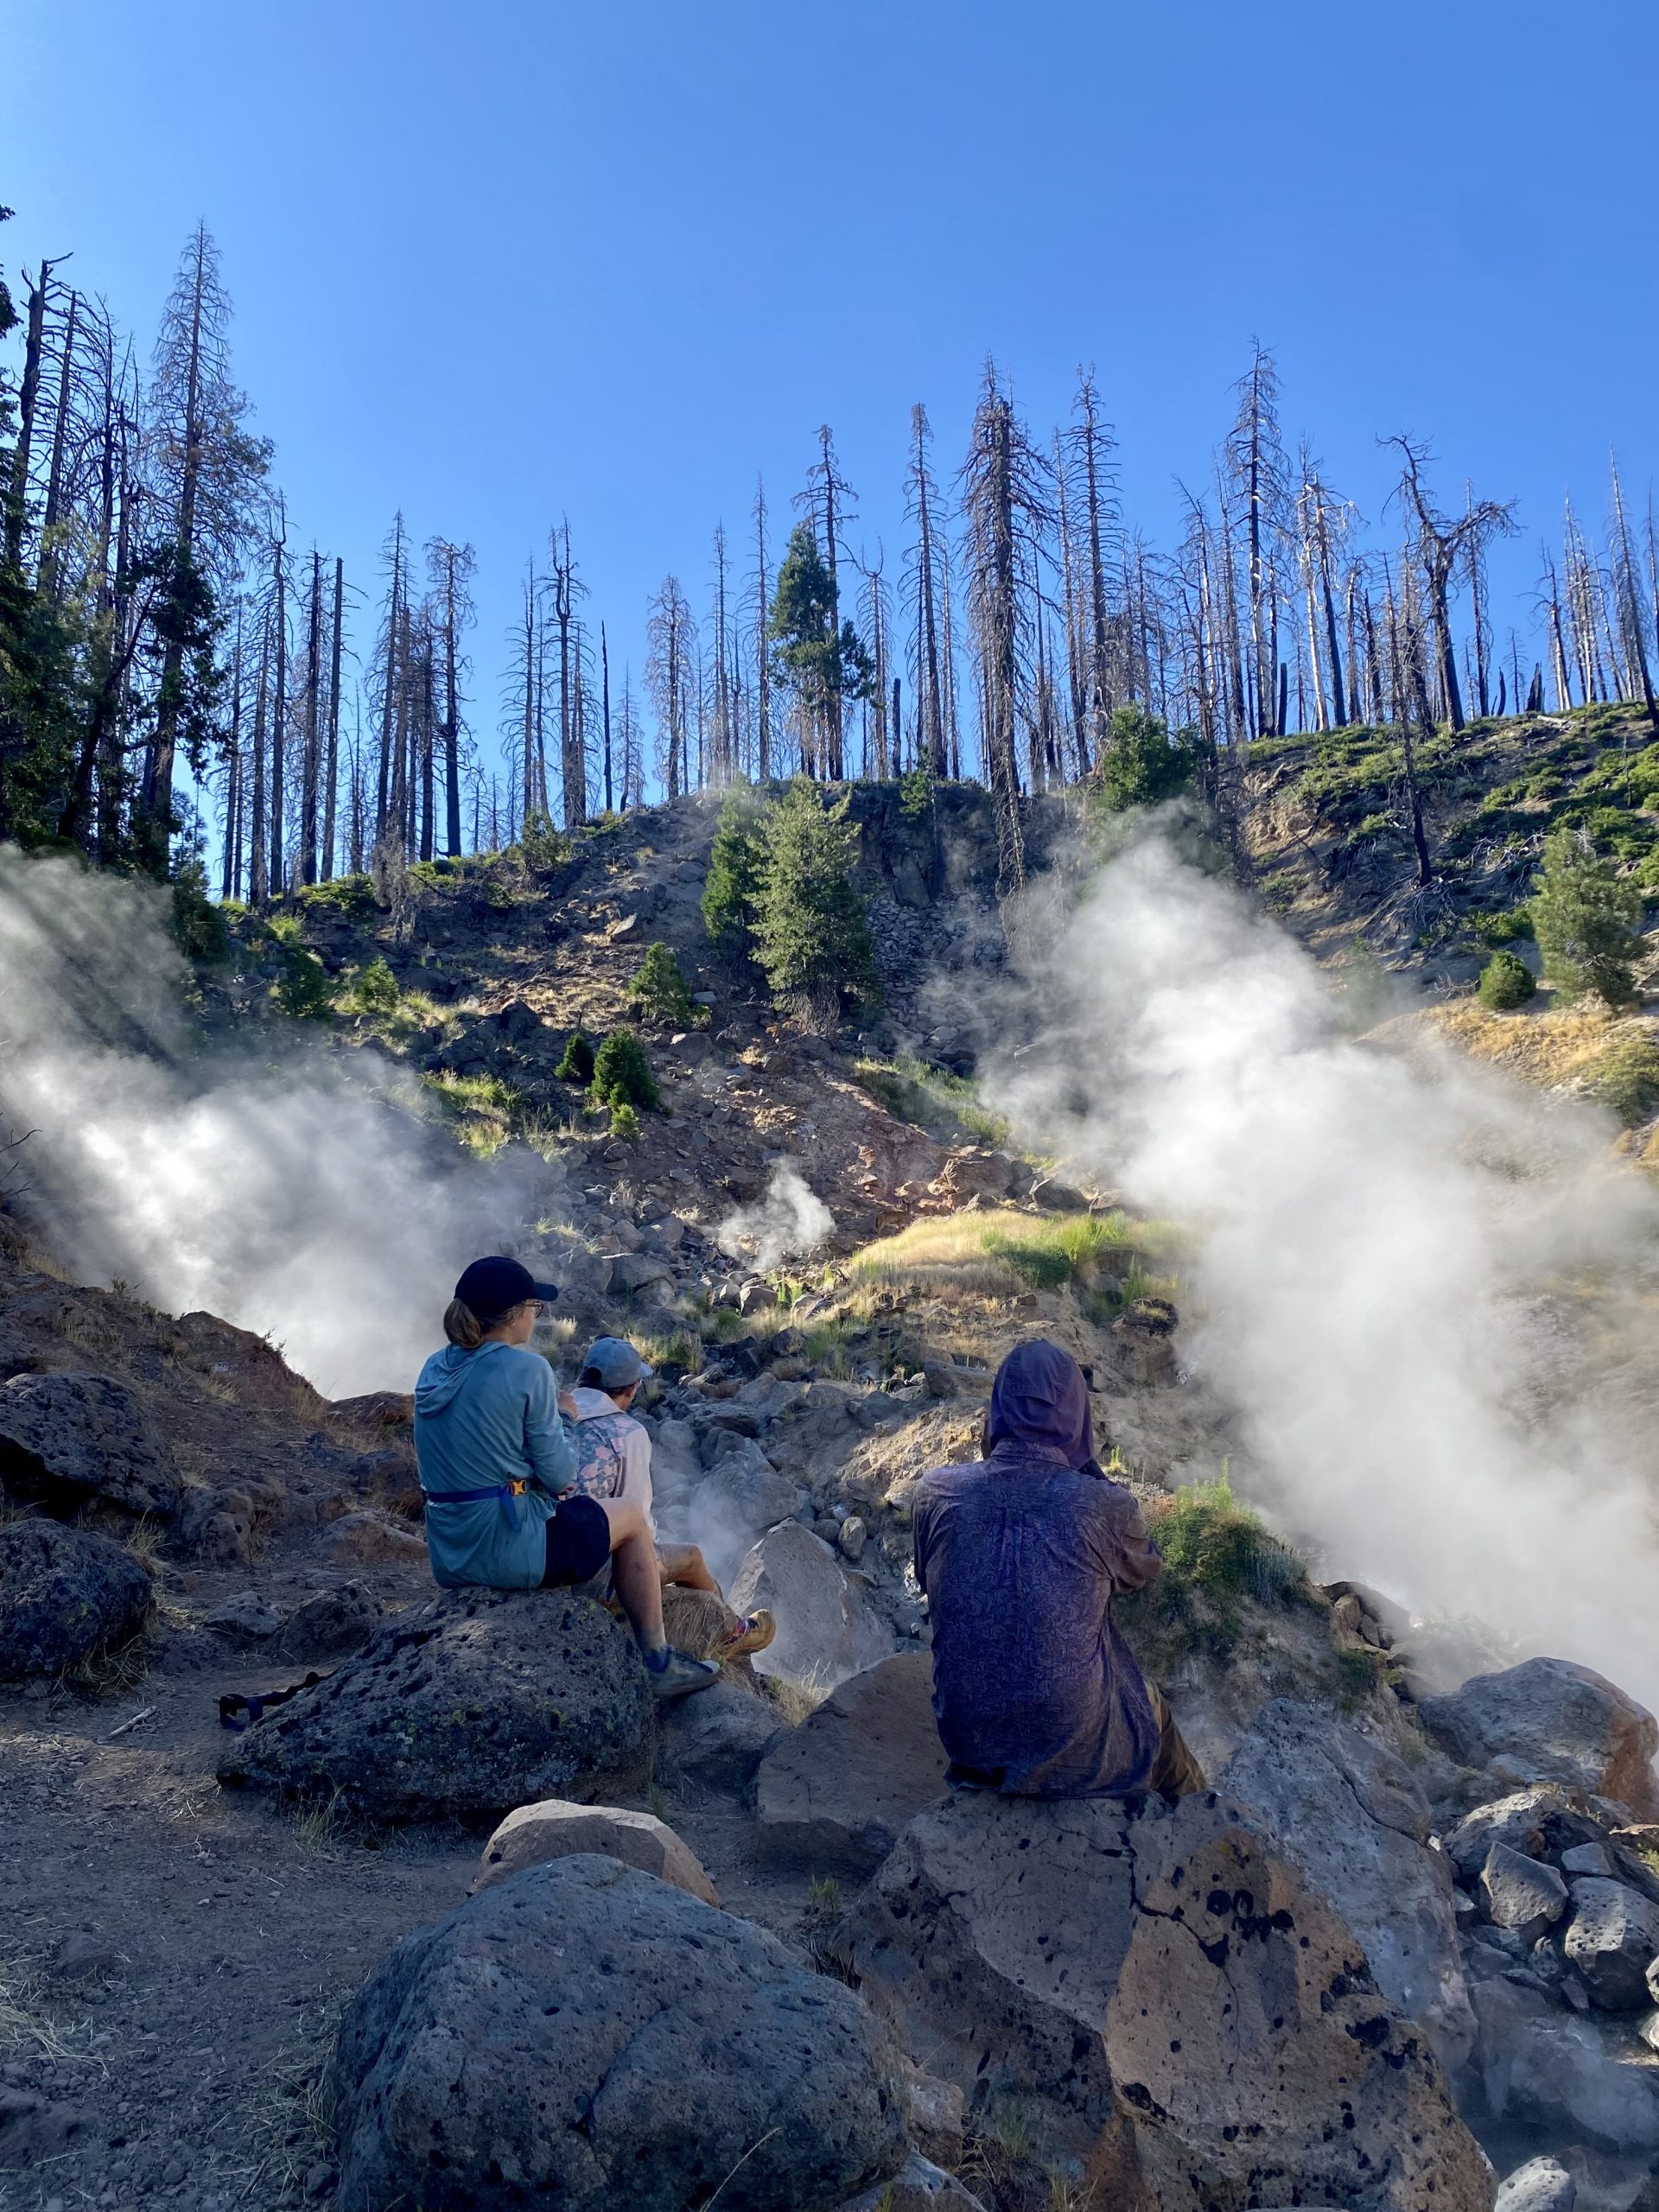
Towards the afternoon we took a small side quest off trail to visit Terminal Geyser. Here we sat watching the billowing clouds of supher loaded steam ascend from the spewing water and mud. It rose a few metres before dissipating into nothingness.
As we continued on we came across Boiling Springs Lake, a sulphur spring. It sat within a basin of red and yellow mud. The water itself looked the colour of an artists water jar after use, a mirky mix of grey and colour. It rippled with activity, steam dancing in the wind, and bubbles breaking the surface of the water.
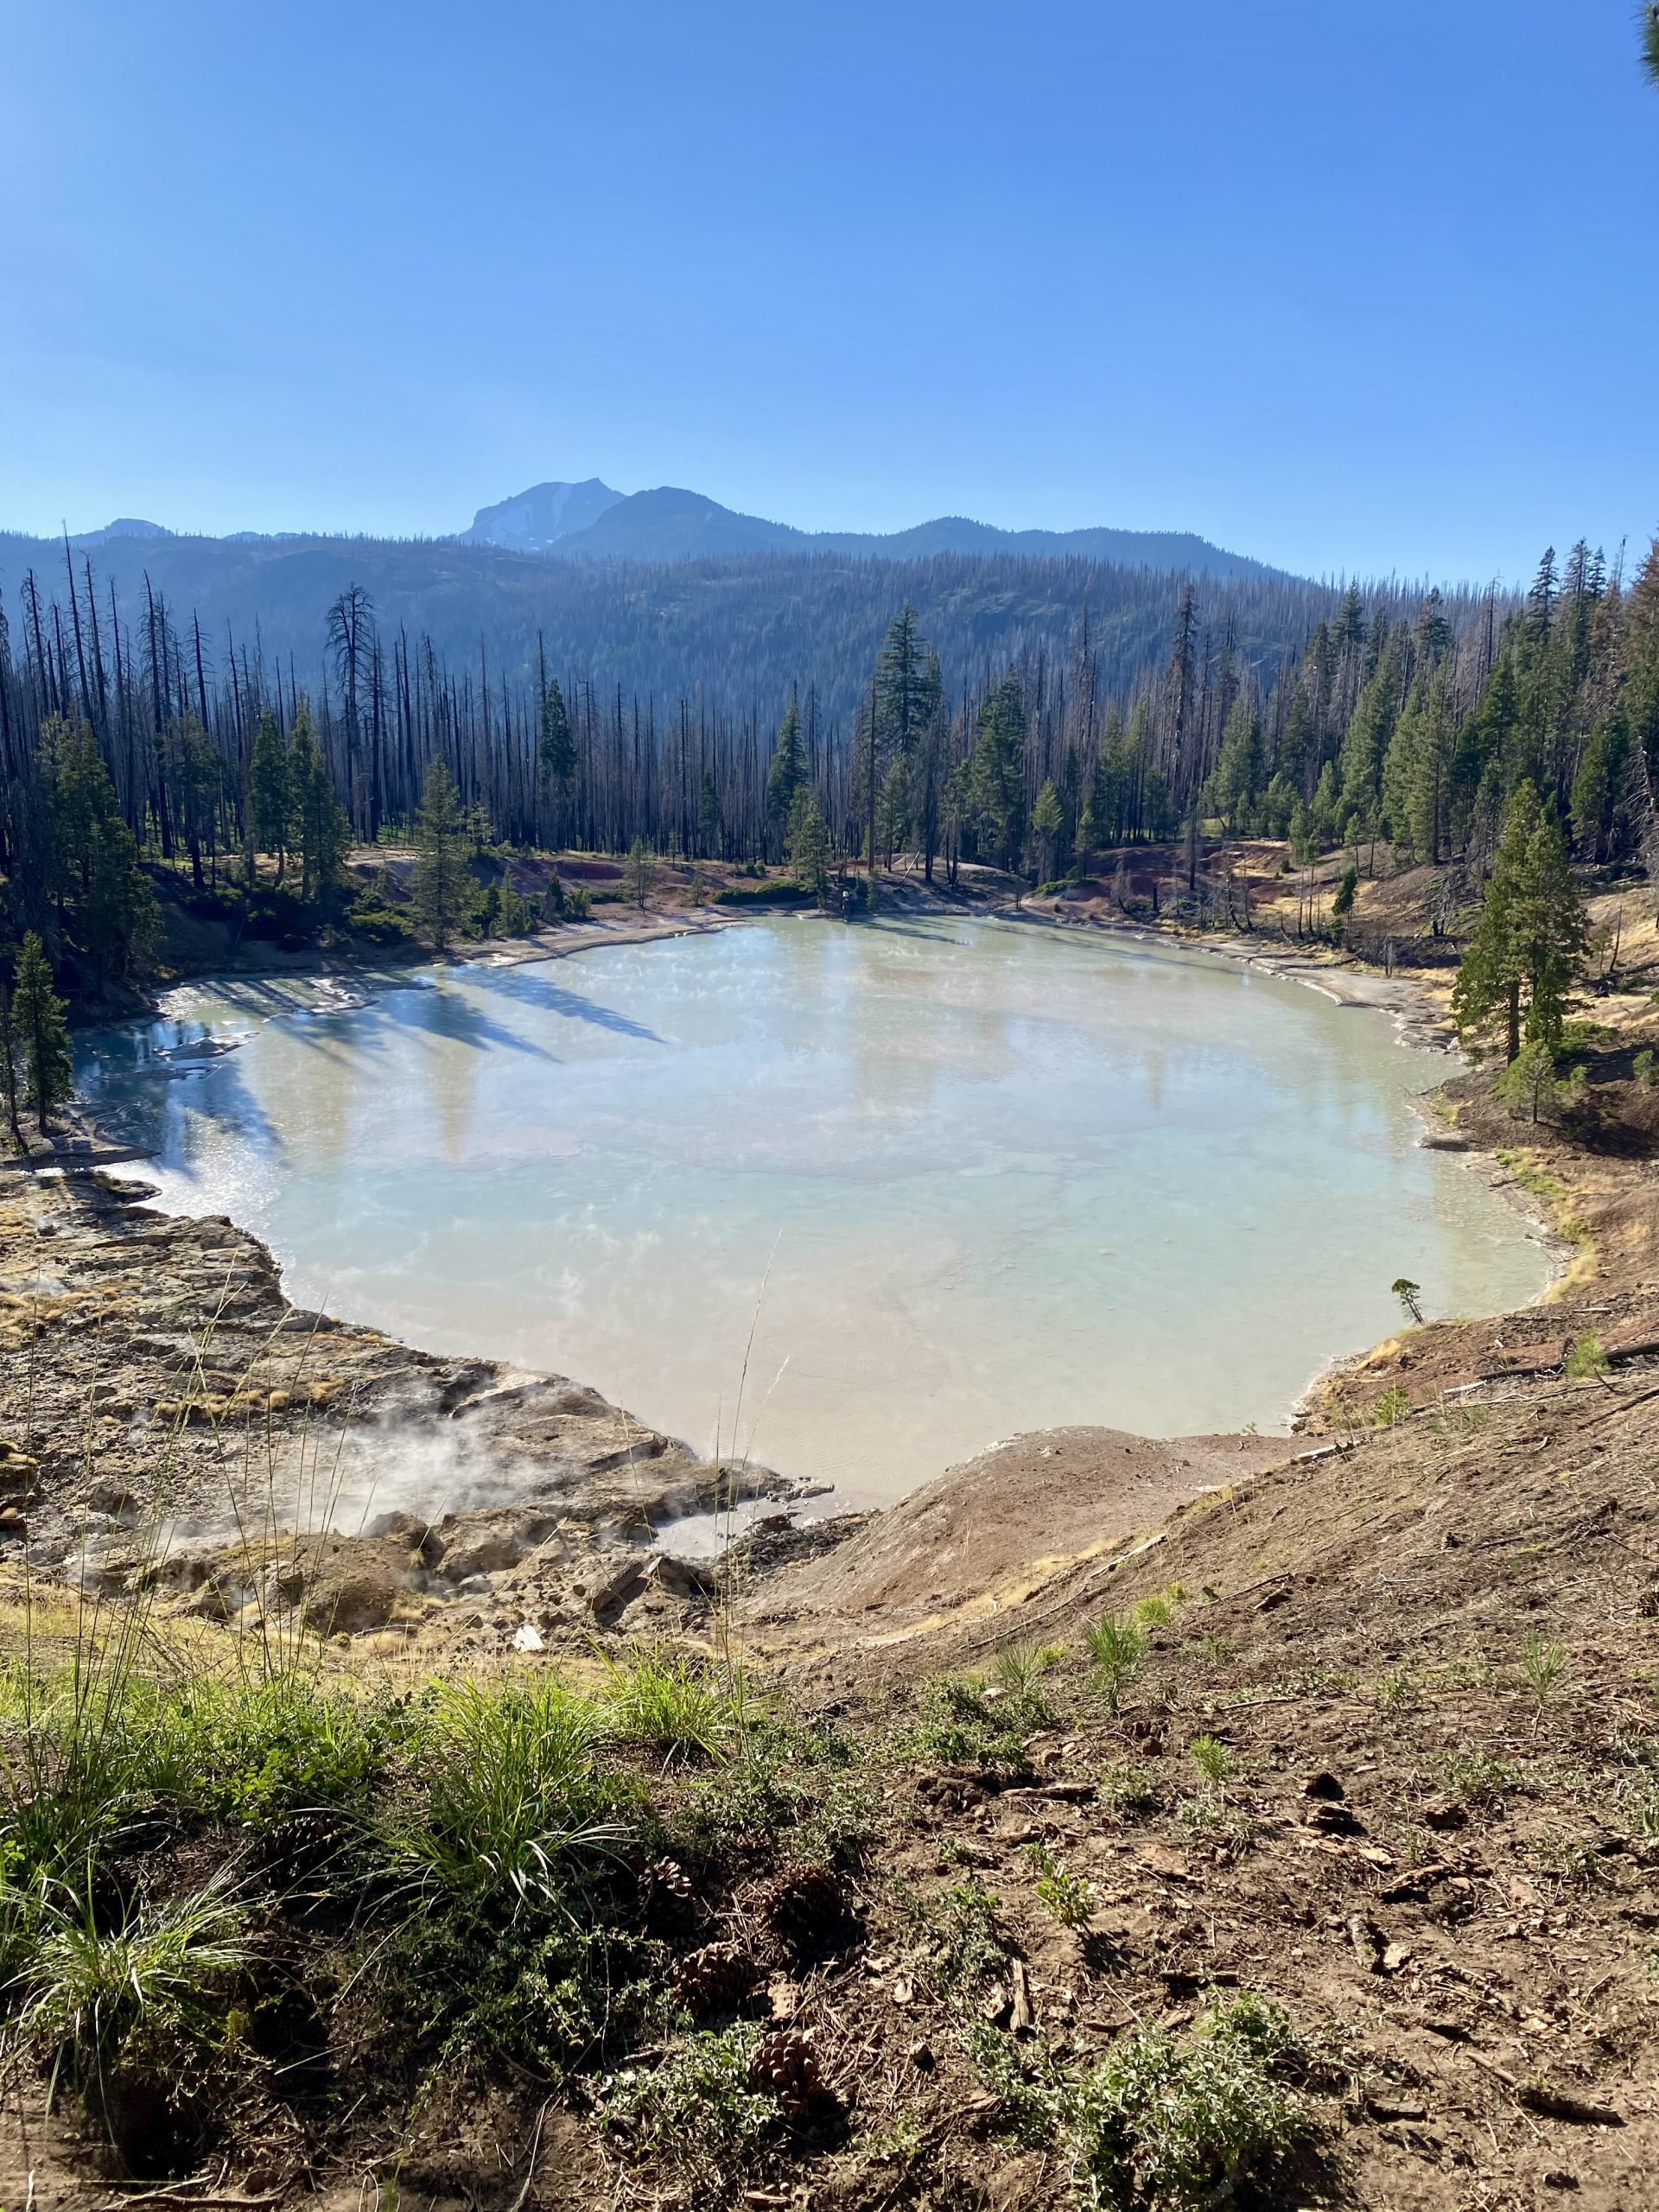
We arrived at camp, now a large party of nine. Luckily there was room for us all at the campsite with bear boxes for use.
“It’s called the CREST trail. That’s why it’s so hard” – Kaleidoscope
Day 96
The mission that day was to get to the post office before 2pm to pick up resupply before it shut. The post office was 24 miles away. Kaleidoscope was in the same position as me so at 5am the two of us snuck out of camp to begin our quest of reaching the post office in time, leaving the rest of the camp sleeping. Dan was quite happy to enjoy an extra hour of sleep and not have to rush on his sore foot.
We started the climb up in the dark, sunrise breaking through the trees as we reached the summit. The dawning light revealed darkening wisps of cloud which promised rain. We raced on, trying to not only keep to our schedule but to also avoid the darkest of the clouds above us.
By 10am we had managed 13 miles and treated ourselves to a coffee break. We took a moment to discuss how we experienced trail, neither of us fully understanding what was driving us forward. Trail is not enjoyable in the typical sense. It is hard, painful and relentless. Yet there is a satisfaction of getting to the end of the day knowing that despite this, my body and mind can endure and even find joy and meaning in the day. We both reflected on how our tolerance for discomfort has increased and how much more adept we feel coping with the never ending challenges of trail. Whether this attitude will continue post-trail and back in the real world remains to be seen.
The night before, Twister had asked what everyone thought about while walking on trail. Interestingly, Sweet Rolls and Dan had expressed having blank minds while walking which shocked the rest of us who have to use audiobooks to mute the continuous ramblings of our brains. Kaleidoscope reflected that they thought they would have detailed discussions on people’s ‘why’s’ on the PCT and that would be the catalyst for deep reflective conversation with others. But in reality this question falls a little flat. My experience is that most hikers don’t fully know why they are compelled to hike the PCT. There is a calling and one must respond. I’ve also found that there’s a sense of understanding amongst hikers, whereby you don’t need to know their why, just an understanding that the same summoning has captured you.
Just as we packed away our cups the rain came and we swiftly departed, our ponchos fluttering in the wind.
We made it to Old Station for 13:30 and after retrieving our packages settled at a shaded table outside of the general store. For the next couple of hours the rest of our family trailed in and we spent a considerable time eating ice cream and lounging about.
A ten year old and her two friends asked if we wanted hot dogs and sodas. The three of them tended to the grill and severed us some of the most unexpected trail magic on trail so far. Turns out the young girl in question is keen to hike the PCT with her mum one day and until then wants to help other hikers the way she anticipates to be treated.
The final 5 miles to camp were easy, especially after food and four hours of rest. We set up camp before squeezing into a cramped picnic bench for family dinner.
Day 97
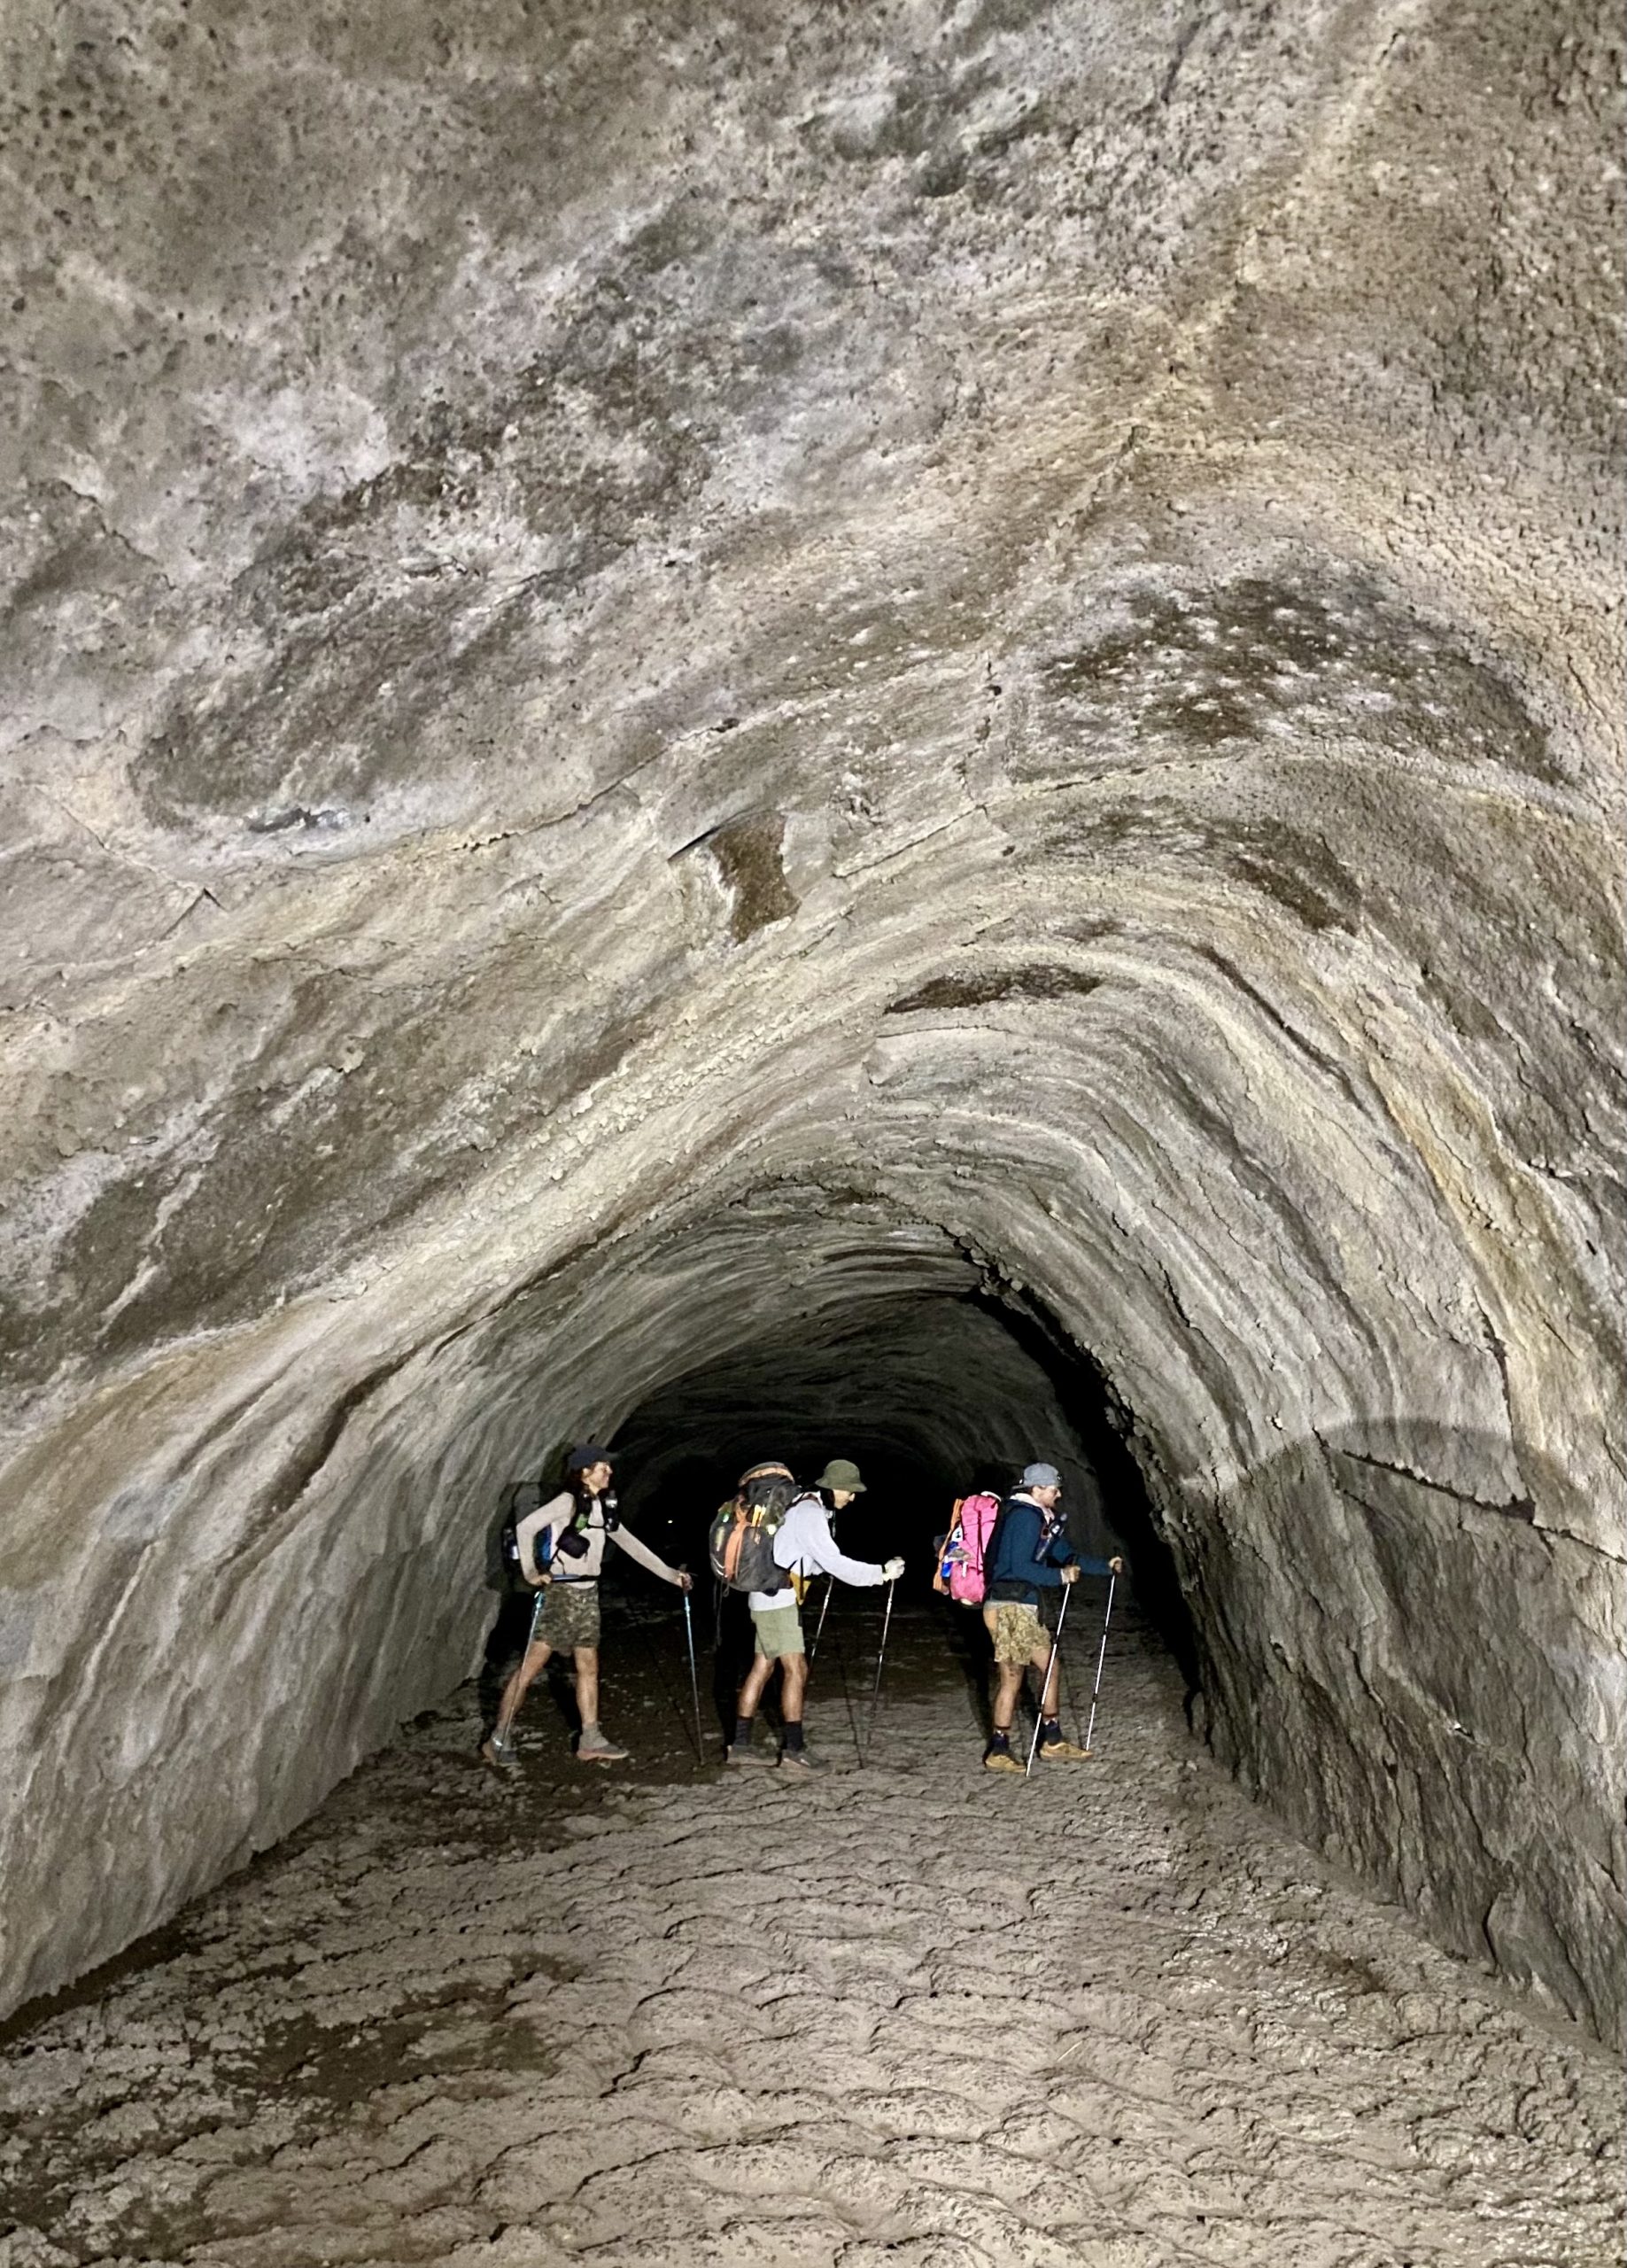
None of us set an alarm and I fully enjoyed the lie in, finally stirring at 6:30am. We packed away and got a coffee and bear claw from the gas station before walking half a mile down the trail. We arrived at the entrance to the lava tube. This is essentially a cave with a path running 1000 feet (300m) underground where lava use to flow about 20,000 years ago.
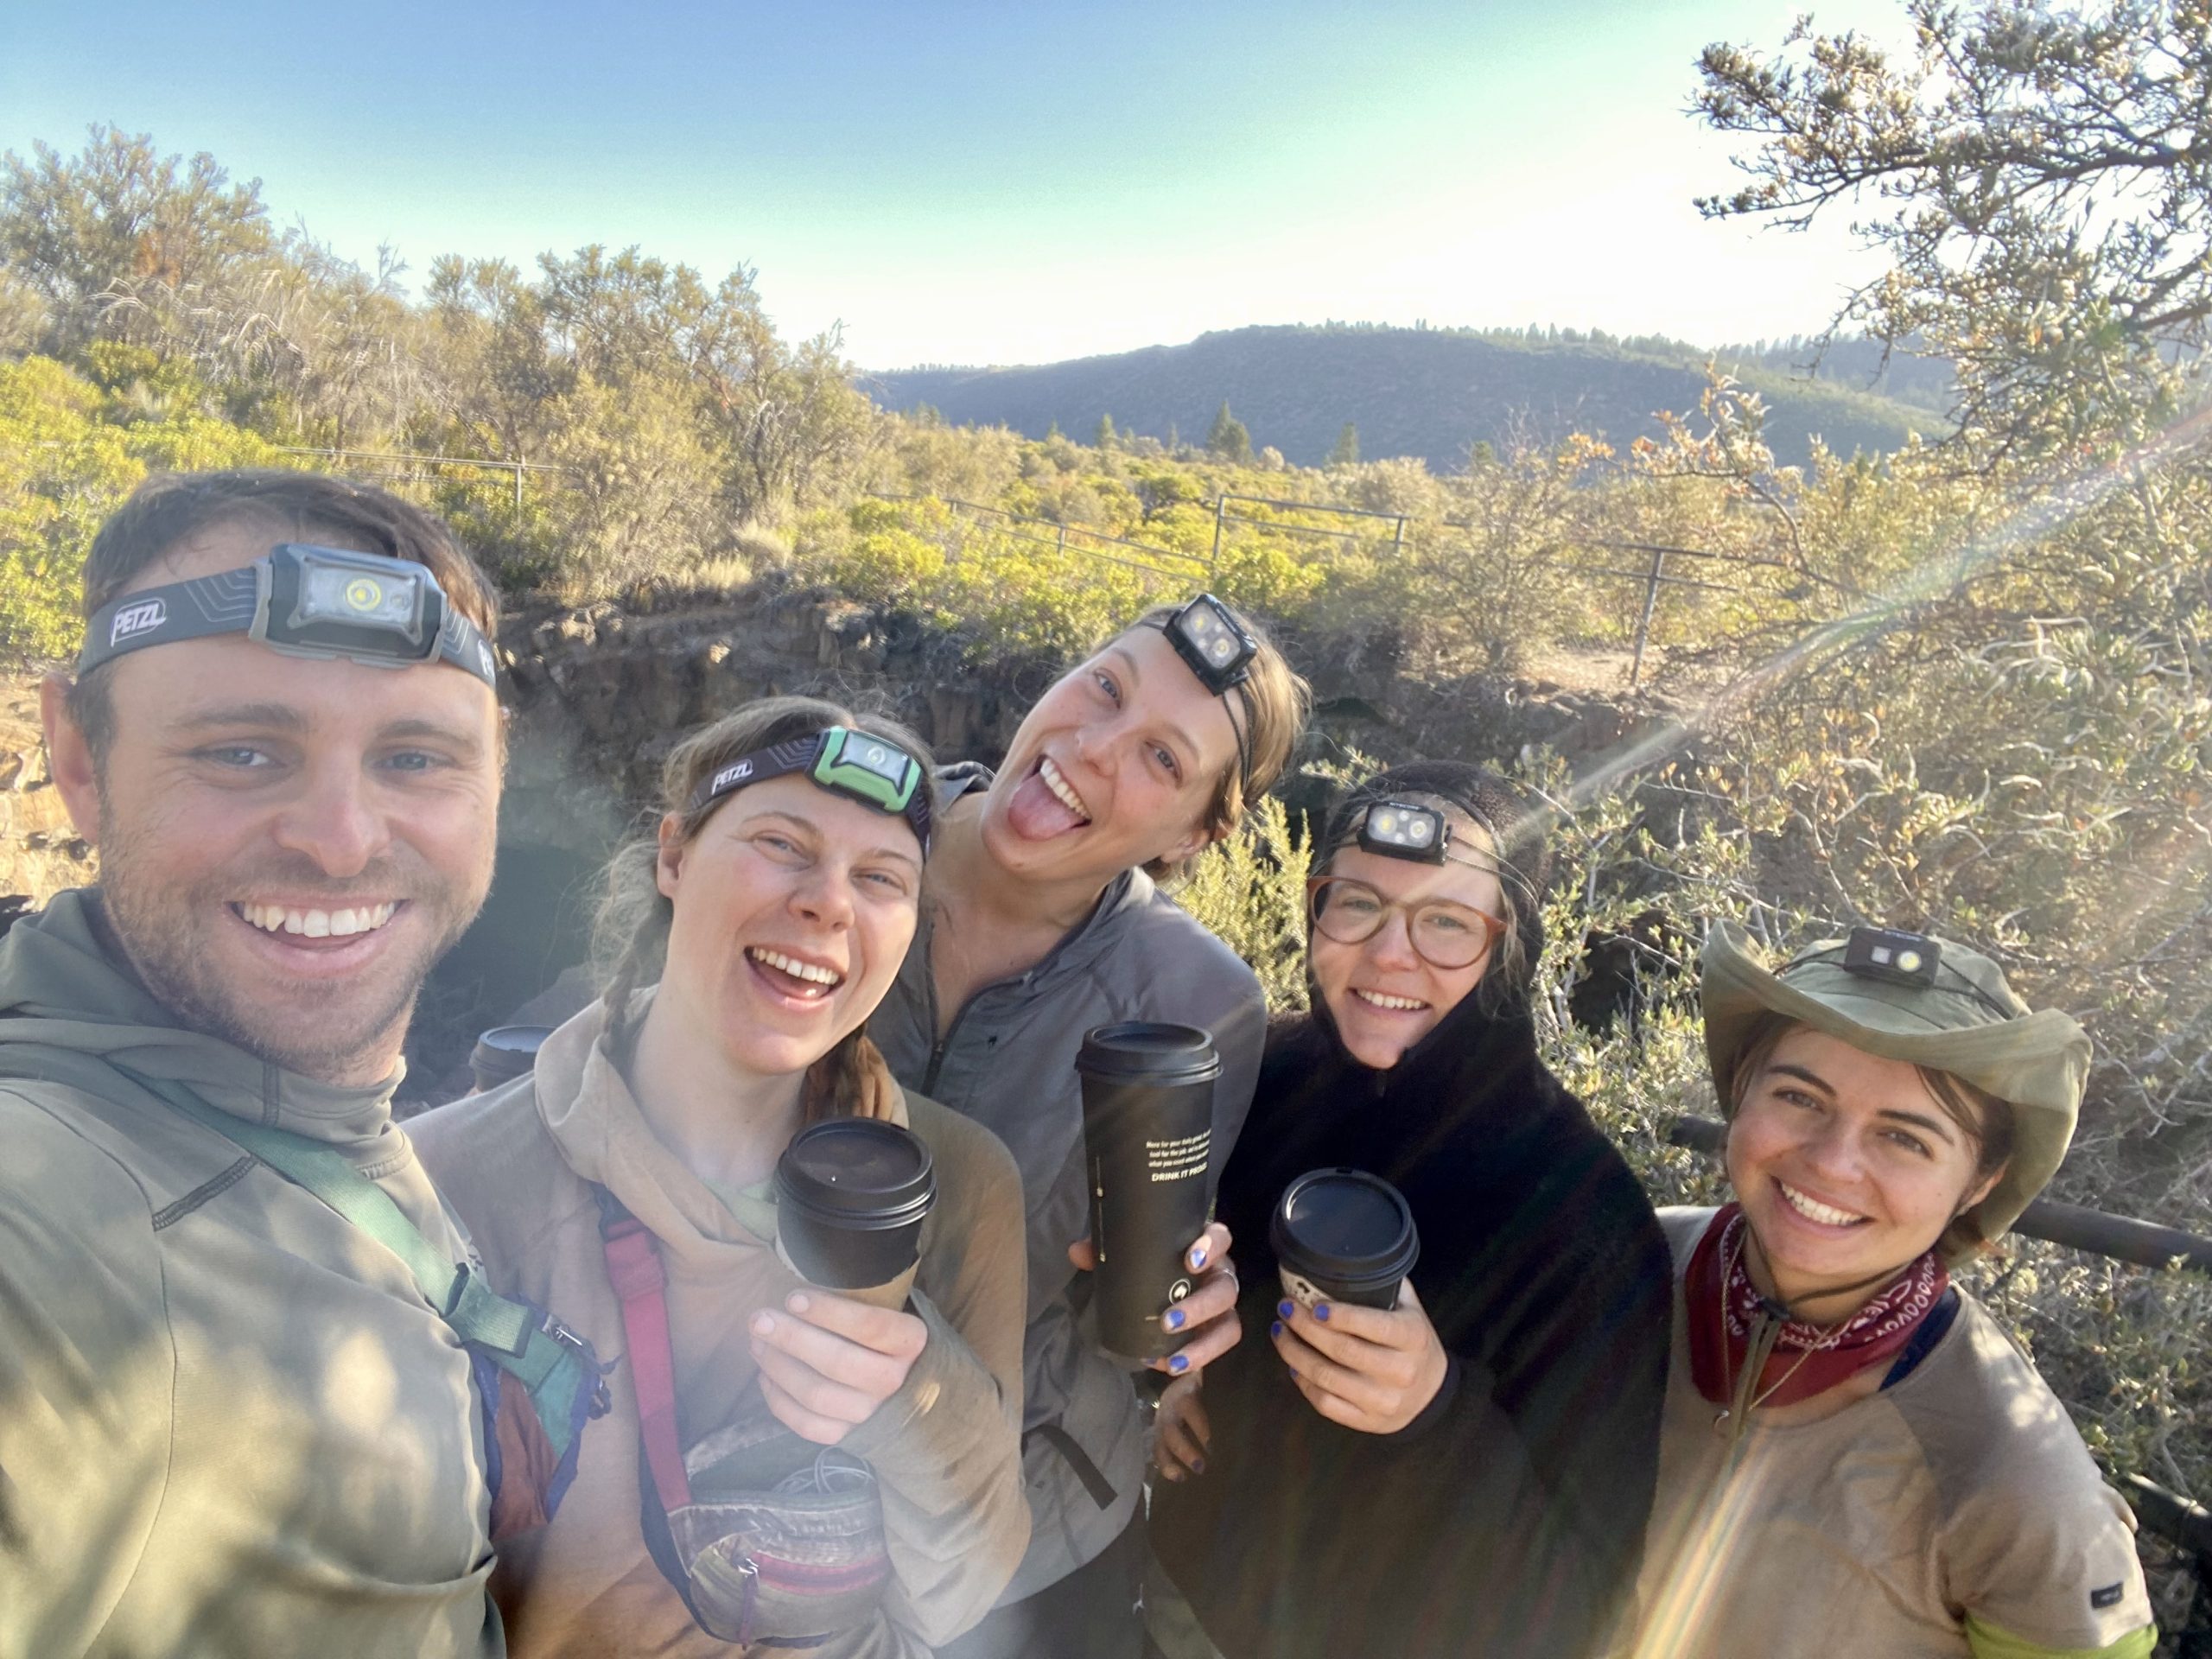
Still with coffees in hand we descended the steps and into the damp coolness of the tunnel. We donned head torches and as we walked we came across three figures up ahead, frozen while walking across the length of the passage. It was Sweet Rolls, Kaleidoscope and Sam, who admitted to waiting longer than anticipated in this position for our arrival.
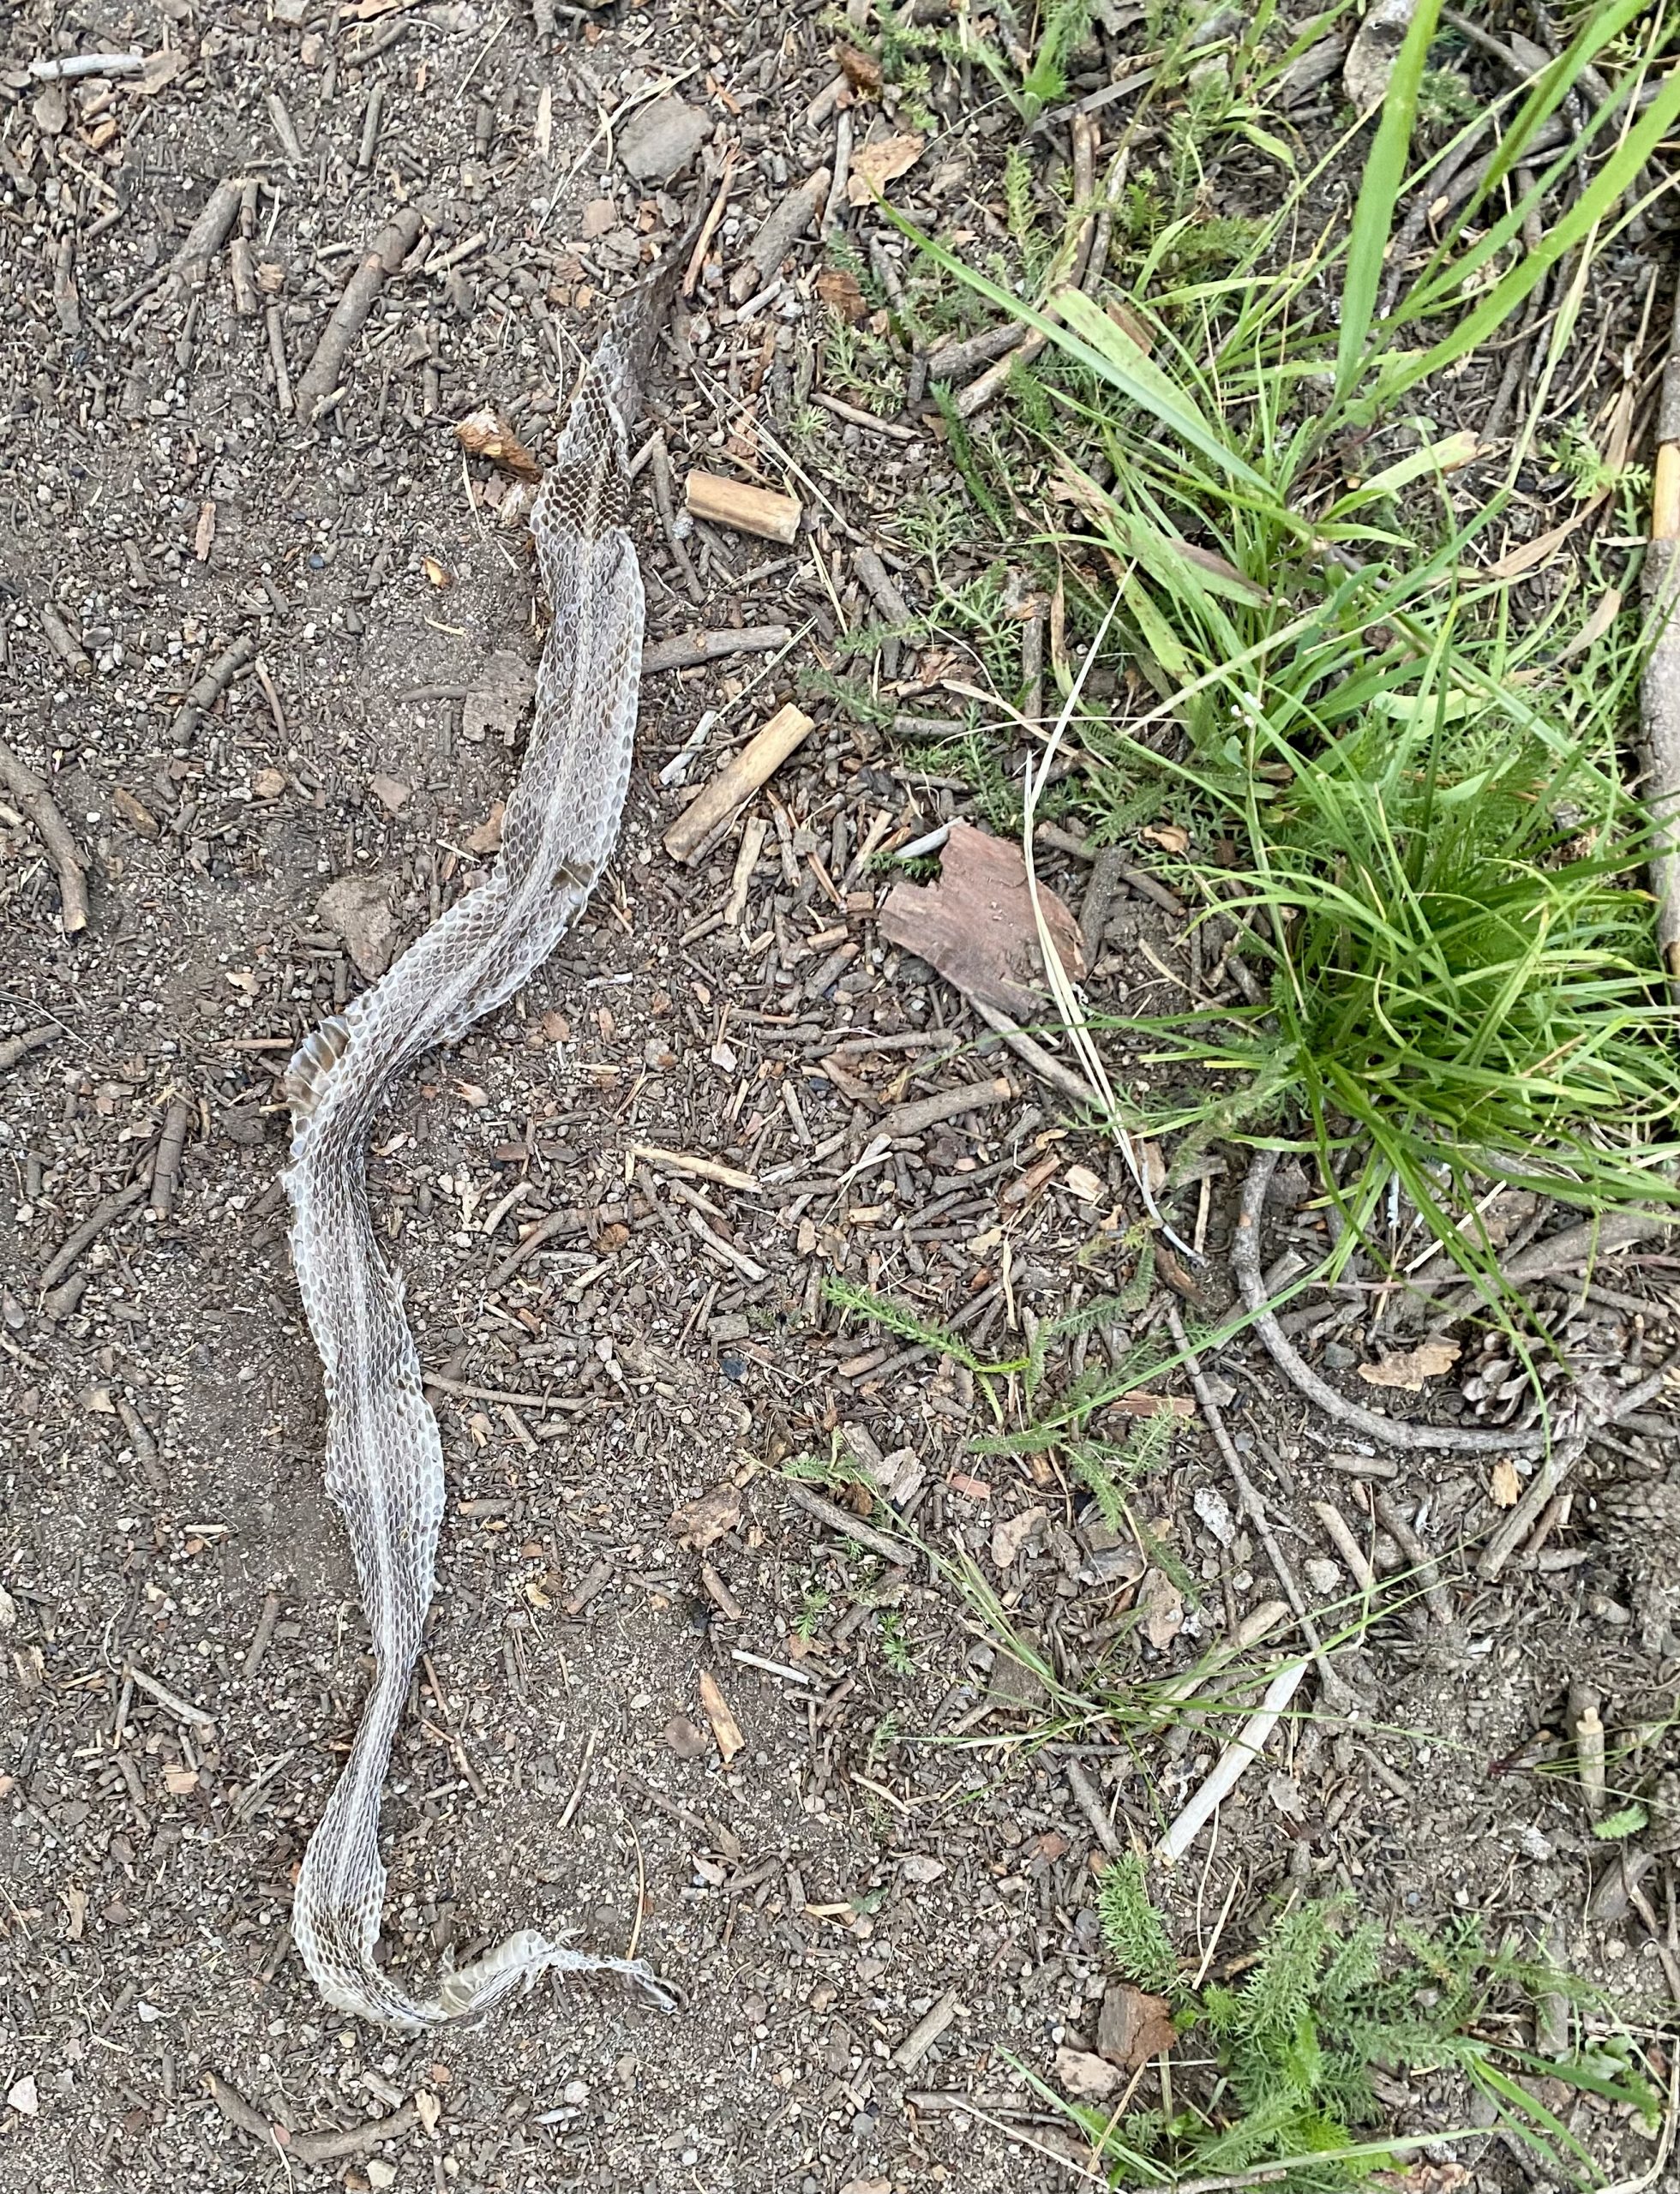
We headed on out up the exposed rocky path and suddenly we felt as though we were back in the desert. Manzanita shrubs lined the way and we were carrying 5L of water each to manage 30 miles without reliable water. To add to the desert feel, Dan and I heard a rattle and had to veer off the path due to a Mojave rattle snake territorially marking the area. We watched him for a while from a distance and he finally crossed the path revealing his sage coloured skin.
The heat was almost debilitating, hot and dry, but luckily with a flicker of cool air whenever the wind blew. One highlight of the day was seeing Mount Shasta for the first time, and in the other direction, from the same viewpoint, Mount Lassen.
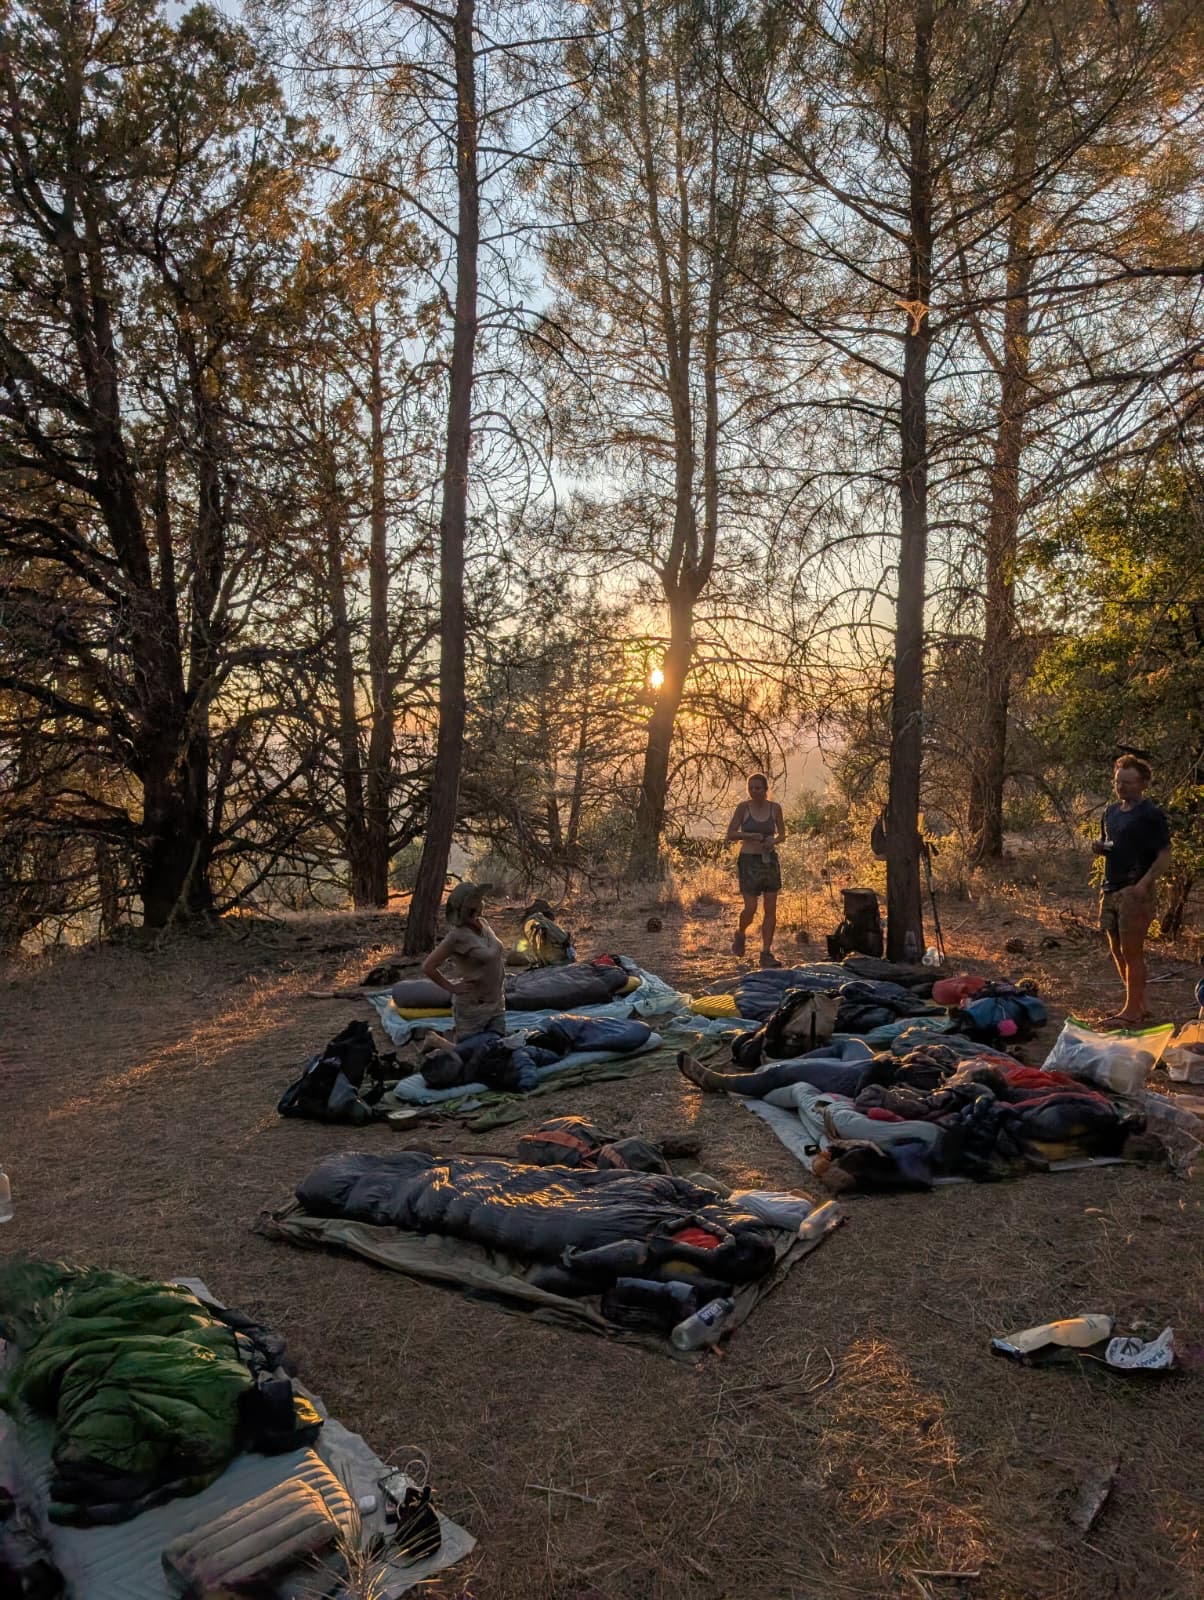
We made it to camp for 6pm, and collapsed onto the floor in a circle. The group were all tired and feeling burnt out. We all slowly came to the conclusion that we were too tired to set up tents, so simply cowboy camped where we dropped. The eight of us randomly dotted about on a slanted slope gave no heed to the poor night sleep we would likely have, just grateful to stop and admire the view of the sun setting from where we lay.
Day 98
For once we all woke up early. Not a surprise really: in such a close formation the first person rustling simply triggered the domino-alarm system. We began our day, and with 15 miles to town and a large resupply to do to cover us to the end of California, Dan and I decided to split, myself running on and Dan staying with the others. I shot off, grateful for the cooler climate so early in the morning, but cursed the sharp uneven ground that was trail.
Time moved quickly, myself hurtling towards the road. Squirrels and lizards darted from my path once the temperature picked up, but they were my only companions. By 10am I had made the road and hitched into the town of Burney. It was a logging town, but with decreases in the industry many establishments have gone out of business.
Our accommodation for the night would be the floor of the Word of Life Assembly Church. Here I was greeted with a free coffee, full use of showers and kitchen facilities, and allowed to camp on the gymnasium floor. I grabbed a latte and took it to the shower where I began the removal of the mud caking my legs. As I was scrubbing away the lights went off and I tried to tell myself it was the timer setting on the lights and not some haunted spirit.
By the time the others made their way down I had picked up our bounce box, showered and was on my way to the grocery store. After some food Dan joined me to help carry the bulging bags back to our accommodation. As we crossed a road a car pulled up and out jumped Paige. Utter joy passed us all at being reunited. While we haven’t been short of company I missed her terribly. Alistair and her drove us down the road saving our arms from the effort of carrying bags.
Come evening we congregated in Sweet Roll’s room where we ate Chinese food and drank beer. By 10pm we were back at the church, the gym littered with sleeping bags. For the second time this week we would be camping under a basketball hoop.
Physically we’re feeling well in ourselves. Both of us have had ongoing foot problems, but with new shoes this is improving. Mentally, we feel fantastic, surrounded by people we adore and enjoying the morale boost of passing halfway. It feels like we’ve finally found our trail legs, moving through high milage days and minimising town stays. As a group we are churning through the miles, something which continued into the next week.
-

 Brand Stories3 weeks ago
Bloom Hotels: A Modern Vision of Hospitality Redefining Travel
-

 Brand Stories2 weeks ago
CheQin.ai sets a new standard for hotel booking with its AI capabilities: empowering travellers to bargain, choose the best, and book with clarity.
-
 Destinations & Things To Do3 weeks ago
Untouched Destinations: Stunning Hidden Gems You Must Visit
-

 Destinations & Things To Do2 weeks ago
This Hidden Beach in India Glows at Night-But Only in One Secret Season
-

 AI in Travel3 weeks ago
AI Travel Revolution: Must-Have Guide to the Best Experience
-

 Brand Stories1 month ago
Voice AI Startup ElevenLabs Plans to Add Hubs Around the World
-

 Brand Stories1 month ago
How Elon Musk’s rogue Grok chatbot became a cautionary AI tale
-

 Brand Stories3 weeks ago
Contactless Hospitality: Why Remote Management Technology Is Key to Seamless Guest Experiences
-

 Asia Travel Pulse1 month ago
Looking For Adventure In Asia? Here Are 7 Epic Destinations You Need To Experience At Least Once – Zee News
-

 Brand Stories1 month ago
ChatGPT — the last of the great romantics
You must be logged in to post a comment Login